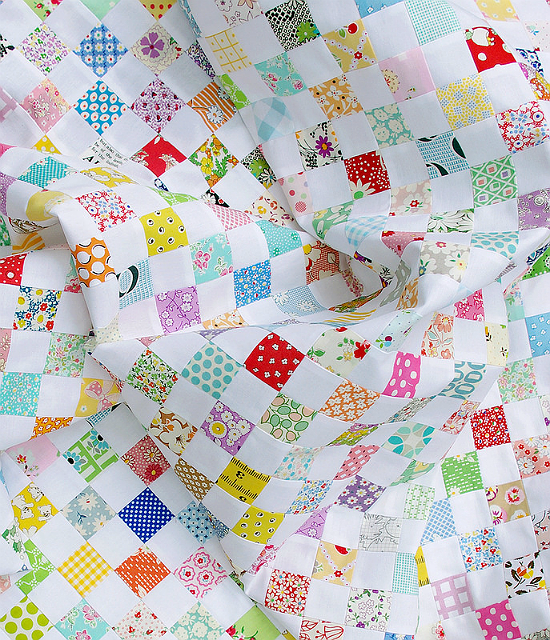
A Checkerboard Quilt and Strip Piecing - Pattern

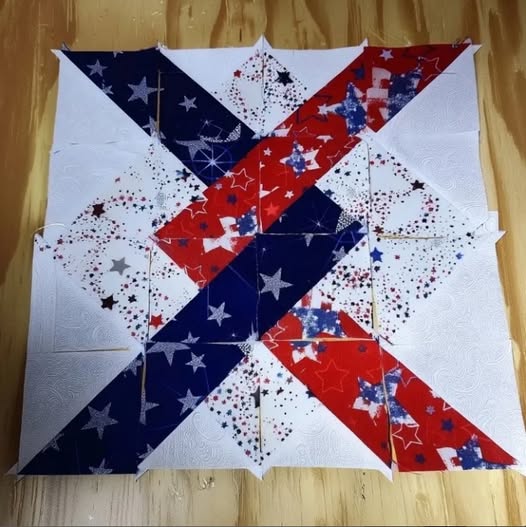
The Radiant Flag Quilt – Pattern is a breathtaking way to celebrate heritage, patriotism, and the artistry of modern quilting all in one stunning project. Whether you are looking to create a centerpiece for an Independence Day celebration or a meaningful heirloom for a veteran, this design offers a dynamic twist on traditional flag motifs. Unlike standard flag quilts that use simple stripes, a radiant version incorporates geometric precision and color grading to create an illuminated effect that appears to glow from within the fabric layers.
Engaging with a Radiant Flag Quilt – Pattern allows quilters to experiment with advanced color theory and light-play techniques that bring a sense of movement to the finished piece. The “radiant” element typically involves using a spectrum of shades—from deep navies to bright sky blues and rich crimsons to soft pinks—to simulate how light hits a waving banner. This approach transforms a classic symbol into a contemporary work of art, making it a favorite for those who want their quilting projects to stand out with professional-grade depth and complexity.
In this detailed guide, we will explore every facet of mastering the Radiant Flag Quilt – Pattern, ensuring that your journey from fabric selection to the final stitch is seamless. We will discuss the structural logic of the radiant design, the importance of high-quality cotton, and the specific cutting techniques required to maintain the sharp lines of the stars and stripes. By understanding the nuances of this patriotic quilt design, you will be able to create a durable, visually arresting masterpiece that honors tradition while embracing modern aesthetic standards.
The success of any Radiant Flag Quilt – Pattern begins with the quality of your textile choices, specifically 100% quilting cotton. Because this design relies on subtle color transitions to achieve its glowing effect, you will need a wide variety of “solids” or “read-as-solids” fabrics. Standard flag colors are red, white, and blue, but for a radiant effect, you should look for at least four to five varying tones of each primary color to create a smooth gradient transition.
In addition to your primary fabrics, a Radiant Flag Quilt – Pattern requires high-quality thread that can withstand the density of many seams. It is highly recommended to use a 50wt cotton thread in a neutral color like light grey or tan, which blends perfectly with both dark and light fabrics. Using a consistent thread weight ensures that your seam allowance remains accurate, which is critical when you are piecing together the many small triangles and strips that form the radiant rays.
The “stars” section of your Radiant Flag Quilt – Pattern often involves intricate piecing or applique, which means you will need stabilizing materials. If you choose the paper-piecing method for the stars, high-quality foundation paper is a must to prevent fabric distortion. For those who prefer traditional piecing, a star-shaped acrylic template can be an invaluable tool to ensure every point is sharp and symmetrical across the blue canton of your quilt.
Batting is another critical component that determines how the Radiant Flag Quilt – Pattern will drape and hold its shape over time. Since this is often a decorative or commemorative piece, a low-loft cotton or bamboo batting is ideal as it allows the intricate quilting stitches to pop without being overly bulky. A flatter batting also makes it easier to achieve the precision piecing required for the radiant lines, preventing the fabric from shifting during the machine quilting phase.
Cutting tools are the unsung heroes of the Radiant Flag Quilt – Pattern process. You will definitely need a fresh rotary blade and a long acrylic ruler (at least 24 inches) to cut the long, tapering strips that create the “radiant” beam effect. Precision is everything in this pattern; even a 1/8-inch error can cause the rays of the flag to become misaligned as you move toward the outer edges of the quilt top.
Finally, do not forget the importance of a high-quality iron and pressing surface for your Radiant Flag Quilt – Pattern. Because there are many intersecting seams in a radiant design, “pressing as you go” is the only way to ensure a flat finish. A digital iron with consistent steam settings will help you flatten those bulky intersections where multiple rays meet, ensuring that your finished quilt looks as professional and polished as a museum exhibit.
When you first look at the Radiant Flag Quilt – Pattern, the geometry might seem intimidating, but it is actually built on a logical foundation of repeating shapes. The “radiant” effect is usually achieved through foundation paper piecing (FPP) or by cutting wedge-shaped strips that fan out from a central focal point. Starting with the blue canton—the area where the stars reside—provides a solid anchor for the rest of the flag’s construction and helps establish the scale for the stripes.
For the stripes in a Radiant Flag Quilt – Pattern, instead of simple horizontal rectangles, you will be working with elongated trapezoids. These shapes must be cut with extreme care to ensure the grain of the fabric remains stable. If the grain is off, the long strips may stretch, causing the flag to “wave” in an unintentional and messy way. Using a quilting mat with grid lines is the best way to keep your angles consistent as you work through the red and white segments.
Piecing the radiant rays requires a technique known as “chain piecing” to keep your workflow efficient and organized. In a Radiant Flag Quilt – Pattern, it is very easy to mix up your shades of red or blue, so labeling your fabric piles with numbers (e.g., Red 1 for darkest, Red 5 for lightest) is a lifesaver. This organization ensures that the color graduation remains consistent across the entire width of the flag, maintaining the illusion of light hitting the surface.
The stars are often the most challenging part of the Radiant Flag Quilt – Pattern. Depending on your skill level, you might choose “fussy cutting” for specific star fabrics or using a reflective silver fabric to make the stars truly shine. If the pattern calls for fifty stars, many quilters opt for a simplified version with fewer, larger stars, or use a decorative embroidery stitch to add the stars after the main piecing is complete to reduce bulk.
Joining the “rays” to the canton in your Radiant Flag Quilt – Pattern is where the design truly comes together. This is known as a “Y-seam” or a partial seam in some versions of the pattern. Taking your time with pins or fabric clips at these intersections will prevent “pleating,” which is when the fabric folds over itself at the seam. A perfectly flat quilt top is the hallmark of a quilter who has mastered the technical demands of this specific geometric style.
Once the top of your Radiant Flag Quilt – Pattern is finished, it is time for the “squaring up” process. Because of the radiant angles, the edges might look slightly jagged or uneven before the borders are added. Use your largest square ruler to trim the excess fabric, ensuring the corners are exactly 90 degrees. This step is vital because it prepares the quilt sandwich for the final stage of quilting, where the “radiant” lines are reinforced with decorative stitching.
The way you choose to quilt your Radiant Flag Quilt – Pattern can either subtly support the design or become a major feature in itself. For a “radiant” look, many experts recommend matchstick quilting or “stitch-in-the-ditch” following the lines of the rays. This directs the viewer’s eye from the center outward, mimicking the path of light and reinforcing the geometric strength of the flag’s stripes.
If you have a longarm machine or are comfortable with free-motion quilting, you can add “ghost stars” in the white stripes of your Radiant Flag Quilt – Pattern. This involves quilting the outline of stars into the negative space, which adds a layer of hidden detail that only becomes visible upon closer inspection. This level of artistic quilting elevates the project from a standard blanket to a high-end textile art piece.
Thread color choice for the actual quilting of a Radiant Flag Quilt – Pattern is a point of much debate among enthusiasts. Some prefer a “monofilament” (clear) thread so as not to distract from the color gradients, while others use a variegated thread that transitions from red to white. The key is to choose a thread that complements the fabric without creating harsh contrasts that might “break” the visual flow of the radiant beams.
The density of your quilting will also affect the “stiffness” of the Radiant Flag Quilt – Pattern. If you plan for this to be a wall hanging, denser quilting is beneficial as it prevents the fabric from sagging over time. If it is meant to be a cozy lap quilt, space your quilting lines further apart to maintain a soft, cuddly feel. Balancing aesthetic detail with physical comfort is a central part of the quilter’s decision-making process.
For the borders of your Radiant Flag Quilt – Pattern, consider a simple, dark frame to act as a “shadow box.” This makes the radiant flag in the center appear even brighter by contrast. Using a dark navy or charcoal border provides a professional finish that contains the energy of the radiant rays, making the central motif the undisputed star of the show.
Finally, the binding is the “frame” for your Radiant Flag Quilt – Pattern. A traditional “double-fold bias binding” in a solid red or blue provides a clean, durable edge. For an extra touch of class, some quilters use a “scrappy binding” made from the leftover gradient fabrics, which continues the radiant color theme all the way to the very edge of the quilt, providing a cohesive and thoughtful conclusion.
A Radiant Flag Quilt – Pattern is often a labor of love that represents many hours of work, so proper care is essential. When washing your quilt for the first time, always use “color catchers” to prevent the deep reds from bleeding into the crisp whites. A cold-water wash on a delicate cycle and air-drying (or tumble drying on low) will keep the cotton fibers and the radiant colors vibrant for decades to come.
Displaying your Radiant Flag Quilt – Pattern requires consideration of sunlight exposure. While the quilt itself is “radiant,” actual UV rays from a window can fade the fabric over time. If you are hanging it on a wall, use a quilt sleeve sewn onto the back to distribute the weight evenly, preventing the top edge from stretching or warping under its own gravity.
The symbolism of a Radiant Flag Quilt – Pattern makes it an extraordinary gift for specific milestones. It is a popular choice for “Quilts of Valor” presentations or for celebrating a family member’s naturalization ceremony. The “radiance” in the design symbolizes hope, a bright future, and the vibrant spirit of liberty, making it much more than just a bed covering—it is a narrative told through fabric.
If you are making the Radiant Flag Quilt – Pattern for a child or a dorm room, you might want to add a personalized label to the back. A quilt label featuring the name of the maker, the date, and the occasion ensures that the history of the piece is never lost. In the world of quilting, these labels are essential for documenting the provenance of the “radiant” artwork for future generations.
Storing your Radiant Flag Quilt – Pattern should be done with care to avoid permanent creases. Instead of folding it the same way every time, try rolling the quilt or folding it on the bias (diagonally). This prevents the heavy seams of the radiant rays from becoming weak points. Store it in a breathable cotton bag rather than plastic to prevent moisture buildup and to allow the natural fibers to “breathe.”
In conclusion, the journey of creating a Radiant Flag Quilt – Pattern is one of technical growth and emotional satisfaction. Every strip of fabric you sew is a tribute to the craftsmanship of the past and the creativity of the future. By focusing on precise geometry and thoughtful color selection, you create a piece of history that radiates beauty and meaning in equal measure, cementing your place in the long tradition of master quilters.
The Radiant Flag Quilt – Pattern is generally considered an intermediate-level project. While the basic shapes are simple, the precision required for the “radiant” angles and the management of color gradients can be challenging for someone who hasn’t mastered a consistent 1/4-inch seam. However, a patient beginner can certainly succeed by taking it slow.
The amount of fabric depends on the final size, but for a standard throw-size Radiant Flag Quilt – Pattern, you will typically need about 5 to 7 yards of fabric in total. This includes the various shades for the red and white stripes, the blue canton, the backing, and the binding. Always buy a little extra of each gradient shade to account for cutting errors.
Yes, most modern Radiant Flag Quilt – Pattern versions are designed for machine piecing. You can use applique, traditional piecing, or even machine embroidery to create the stars. Machine piecing is often faster and more durable for quilts that will be used and washed frequently.
If your Radiant Flag Quilt – Pattern isn’t laying flat, it is likely due to “wavy” seams caused by stretching the fabric on the bias. When cutting and sewing the diagonal lines of the radiant rays, be careful not to pull the fabric. Using starch or a fabric stabilizer can help keep the pieces firm and prevent distortion.
While the Radiant Flag Quilt – Pattern is traditionally made in red, white, and blue, you can certainly use “monochrome” schemes (shades of grey and black) or “vintage” palettes (tea-stained creams and muted burgundies). The “radiant” effect works with any color family as long as you have a good range of light to dark values.
While a standard 24-inch acrylic ruler is usually sufficient, some versions of the Radiant Flag Quilt – Pattern may recommend a “wedge ruler” or a 60-degree triangle ruler. Always check the specific requirements of your pattern before starting to ensure you have the right tools for the specific angles used in that design.
The Radiant Flag Quilt – Pattern is a magnificent project that challenges your technical skills while rewarding you with a stunning, patriotic work of art.
We have covered the vital steps of material selection, the precision needed for radiant cutting and piecing, advanced quilting techniques, and the best practices for long-term care. By mastering the gradient color play and geometric alignment, you can turn a classic symbol into a glowing masterpiece that honors tradition with a modern, “radiant” flare.