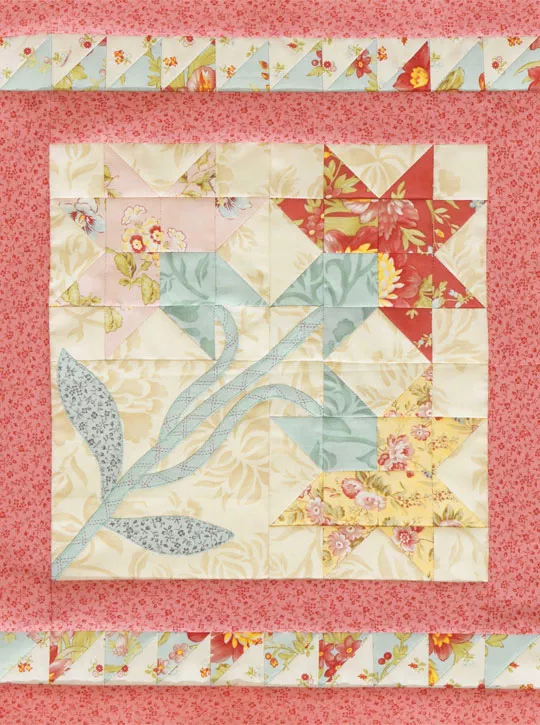
Carolina Lily Tabletop Quilt - Pattern

Sewing Caddy – Pattern designs are the ultimate solution for crafters looking to harmonize their workspace while adding a touch of personal flair to their hobby room. Whether you are a seasoned quilter or a beginner just learning to thread a needle, having a dedicated Sewing Caddy – Pattern allows you to organize your essential tools—like snips, measuring tapes, and seam rippers—into one portable and stylish unit. Many enthusiasts find that creating their own Sewing Caddy – Pattern is not just a functional project, but a creative rite of passage that helps them master tricky techniques like binding and pocket reinforcement.
The beauty of a high-quality Sewing Caddy – Pattern lies in its versatility and the way it maximizes efficiency during long hours of crafting. By following a well-structured Sewing Caddy – Pattern, you can customize the dimensions to fit your specific table or even create a wrap-around version for your chair armrest. This level of personalization ensures that your most-used notions are always within arm’s reach, reducing the time spent hunting through cluttered drawers and allowing you to focus entirely on the joy of the stitch.
In the world of DIY organization, the Sewing Caddy – Pattern stands out because it combines soft sculpture with extreme utility. Choosing the right Sewing Caddy – Pattern means looking for a design that offers stability, perhaps through the use of heavy-duty interfacing or weighted bases, so it doesn’t tip over when filled with heavy shears. As we dive deeper into this guide, we will explore the essential components of a Sewing Caddy – Pattern, the best materials to use, and how to execute the assembly to professional standards.

When you start looking for a Sewing Caddy – Pattern, the first thing to understand is that “Caddy” refers to a specialized storage container designed for portability and easy access. A Sewing Caddy – Pattern serves as the blueprint for this container, providing the measurements and templates needed to cut fabric pieces that will eventually hold your pins, thread, and scissors.
The term Sewing Caddy – Pattern is essential because it bridges the gap between raw materials and a finished organizational tool. In the sewing world, a pattern is a guide, usually made of paper or digital instructions, that tells you exactly how to replicate a specific design. Without a proper Sewing Caddy – Pattern, you would be guessing dimensions, which often leads to pockets that are too tight or a base that is too flimsy.
Quality patterns for these caddies often include variations, such as a “weighted” version for the edge of a table or a “pincushion” top. When you use a Sewing Caddy – Pattern, you are essentially following a roadmap created by an expert designer to ensure your final product is balanced. This balance is crucial because sewing tools can be surprisingly heavy when grouped together.
A great Sewing Caddy – Pattern will also introduce you to the concept of “notions,” which are the small items used in sewing, such as zippers, buttons, and snaps. Most caddies are specifically engineered to house these notions in dedicated compartments. By utilizing a Sewing Caddy – Pattern, you learn how to categorize your tools logically, making your workflow much more fluid.
For those new to the craft, a Sewing Caddy – Pattern is an excellent way to practice “fussy cutting.” This technique involves centering a specific motif from your fabric—like a flower or a bird—right in the middle of a pocket or a flap. Because the pieces in a Sewing Caddy – Pattern are relatively small, it is the perfect low-risk project to experiment with bold prints and vibrant colors.
Ultimately, the primary goal of any Sewing Caddy – Pattern is to solve the problem of “the lost seam ripper.” We have all been there—mid-project, needing to undo a mistake, and unable to find the tool. By investing time in a Sewing Caddy – Pattern, you are building a permanent home for your gear, ensuring that your creative process remains uninterrupted and stress-free.
Choosing the right fabric is the most critical step after selecting your Sewing Caddy – Pattern. Most experts recommend using 100% cotton quilting fabric because it is easy to handle, presses beautifully, and comes in endless designs. When following a Sewing Caddy – Pattern, the fabric weight determines how much “body” the caddy will have and how well it will stand up on its own.
Interfacing is the secret ingredient in any successful Sewing Caddy – Pattern. Interfacing is a non-woven or woven material applied to the wrong side of the fabric to add stiffness and durability. Since a Sewing Caddy – Pattern usually involves pockets that will be tugged on frequently, using a firm fusible interfacing ensures that the fabric doesn’t sag or lose its shape over time.
Don’t forget the importance of “loft” if your Sewing Caddy – Pattern includes a pincushion element. Loft refers to the thickness and bounce of batting or stuffing. When a Sewing Caddy – Pattern calls for a padded section, using a high-quality polyester fiberfill or even crushed walnut shells can provide the weight and texture needed to keep your pins secure and sharp.
Thread choice might seem secondary, but for a Sewing Caddy – Pattern, durability is key. Using a polyester or a cotton-poly blend thread ensures that the seams can handle the weight of heavy metal scissors. Many Sewing Caddy – Pattern instructions will suggest a coordinating or contrasting thread color to add a decorative “topstitching” finish to the edges of the pockets.
The “Pattern” part of Sewing Caddy – Pattern also dictates what kind of closures you might need. Depending on the design, you might require hook-and-loop tape (Velcro), magnetic snaps, or even a drawstring. High-end Sewing Caddy – Pattern designs often incorporate these elements to make the caddy collapsible for travel, allowing you to take your studio with you to classes.
Finally, consider the “lining” fabric mentioned in your Sewing Caddy – Pattern. The lining is the interior fabric that hides the raw edges and interfacing. Choosing a lighter, contrasting color for the lining in your Sewing Caddy – Pattern can actually make it easier to see small items like needles or bobbins that might get lost against a dark or busy background print.
One of the most common techniques you will encounter in a Sewing Caddy – Pattern is the creation of “bellows pockets” or pleated pockets. These are pockets designed to expand, allowing you to fit bulkier items like a pack of needles or a small tape measure. Mastering this via a Sewing Caddy – Pattern will significantly improve your overall sewing skills and project versatility.
“Edge stitching” is another vital skill highlighted in many Sewing Caddy – Pattern tutorials. This involves sewing a straight line very close to the folded edge of the fabric, usually about 1/8th of an inch away. In a Sewing Caddy – Pattern, edge stitching isn’t just for looks; it reinforces the pocket openings where the most stress occurs during daily use.
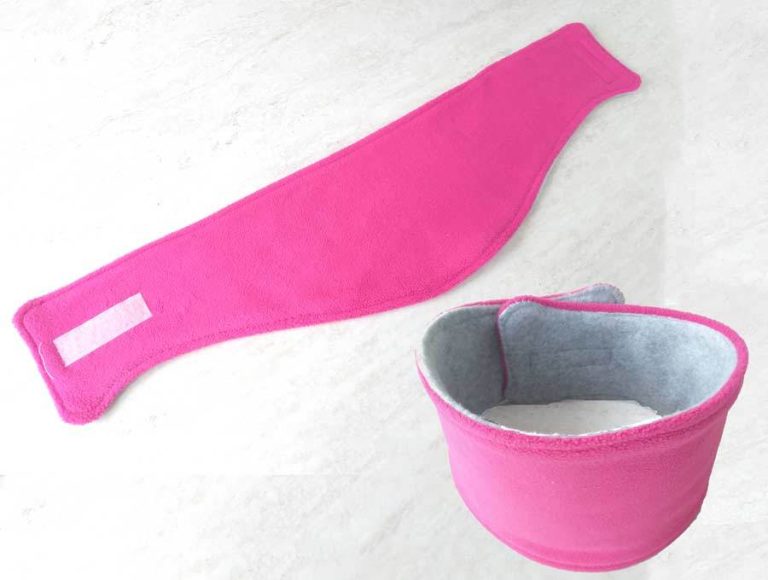
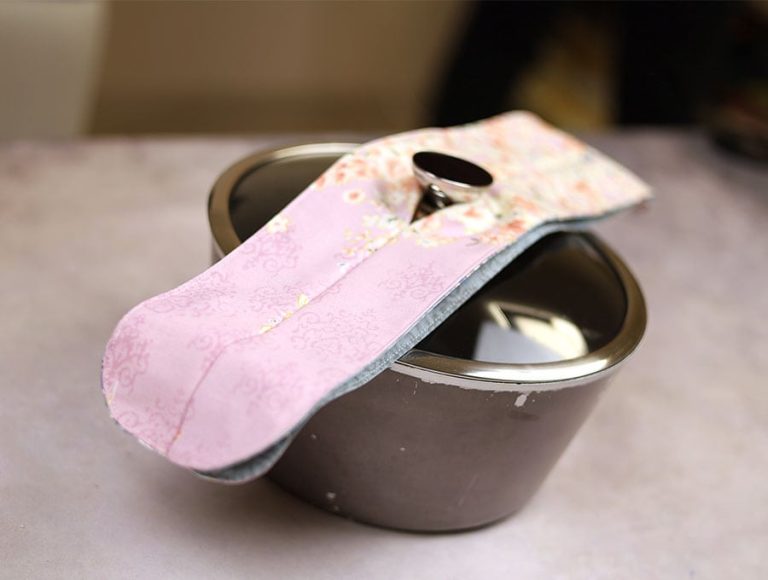
If your Sewing Caddy – Pattern is the type that hangs off a table, you will likely learn about “weighting.” This involves sewing a small pouch filled with heavy beads, sand, or washers and tucking it into a hidden compartment of the caddy. A well-designed Sewing Caddy – Pattern uses physics to ensure that the weight of the tools hanging down is balanced by the weight resting on the table.
Binding is a technique often used to finish the raw edges of a Sewing Caddy – Pattern. It involves wrapping a strip of fabric around the edge and sewing it down. While it can be intimidating for beginners, a clear Sewing Caddy – Pattern will guide you through “mitered corners,” which create a professional, clean 90-degree angle that makes your caddy look store-bought.
“Backstitching” at the start and end of every pocket seam is a non-negotiable step in any Sewing Caddy – Pattern. Because these pockets are functional and will be used constantly, a simple straight stitch isn’t enough. The Sewing Caddy – Pattern serves as a reminder to reinforce these high-stress points so your hard work doesn’t unravel after a few weeks of use.
Lastly, many modern Sewing Caddy – Pattern designs include a “scrap catcher” or a “thread bin.” This is a detachable or integrated bag designed to catch those tiny bits of thread and fabric clippings. Learning to sew a curved bottom or a structured bin through a Sewing Caddy – Pattern adds a 3D element to your sewing repertoire that is both fun and incredibly practical.
Once you have mastered the basic Sewing Caddy – Pattern, the world of customization opens up. You can add “elastic loops” to your caddy to hold marking pens or crochet hooks. By modifying the original Sewing Caddy – Pattern, you can tailor the tool slots to the exact dimensions of your favorite specialized equipment, making it truly one-of-a-kind.
Embellishment is where your Sewing Caddy – Pattern project really shines. You can use embroidery, appliqué, or even decorative ribbons to personalize the exterior. Many crafters like to embroider their names or a fun sewing quote onto the main panel of the Sewing Caddy – Pattern, turning a simple organizational tool into a piece of textile art.
Maintenance of your finished Sewing Caddy – Pattern is straightforward but important. Since it lives in a dusty environment (fabric lint is real!), choosing washable fabrics during the initial phase is wise. If your Sewing Caddy – Pattern used high-quality cotton, you can usually spot clean it with a damp cloth or give it a gentle hand wash to keep it looking fresh for years.
If you find that your Sewing Caddy – Pattern is becoming too small as your tool collection grows, don’t be afraid to make a second one! Many sewists have multiple caddies based on the same Sewing Caddy – Pattern—one for hand-stitching, one for machine maintenance, and one for embroidery. This “modular” approach keeps your workspace clean and specialized.
Sharing your progress is a big part of the community. When you finish a project using a specific Sewing Caddy – Pattern, posting it on social media or sewing forums helps others see how different fabric choices can change the look. It also allows you to give feedback to the designer of the Sewing Caddy – Pattern, helping the craft community grow and improve.
In conclusion, a Sewing Caddy – Pattern is more than just a set of instructions; it is an investment in your crafting happiness. It organizes your space, hones your skills, and provides a creative outlet. By following the steps outlined in your chosen Sewing Caddy – Pattern, you create a lasting companion that will sit by your side through every hem, seam, and masterpiece you create.
What is the best fabric for a Sewing Caddy – Pattern?
The most recommended fabric is 100% cotton quilting fabric. It is durable, non-slip, and available in various patterns. For added structure, many users combine it with heavy-duty interfacing or canvas for the base.
Can a beginner complete a Sewing Caddy – Pattern?
Yes! Most Sewing Caddy – Pattern designs are rated for “confident beginners.” They involve straight seams and basic pocket construction. It is an excellent project for practicing accuracy and learning how to work with multiple layers of fabric.
How do I make my Sewing Caddy – Pattern stay on the table?
Many designs use a “weighted” method. You can fill a small internal pocket with poly-pellets, rice, or even a flat piece of steel. This counterweight keeps the caddy from sliding off the table when you put heavy tools in the hanging pockets.
What tools do I need to start a Sewing Caddy – Pattern?
You will need a sewing machine, basic thread, fabric scissors or a rotary cutter, a marking pen, pins or clips, and the specific Sewing Caddy – Pattern instructions. An iron is also essential for pressing seams to get a crisp, professional look.
Are digital Sewing Caddy – Patterns better than paper ones?
It depends on your preference. Digital Sewing Caddy – Pattern files (PDFs) are instant and can be printed at home, while paper patterns are often more durable and easier to manipulate if they are large. Digital versions often include video links for tricky steps.
How long does it take to sew a Sewing Caddy – Pattern?
A standard Sewing Caddy – Pattern usually takes between 2 to 5 hours to complete, depending on your experience level and the complexity of the pockets. It is a perfect weekend project that provides immediate satisfaction.
Creating a Sewing Caddy – Pattern is a rewarding journey that transforms a few scraps of fabric into a vital piece of studio equipment. Throughout this article, we have explored the definition of a Sewing Caddy – Pattern, the essential materials like interfacing and cotton, and the technical skills such as mitered corners and weighted bases.
We also discussed how customization can turn a standard Sewing Caddy – Pattern into a personalized reflection of your creative style. By organizing your notions and tools, you are not just cleaning your desk; you are clearing your mind for more creative work.

