
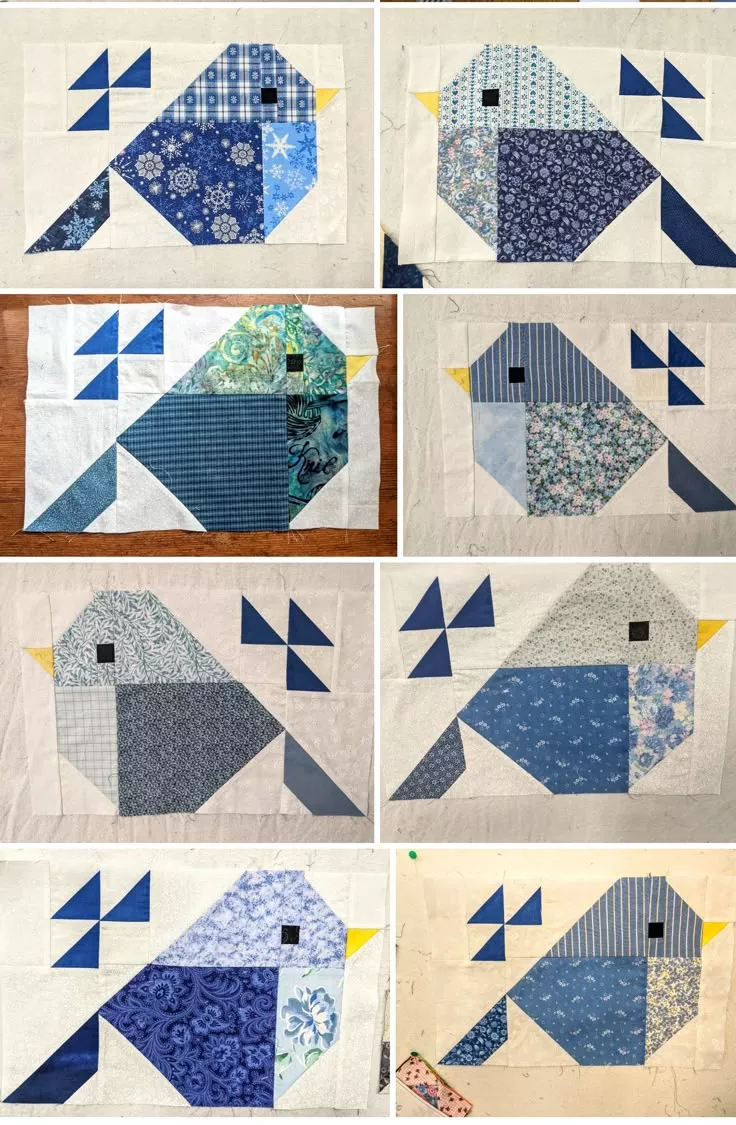
Bird-shaped Pincushion - Pattern

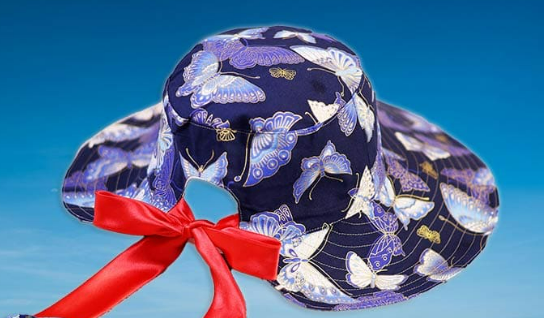
A Sun hat with reversible back tie – Pattern is the perfect sewing project for anyone looking to combine fashion, functionality, and the joy of handmade summer accessories. As the temperatures rise and the sun’s rays become more intense, having a reliable, wide-brimmed hat becomes a necessity rather than a luxury. This specific design is particularly popular because it offers two looks in one, allowing you to match your outfit effortlessly while providing essential shade for your face and neck. Whether you are a beginner at the sewing machine or an experienced seamstress, creating a reversible hat is a rewarding way to use up beautiful fabric scraps or showcase a favorite new print.
The beauty of a Sun hat with reversible back tie – Pattern lies in its adjustable nature and versatile aesthetic. Unlike standard store-bought hats that often come in a “one size fits all” format—which rarely fits anyone perfectly—this pattern allows you to tailor the crown and the tie to your specific head measurements. The back tie serves two purposes: it acts as a decorative bow that adds a feminine touch to the silhouette, and it functions as a sizing mechanism to ensure the hat stays secure even on a breezy day at the beach. By making it reversible, you double the value of your labor, essentially creating two distinct hats within a single construction process.
In this detailed guide, we are going to explore the nuances of executing a high-quality Sun hat with reversible back tie – Pattern. We will discuss the best fabric choices for UV protection, the importance of structural interfacing, and the step-by-step techniques required to achieve a professional finish. Investing time into a DIY sun hat ensures that you have a durable, washable, and stylish piece of headwear that will last for many summers to come. From selecting the right needle size to mastering the art of the top-stitched brim, every detail counts when you are crafting your own sun-safe gear. Let’s dive into the world of creative millinery and start building your custom summer wardrobe.
When you begin working on a Sun hat with reversible back tie – Pattern, the fabric you choose will dictate both the comfort and the effectiveness of the final product. Since the primary goal is sun protection, you should look for tightly woven natural fibers like 100% cotton canvas, linen, or heavy-duty poplin. These materials are breathable, which prevents your head from overheating, but they are also dense enough to block a significant portion of harmful UV radiation. Avoid thin or sheer fabrics unless you plan on using multiple layers of lining.
Because this is a reversible hat pattern, you have the exciting opportunity to pair two different designs. A common strategy is to choose a vibrant, busy floral or geometric print for one side and a solid, neutral color for the other. This gives you a “party” side and a “practical” side, ensuring the hat coordinates with a wide variety of swimwear and sundresses. Make sure the weights of the two fabrics are similar; if one is significantly heavier than the other, the hat may drape awkwardly or feel lopsided when worn.
The “back tie” element of the Sun hat with reversible back tie – Pattern requires a fabric that can hold a knot or a bow without being too bulky. While you want the brim to be sturdy, the ties should remain relatively soft and pliable. If you are using a very stiff canvas for the main hat, you might consider using a lighter weight cotton for the ties themselves to ensure they look elegant rather than stiff. This contrast in texture can add a sophisticated look to your handmade headwear.
Interfacing is the secret ingredient in any successful Sun hat with reversible back tie – Pattern. To prevent the brim from flopping into your eyes, you must apply a layer of fusible interfacing to at least one side of the brim pieces. For a very structured look, you can interface both sides. Look for a medium-to-heavyweight woven interfacing that provides stiffness while still allowing the fabric to be turned right side out during the assembly process.
Don’t forget to pre-wash your fabrics before cutting your Sun hat with reversible back tie – Pattern. Cotton and linen are notorious for shrinking during their first wash. Since a hat needs to fit precisely around the crown of your head, any shrinkage after the project is finished could make it unwearable. Washing and drying the fabric exactly how you plan to care for the finished hat will ensure that your custom-fit sun hat maintains its dimensions over time.
Lastly, consider the “coolness” factor of the colors you select for your Sun hat with reversible back tie – Pattern. Darker colors tend to absorb more heat, while lighter colors reflect it. If you spend a lot of time in extremely hot climates, choosing a light-colored fabric for the interior or exterior can help keep you significantly cooler. This functional approach to color choice is what elevates a DIY sewing project into a piece of high-performance gear.
The first technical step in your Sun hat with reversible back tie – Pattern is the layout and cutting phase. Most patterns will consist of three main parts: the crown (the top circle), the side wall (the band that goes around your head), and the brim. Since the hat is reversible, you will need to cut two sets of these pieces—one from your “Side A” fabric and one from your “Side B” fabric. Precision is key here; even a quarter-inch error can affect how the pieces fit together during the sewing process.
When cutting the brim for your Sun hat with reversible back tie – Pattern, pay close attention to the grainline of the fabric. Cutting the brim on the bias (a 45-degree angle to the selvage) can provide a nicer drape, but most standard patterns recommend cutting on the straight grain for maximum stability. If your fabric has a directional print—like stripes or a specific floral pattern—ensure that the pieces are oriented so the design looks intentional once the hat is fully assembled.
Marking your notches is a vital part of the Sun hat with reversible back tie – Pattern workflow. Notches are small marks on the pattern that help you align the center of the crown with the center of the side walls and the brim. Without these guideposts, it is very easy to accidentally twist the fabric as you sew, resulting in a lopsided hat. Use a fabric pen or a small snip within the seam allowance to keep your assembly lines perfectly aligned.
The “reversible back tie” portion of the Sun hat with reversible back tie – Pattern usually involves a gap in the back of the side wall and brim where the ties are attached. You will need to cut four tie pieces (two for each side of the hat). Some crafters prefer to make the ties a contrasting color to add a pop of visual interest. Ensure that you leave enough length on the ties to create a generous bow, as this is the primary aesthetic feature of this stylish sun hat.
Once the fabric is cut, it is time to apply the interfacing to your Sun hat with reversible back tie – Pattern pieces. Use a hot iron and plenty of steam to bond the interfacing to the wrong side of your fabric. Focus specifically on the brim and the side wall. If you want the top of the hat to stay flat and crisp, you can interface the crown circle as well. Proper interfacing application is what separates a floppy, homemade-looking hat from a high-end boutique version.
Before you sit down at the sewing machine, organize your pieces into two distinct piles: Side A and Side B. This prevents you from accidentally mixing up the lining and the exterior fabric. Having a clean, organized workspace for your Sun hat with reversible back tie – Pattern will make the transition from cutting to sewing much faster and will reduce the likelihood of mistakes that require the dreaded seam ripper.
Assembly of the Sun hat with reversible back tie – Pattern begins with creating the two separate “hat shells.” You will sew the side wall into a circle (leaving the back open for the tie) and then attach the crown. Slow and steady wins the race when sewing curves. Use plenty of pins or clips to ease the flat circle of the crown into the cylindrical side wall. This ensures there are no puckers or pleats in your hand-sewn crown.
Next, you will attach the brim pieces to each respective shell of the Sun hat with reversible back tie – Pattern. This is often the most challenging part because you are working with multiple layers of fabric and interfacing. Using a “walking foot” on your sewing machine can be incredibly helpful here, as it helps feed all the layers through the machine at the same rate, preventing the fabric from shifting and causing seam misalignment.
The ties are typically constructed by sewing two strips together, turning them right side out, and pressing them flat. In a Sun hat with reversible back tie – Pattern, these ties are basted into the back opening of the side wall before the two hat shells are joined. It is important to double-stitch the area where the ties meet the hat, as this is a high-stress point that will be pulled and knotted frequently during use.
Joining the two hats is the “magic” moment of the Sun hat with reversible back tie – Pattern. You will place one hat inside the other, right sides together, and sew around the entire outer edge of the brim. You must leave a small opening—about 3 to 4 inches—somewhere along the seam to turn the hat right side out. This “turning hole” is usually located at the back of the brim where it is less noticeable in the finished accessory.
After turning the hat right side out through the hole, give it a very thorough pressing with an iron. This is a crucial step for the Sun hat with reversible back tie – Pattern. You want the edges of the brim to be sharp and the two layers of fabric to lay perfectly flat against each other. Roll the seam between your fingers to ensure the lining isn’t peeking out from the front, then pin the opening shut for the final top-stitching phase.
The final touch for any professional Sun hat with reversible back tie – Pattern is decorative top-stitching on the brim. Starting from the edge and moving inward, sew several concentric circles about a half-inch apart. Not only does this look beautiful, but it also adds significant structural integrity to the brim, keeping it stiff and functional. This “top-stitching technique” is the hallmark of a well-made handmade sun hat.
One of the best things about the Sun hat with reversible back tie – Pattern is the ability to adjust the brim width. If you want a more dramatic “Old Hollywood” look, you can extend the brim by two or three inches. If you prefer a sporty, “bucket hat” vibe, you can shorten it. Customizing the brim allows you to tailor the level of sun protection to your specific needs, whether you are gardening or lounging by a pool.
You can also experiment with different tie styles in your Sun hat with reversible back tie – Pattern. Instead of a standard fabric tie, you could use a high-quality grosgrain ribbon or a braided cord. However, keep in mind that if you change the material of the tie, the hat may no longer be fully reversible or machine washable. Stick to fabric ties if you want a truly multi-functional reversible hat.
For those who want extra functionality, you can add a “hidden” feature to your Sun hat with reversible back tie – Pattern, such as a small loop for sunglasses. Another popular modification is to add a chin strap if you live in a very windy area. Since you are the designer, you can incorporate these practical sewing hacks to make the hat work perfectly for your lifestyle and outdoor activities.
Caring for your completed Sun hat with reversible back tie – Pattern is relatively simple if you used cotton or linen. Most can be machine washed on a delicate cycle in a mesh laundry bag. However, to maintain the stiffness of the brim, hand-washing and air-drying is often the better choice. Never wring out the hat; instead, blot it with a towel and reshape it while it is damp to preserve the original pattern shape.
If the brim of your Sun hat with reversible back tie – Pattern starts to lose its shape after a few washes, you can use a bit of spray starch while ironing. This will reactivate the interfacing and give the hat back its “store-bought” crispness. Proper maintenance ensures that your DIY fashion project remains a staple of your summer wardrobe for years, rather than just a single season.
Finally, consider making a matching set! The Sun hat with reversible back tie – Pattern is so fun to sew that many people end up making them for their children or as gifts for friends. Using the same fabric to make a matching tote bag or a simple drawstring pouch creates a coordinated “vacation set” that looks incredibly high-end. The possibilities are endless when you master this versatile sewing pattern.
Yes, it is! While sewing curves and dealing with interfacing requires some patience, the construction is straightforward. It is a fantastic project for someone who has mastered straight seams and wants to move into basic millinery or garment construction.
Typically, you will need about half a yard to a full yard of two different fabrics (one for each side). The exact amount depends on the width of the brim you choose. It is always a good idea to have a little extra for the reversible ties and to allow for any cutting errors.
A medium-to-heavyweight fusible woven interfacing is best. Avoid non-woven “paper-like” interfacing as it can crease and lose its shape when washed. Woven interfacing moves better with the fabric and provides a more professional finish for your hat brim.
While it is possible to sew a Sun hat with reversible back tie – Pattern by hand using a strong backstitch, it is quite labor-intensive due to the multiple layers and the top-stitching on the brim. A sewing machine is highly recommended for durability and a clean look.
Use a soft measuring tape and wrap it around your head where the hat would naturally sit (usually about an inch above the ears). Most sun hat patterns provide a size chart ranging from Small to Extra Large based on this circumference measurement.
Absolutely! That is one of the main functional benefits of the Sun hat with reversible back tie – Pattern. The tie allows you to cinche the back of the hat slightly, providing a more “custom” fit and ensuring the hat doesn’t fly off in the wind.
In this article, we have thoroughly explored the creation and care of a Sun hat with reversible back tie – Pattern, a project that perfectly balances style and utility. We covered the essential fabric choices, the importance of interfacing for a sturdy brim, and the step-by-step sewing techniques required to make the hat fully reversible.
By creating your own sun hat, you gain a custom-fit accessory that offers superior sun protection and the versatility of two designs in one. This project is not only a great way to improve your sewing skills but also an eco-friendly way to build a high-quality summer wardrobe that reflects your personal taste.


