
Horizontal Row Quilt - Pattern

The Twinkle Star Quilt – Pattern is one of those timeless designs that captures the essence of tradition while allowing for infinite modern creativity. Whether you are a seasoned quilter with decades of experience or a curious beginner looking for your first major project, this specific quilt pattern offers a rhythmic sewing process that is both meditative and rewarding. There is something truly magical about seeing a series of fabric scraps transform into a glowing celestial display, making the Twinkle Star Quilt – Pattern a favorite in the quilting community across the globe.
In this comprehensive guide, we are going to dive deep into everything that makes the Twinkle Star Quilt – Pattern so special, focusing on the technical aspects and the artistic joy it brings. Understanding the geometry of the star blocks and how they interact with the negative space of your fabric choice is the key to a successful finish. We will explore how to select the right quilting fabrics, manage your seam allowances, and ensure that every point of your star remains crisp and sharp throughout the assembly process.
Beyond the technicalities, mastering the Twinkle Star Quilt – Pattern is about storytelling through textiles. Each choice you make—from the color palette to the stitching technique—adds a layer of personality to the finished piece. This article is designed to be your ultimate resource, providing clear instructions and SEO-optimized quilting tips to help you navigate the creation of your own masterpiece. By the time you reach the end, you will feel confident in your ability to tackle this twinkle star design and create a family heirloom that will be cherished for generations.
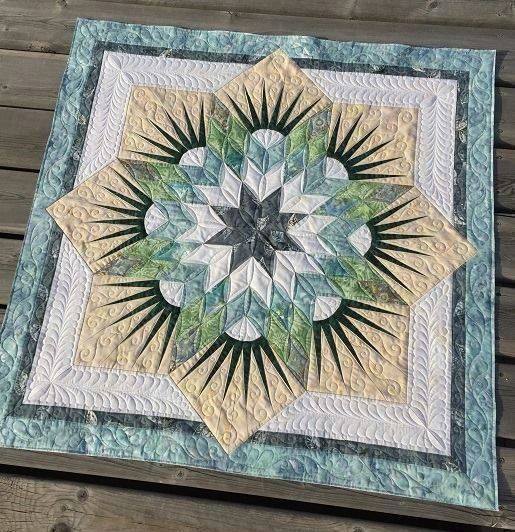
The foundation of any successful Twinkle Star Quilt – Pattern lies in its geometric precision. This specific design typically relies on a variation of the eight-pointed star, often referred to as a LeMoyne Star or a Sawtooth Star, depending on the complexity of the points. To achieve that iconic “twinkle” effect, the star blocks are often scaled differently or surrounded by secondary patterns that draw the eye toward the center.
When you begin working on your Twinkle Star Quilt – Pattern, accuracy in cutting is your best friend. Even a slight deviation of an eighth of an inch can cause the star points to become “blunted” or misaligned when the blocks are joined together. Using a high-quality rotary cutter and a non-slip quilting ruler is essential for ensuring that every half-square triangle (HST) and square is uniform.
The Twinkle Star Quilt – Pattern often utilizes a “fussy cutting” technique if you are working with patterned fabric. This involves centering a specific motif from your fabric—like a small flower or a geometric shape—right in the middle of the star’s center square. This adds an extra layer of detail that makes the quilt design look much more professional and intricate without adding significant difficulty to the sewing process.
Another critical element is the fabric contrast. For the Twinkle Star Quilt – Pattern to truly shine, you need a clear distinction between the star fabric and the background fabric. High-contrast pairings, such as navy blue stars on a cream background or bright yellow stars on a charcoal grey, help the twinkle effect pop, ensuring the pattern is visible even from a distance.
As you assemble the units, pay close attention to the seam intersections. In a Twinkle Star Quilt – Pattern, many seams meet at a single point. To avoid excessive bulk that can make machine quilting difficult later, it is often recommended to press your seams open or use a “twirling” technique at the intersections. This keeps the fabric flat and the quilt top smooth.
Finally, don’t be afraid to experiment with the block layout. While the traditional Twinkle Star Quilt – Pattern follows a grid, you can create a modern “shattered” look by varying the size of the stars or placing them randomly across the quilt top. This versatility is exactly why this star pattern remains a staple for modern makers and traditionalists alike.
Choosing the right materials for your Twinkle Star Quilt – Pattern is just as important as the sewing itself. Most quilters prefer using 100% cotton quilting fabric because of its durability and ease of handling. Cotton has just enough “grip” to stay in place during the piecing process, which is vital when you are working with the many small triangles required for a star block.
If you want your Twinkle Star Quilt – Pattern to have a vintage feel, consider using civil war reproduction fabrics or “thimbleberries” style prints. These muted tones give the star points a soft, glowing appearance. On the other hand, if you prefer a modern aesthetic, solid fabrics or “batiks” can provide a bold, graphic look that emphasizes the sharp lines of the Twinkle Star Quilt – Pattern.
In terms of tools, a quarter-inch sewing foot is a non-negotiable requirement for this project. The Twinkle Star Quilt – Pattern relies heavily on the scant 1/4 inch seam, a technique where you sew a hair’s breadth narrower than a true quarter inch to account for the fold of the fabric. This ensures that your finished quilt blocks are the exact size they are supposed to be.
Don’t overlook the importance of your thread choice. A high-quality 50wt cotton thread in a neutral color like dove grey or tan is usually best for piecing the Twinkle Star Quilt – Pattern. Thinner thread reduces bulk in the seams, which is particularly helpful when you have multiple star points meeting in one area. This leads to a much flatter and more professional-looking finished quilt.
A good steam iron is another essential tool for the Twinkle Star Quilt – Pattern. Pressing (not sliding) the iron over your seams helps “set” the stitches and ensures the fabric doesn’t stretch out of shape. Since stars involve many diagonal seams (bias edges), being gentle with the iron prevents the quilt blocks from becoming distorted or wavy.
Lastly, consider using fabric starch or a sizing spray. Applying starch to your fabric before cutting makes the cotton stiffer and less likely to fray or stretch. This is a “pro-tip” for the Twinkle Star Quilt – Pattern, as it makes handling small star point units much easier, resulting in a quilt that lies perfectly flat once it is fully assembled.
The heart of the Twinkle Star Quilt – Pattern is the individual block construction. Most variations begin with a center square, four corner squares, and four flying geese units that form the points. Master the flying geese technique, and you have mastered the star. You can use the “four-at-a-time” method to speed up the process and minimize fabric waste.
Once your units are cut, the assembly of the Twinkle Star Quilt – Pattern usually follows a “nine-patch” logic. You arrange your units into three rows of three. The top row consists of a corner square, a star point, and another corner square. The middle row features a star point, the center square, and another star point. The bottom row mirrors the top.
When sewing these rows together for your Twinkle Star Quilt – Pattern, “pinning” is your best friend. Align the points where the flying geese meet the center square and use a pin to hold them exactly in place. This prevents the “shifting” that often leads to cut-off points, which is the most common challenge when tackling a star-based quilt pattern.
As you complete each row, press the seams in opposite directions. For example, press the top and bottom rows to the left and the middle row to the right. This “nesting” of seams allows the pieces to lock together perfectly when you join the rows, creating a crisp intersection in your Twinkle Star Quilt – Pattern without any unsightly gaps or lumps.
After the block is assembled, it is time for squaring up. Even the best quilters find that their blocks can be off by a tiny fraction. Use a square quilting ruler to trim the block to its intended size, ensuring that you leave a quarter-inch of space beyond the star points. This “seam allowance buffer” ensures that when you sew the blocks together, you don’t lose the tips of your stars.
Repeat this process for all the blocks in your Twinkle Star Quilt – Pattern. Some quilters like to “chain piece,” which means sewing all the same units at once without cutting the thread between them. This is an efficient way to manage a large project and ensures that your tension and stitch length remains consistent across every star block in the quilt.
Once your quilt top is finished, it’s time to think about the quilting motifs that will enhance your Twinkle Star Quilt – Pattern. You have two main options: “stitching in the ditch” or free-motion quilting. Stitching in the ditch follows the seams of the stars, making the pattern stand out, while free-motion allows you to add swirls, feathers, or even smaller stars in the background space.
For a Twinkle Star Quilt – Pattern, a “starburst” quilting design is particularly effective. By radiating lines outward from the center of each star, you create a sense of movement and light. If you are using a longarm quilting service, ask for a “minimalist” edge-to-edge design so that the intricate piecing of the star pattern remains the primary focus of the viewer.
The quilt batting you choose will also affect the final look. A 100% cotton batting will give your Twinkle Star Quilt – Pattern a flat, traditional appearance that crinkles beautifully after the first wash. If you want more “loft” or puffiness to make the stars stand out, a polyester or wool blend batting is a fantastic choice as it holds its shape very well.
Don’t forget the quilt backing! While many people use a solid color, a wide-back fabric with a subtle celestial print can complement the Twinkle Star Quilt – Pattern theme. Make sure your backing is at least 4 to 8 inches larger than your quilt top on all sides to allow for the shifting that naturally occurs during the quilting process.
The binding is the final frame for your work. For a Twinkle Star Quilt – Pattern, a striped binding cut on the “bias” can create a fun “barber pole” effect that adds energy to the edges. Alternatively, using the same fabric as your star points for the binding creates a cohesive look that ties the whole design together beautifully.
Finally, always add a quilt label to the back of your Twinkle Star Quilt – Pattern. Include the name of the pattern, your name, the date, and the location. Quilts are historical documents, and by labeling your star quilt, you ensure that future generations know the story and the hands behind this beautiful piece of textile art.
1. Is the Twinkle Star Quilt – Pattern suitable for beginners?
Yes, it can be! While it looks complex, the Twinkle Star Quilt – Pattern is mostly made of basic shapes like squares and triangles. If you take your time with accurate cutting and use plenty of pins, a beginner can definitely achieve a beautiful result. Start with a larger block size to make the pieces easier to handle.
2. How much fabric do I need for a throw-sized Twinkle Star Quilt?
Generally, for a standard throw size (approx. 60″ x 60″), you will need about 3 to 4 yards of background fabric and a variety of fat quarters or 1/4 yard cuts for the stars. Always check your specific pattern instructions, as fabric requirements vary based on the number of stars and the width of the borders.
3. How do I keep my star points from being cut off?
The secret is the scant 1/4 inch seam. When you sew your units together, ensure your needle is just a tiny bit to the right of the quarter-inch mark. Also, when sewing across a star point intersection, look for the “V” created by the previous seams and sew exactly through the point of that V.
4. Can I use a charm pack for a Twinkle Star Quilt – Pattern?
Absolutely! Charm packs (5-inch squares) are excellent for the center of the stars or for making smaller star points. Many modern quilt patterns are specifically designed to be “pre-cut friendly,” allowing you to use charm packs, layer cakes, or jelly rolls to speed up the process.
5. What is the best way to wash my finished star quilt?
To preserve the colors of your Twinkle Star Quilt – Pattern, wash it in cold water on a gentle cycle using a mild detergent. Using color catchers is highly recommended, especially if you have high-contrast fabrics like red and white, to prevent the darker dyes from bleeding into the lighter areas.
6. How can I make my stars “twinkle” more?
The “twinkle” effect comes from color value. Use “low volume” prints for the background and very vibrant, saturated colors for the stars. Adding a few stars in a slightly different shade or a shimmering metallic thread can also enhance the celestial feel of the quilt.
Creating a Twinkle Star Quilt – Pattern is a journey through color, geometry, and patience. In this article, we have explored the essential steps to success—from understanding the geometric layout and selecting the best quilting tools to the precise construction of star blocks and the final quilting flourishes.
By focusing on accurate seams, high-contrast fabric choices, and proper pressing techniques, you can transform simple pieces of cloth into a stunning celestial map. This pattern is not just a sewing project; it is a way to practice mindfulness and create something of lasting value.


