
Horizontal Row Quilt - Pattern

The Twister Block – Pattern is a modern and visually striking design that brings movement and energy to any quilting project.
With its unique shape and dynamic twists, this pattern is perfect for quilters who enjoy creating intricate and eye-catching designs.
The Twister Block – Pattern is versatile and can be used for a variety of projects, from quilts to wall hangings and table runners.
This article will explore the beauty of the Twister block, its components, and how to successfully create this stunning quilt pattern.
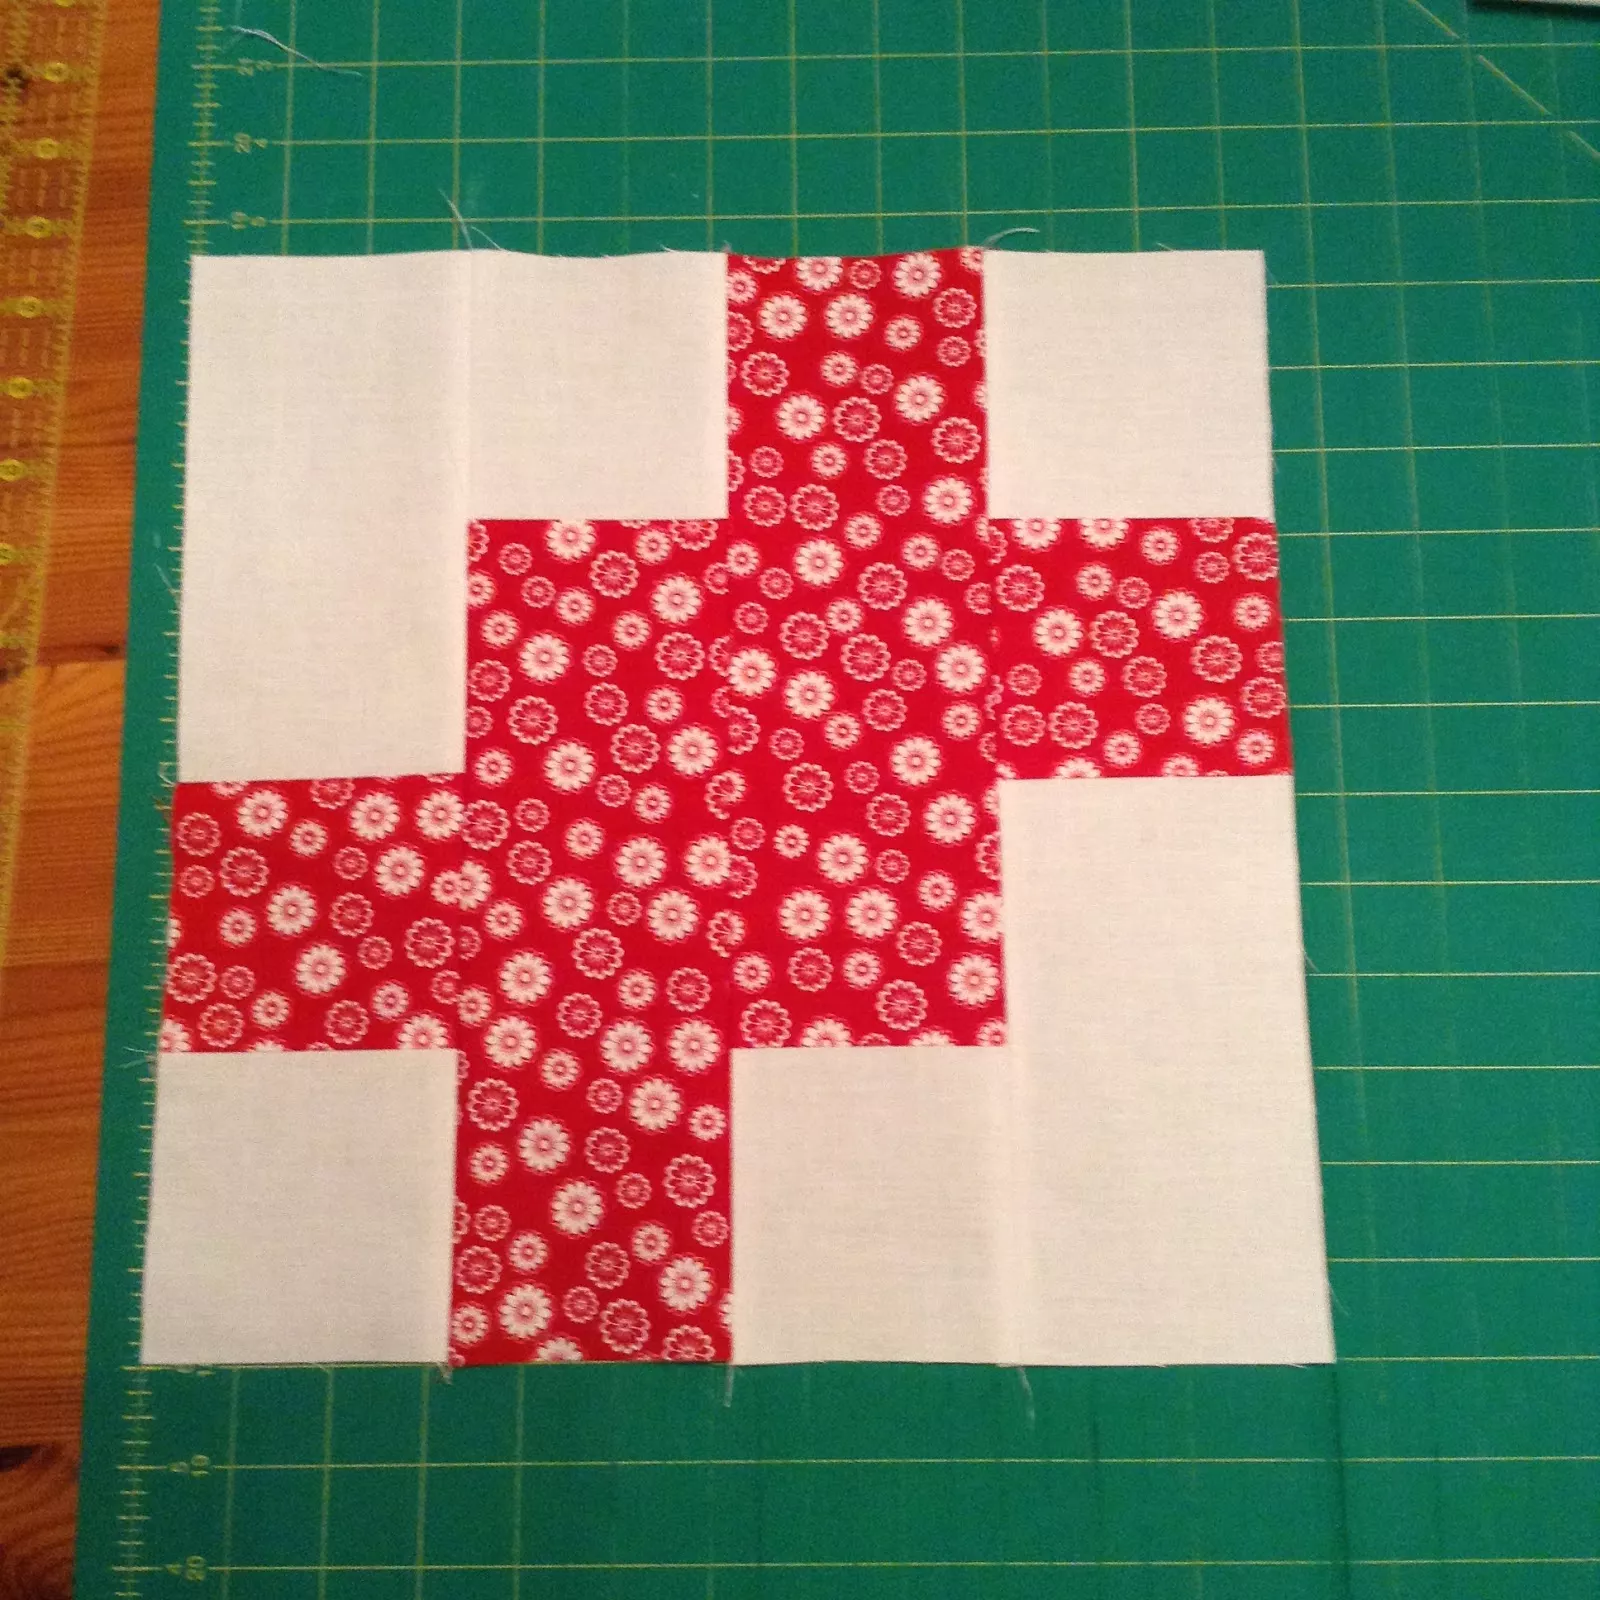
Image From Pinterest
The Twister Block – Pattern is known for its twisty, interlocking blocks that form a swirling pattern. It’s a great choice for quilters who want to create something visually exciting yet still relatively simple to assemble. By cutting squares into smaller pieces and rearranging them, quilters can create a block that looks far more complex than it actually is. With a little practice, this pattern can become one of your favorite go-to designs for your quilting projects.
One of the best things about the Twister Block – Pattern is its adaptability. You can use a variety of fabrics and colors to personalize your quilt. Whether you’re working with scraps or using a coordinated fabric bundle, this pattern can be customized to fit any theme or aesthetic. Additionally, the Twister block can be made in different sizes, which makes it an ideal project for quilters of all skill levels.
Before diving into making your quilt, it’s important to understand the core components of the Twister Block – Pattern. This pattern relies on a few simple principles that create the “twist” effect, making it a fun and visually stimulating design.
The Twister block begins with a basic square. These squares are then cut into smaller pieces and rearranged to create the appearance of movement and depth. The pattern usually features interlocking pieces that look as though they are twisting, hence the name “Twister.” The unique arrangement of the squares makes it appear as if the block is spinning or swirling, which is part of the fun and appeal of this design.
The most common way to create a Twister Block – Pattern is by using a Twister ruler. This tool helps quilters cut and arrange the fabric pieces into the desired shape. The ruler is designed with specific measurements that ensure each cut is precise, which is essential for creating the uniformity and symmetry of the Twister block.
Creating the Twister Block – Pattern quilt requires a few basic materials that will help make the process smoother and more efficient. Here’s a list of the key supplies you will need to get started.
Start with a selection of fabric. For the Twister Block – Pattern, you can choose a variety of fabrics that complement one another. Whether you go for a coordinated fabric set or mix and match from your fabric stash, be sure to pick fabrics that contrast enough to highlight the twisting effect. You’ll need fabric for the background, the twist blocks, and the borders of your quilt.
A Twister ruler is one of the most essential tools for creating the Twister Block – Pattern. This specially designed ruler allows you to cut your squares into smaller pieces with precision. Without this ruler, it can be difficult to achieve the perfect twist effect, so investing in one will make your quilting experience much easier.
For accuracy, you’ll need a rotary cutter and a cutting mat. These tools will allow you to cut your fabric efficiently, and the cutting mat will protect your work surface from damage. Be sure to use a sharp rotary cutter to achieve clean cuts, especially when working with smaller fabric pieces.
While it’s possible to hand-sew your quilt, using a sewing machine will save time and provide cleaner, more even stitches. A sewing machine allows you to piece together your Twister blocks with speed and precision, ensuring that your quilt top looks uniform and professional.
Choose a high-quality thread that matches your fabric colors or creates an interesting contrast. Thread that is specifically designed for quilting will provide durability and strength to your finished quilt. Additionally, be sure to use appropriate needles for quilting to ensure that the fabric layers are sewn together smoothly.
Quilting pins or clips are helpful for holding the fabric pieces together as you sew them. These tools will help you keep everything aligned and in place while you work on your quilt top. Be sure to use pins that are long enough to hold multiple layers of fabric if you plan on using batting or backing fabric.
Now that you have all your materials ready, let’s dive into creating the Twister Block – Pattern. Follow these simple steps to bring your quilt to life.
Start by cutting your fabric into squares. The size of the squares depends on the pattern you’re following, but a common size for the Twister Block – Pattern is 5-inch squares. Be sure to cut all the fabric pieces accurately to ensure that the Twister block turns out neat and symmetrical.
Lay out your squares in the order that you’d like them to appear in your quilt. The placement of the colors and fabrics will determine how your Twister blocks look. This is a great time to experiment with different color combinations to see how they affect the final design.
Once your squares are arranged, use the Twister ruler to cut each square into smaller pieces. The ruler will help you make precise cuts, ensuring that the pieces fit together perfectly. Be sure to follow the instructions that come with the ruler for the most accurate results.
After cutting your fabric, begin sewing the pieces together. Carefully line up the edges and use a quarter-inch seam allowance to join the pieces. This will help create the intricate interlocking design of the Twister block.
Press each seam as you go. This will help the fabric lay flat and create crisp, sharp edges. Pressing also helps to prevent puckering, which can be a problem when working with smaller pieces.
Continue sewing and pressing until all the pieces for each Twister block are complete. Once all the blocks are finished, lay them out and arrange them to form the quilt top. You can choose to arrange the blocks in a traditional grid layout or experiment with more creative arrangements.
While the basic Twister Block – Pattern is beautiful on its own, there are several ways to make your quilt more personal and unique. Here are a few ideas to inspire you.
If you have a stash of fabric scraps, consider using them to create your Twister block quilt. This will not only give your quilt a fun, eclectic look, but it’s also an excellent way to use up leftover fabric from other projects.
To enhance the Twister block design, consider adding borders or sashing between the blocks. This will create more separation between the blocks and can give your quilt a more polished, finished look.
Try using fabrics with different prints and patterns for a more dynamic quilt. Floral, geometric, or even novelty prints can add a fun and personal touch to your Twister Block – Pattern.
You can vary the size of the Twister blocks by adjusting the size of the squares you start with. This allows you to make a larger or smaller quilt, depending on your preference.
If you want to add a bit of texture and dimension to your quilt, try hand-quilting it once the top is finished. This will add a personal touch and make your quilt even more unique.
Q1: Is the Twister Block pattern difficult to make?
A1: Not at all! The Twister Block – Pattern may look complicated, but with the right tools and a bit of patience, it’s an enjoyable project for quilters of all levels. The Twister ruler helps simplify the process and ensures accurate cuts.
Q2: What fabrics work best for the Twister Block?
A2: The Twister block works well with a variety of fabrics, including cotton, flannel, and even batiks. Choose fabrics with enough contrast to highlight the twisting effect, but also consider how the colors and patterns will work together.
Q3: Can I use the Twister Block for larger quilts?
A3: Yes! You can use the Twister Block – Pattern for larger quilts by simply increasing the size of the blocks. The technique is scalable, so you can make a small doll quilt or a large bed quilt.
Q4: Do I need a special ruler to make a Twister Block quilt?
A4: Yes, a Twister ruler is highly recommended for cutting the blocks accurately. This ruler ensures that the cuts are precise and helps maintain the symmetry of the Twister blocks.
Q5: How do I quilt the Twister Block once the top is finished?
A5: After finishing the quilt top, you can quilt it using a sewing machine or by hand. A simple all-over quilting pattern works well, or you can opt for custom quilting to highlight the swirling design.
The Twister Block – Pattern is a fantastic quilting design that adds both movement and visual appeal to any project. With its unique twists and interlocking blocks, this pattern is sure to impress. Whether you’re a beginner or an experienced quilter, this design is both enjoyable and rewarding to create. Experiment with different fabrics, colors, and techniques to make your Twister block quilt truly your own.
If you found this article helpful, we’d love to hear your thoughts! Leave a comment below with any questions or suggestions for future quilting topics. Happy quilting!


