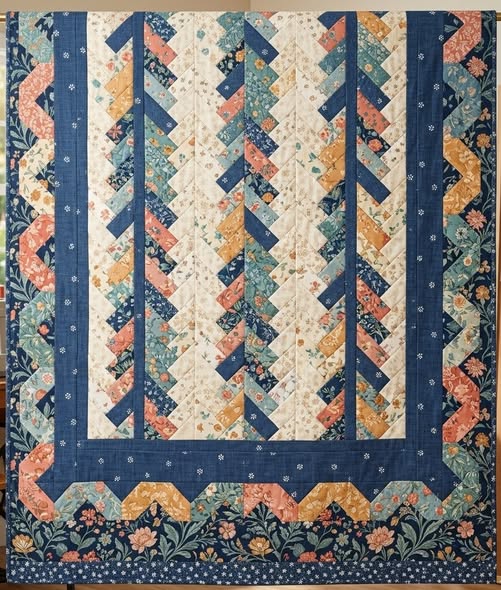
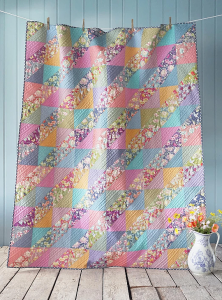
French Braid Quilt- Tutorial

A Waterfall Quilt – Tutorial is exactly what you need if you are looking to create a visually stunning piece of home decor that captures the fluid motion of cascading water. This specific quilting style relies on the strategic placement of fabric colors and values to create a “bleeding” or “dripping” effect that moves across the quilt top. Whether you are a seasoned quilter or a beginner looking for a fresh challenge, mastering the Waterfall Quilt – Tutorial techniques will allow you to play with gradients and geometric shapes in a way that feels organic and modern.
The beauty of a Waterfall Quilt – Tutorial lies in its versatility, as it can be adapted to any color palette, from icy blues and teals to fiery oranges and yellows. The “waterfall” effect is typically achieved using rectangular strips or squares of varying lengths, which are then arranged to mimic the natural flow of a liquid descent. By following this Waterfall Quilt – Tutorial, you will learn how to select the right fabrics, calculate your cuts accurately, and piece the columns together to ensure that the vertical lines remain crisp while the colors blend seamlessly.
Planning your Waterfall Quilt – Tutorial project requires a bit of foresight regarding the “flow” of your design. You want to choose a range of fabrics that offer a smooth transition, often referred to as a gradient or ombre effect. This Waterfall Quilt – Tutorial will guide you through the process of organizing your fabric “drops” so that the finished product looks like a deliberate work of art rather than a random scrap quilt. Let’s dive into the specifics of creating your own masterpiece, ensuring every seam contributes to the overall motion of the design.

Choosing the right materials is the most critical step in this Waterfall Quilt – Tutorial because the entire visual impact depends on color value. You should look for at least five to seven different shades of the same color family to create a believable gradient. High-quality quilting cotton is the gold standard here, as it holds its shape well and offers the flat finish needed for vertical precision.
In this Waterfall Quilt – Tutorial, we recommend using solids or near-solids (like batiks or subtle prints) to keep the focus on the movement. If you use busy patterns, the “waterfall” effect might get lost in the noise of the fabric designs. Focus on color saturation and ensure there is enough contrast between your lightest and darkest shades to define the “top” and “bottom” of the fall.
The background fabric in a Waterfall Quilt – Tutorial acts as the negative space that allows the “water” to shine. Most quilters opt for a crisp neutral background, such as white, light gray, or charcoal, to provide a clean slate. This contrast is what makes the colored strips appear as if they are falling through the air, giving the quilt its signature depth.
When following a Waterfall Quilt – Tutorial, consider the thread weight as well. A fine, strong thread like a 50wt cotton will help your seams lay flat without adding bulk. Since this design involves many vertical seams, reducing bulk is essential for a professional-looking finish. Always pre-wash your fabrics if you are worried about color bleeding, especially when using dark blues or reds against a light background.
The term Waterfall Quilt – Tutorial also implies a need for organizational tools, so grab some labeled clips or sticky notes. As you select your fabrics, arrange them in a row from darkest to lightest. This visual guide will be your reference throughout the entire cutting and piecing process, preventing any accidental swaps that could break the visual flow of the waterfall.
Lastly, keep in mind the final size of your quilt. If you are making a lap quilt, you can use wider strips; however, for a larger bed-sized Waterfall Quilt – Tutorial, thinner strips often look more sophisticated. The scale of your fabric pieces should always be in proportion to the overall dimensions of the quilt top to maintain the illusion of cascading motion.
Precision is your best friend when executing a Waterfall Quilt – Tutorial. You will start by cutting your “water” fabrics and your background fabric into strips of a consistent width, typically 2.5 inches, which is the standard for “jelly roll” style designs. This Waterfall Quilt – Tutorial emphasizes using a sharp rotary cutter and a non-slip ruler to ensure every strip is exactly the same width for perfect alignment.
Once your long strips are cut, this Waterfall Quilt – Tutorial moves into the “sub-cutting” phase. This is where the magic happens. You will cut your colored strips into varying lengths—some 4 inches, some 8 inches, some 12 inches—and do the same with your background fabric. The goal is to create a staggered layout where the colored segments appear at different heights in each column.
A key secret in any Waterfall Quilt – Tutorial is the use of a design wall. If you don’t have one, a clean floor or a large table will work. Lay out your columns vertically, placing the colored blocks in a way that they seem to “drop” from one column to the next. This allows you to visualize the Waterfall Quilt – Tutorial layout before a single stitch is sewn, ensuring the distribution of color is balanced.
When cutting for a Waterfall Quilt – Tutorial, always account for the quarter-inch seam allowance. If you want a finished block to be 10 inches long, you must cut it to 10.5 inches. This small detail is where many beginners struggle, but this Waterfall Quilt – Tutorial encourages you to double-check your measurements twice before cutting to avoid wasting your precious fabric.
Organization is paramount during the cutting phase of a Waterfall Quilt – Tutorial. Group your cut pieces by color and length, and keep them in stacks. Many quilters find it helpful to use Wonder Clips to hold groups of pieces together with a small note indicating which column they belong to. This prevents confusion once you move to the sewing machine to begin the assembly process.
Remember that the background pieces in a Waterfall Quilt – Tutorial are just as important as the colored ones. They fill the gaps at the top and bottom of each column to ensure the final quilt top is a perfect rectangle. By varying the length of these background pieces, you effectively “push” the colored waterfall segments up or down, creating the dynamic movement that gives the quilt its name.
The assembly of a Waterfall Quilt – Tutorial is done column by column rather than row by row. This is a departure from traditional block quilting, but it is the most effective way to maintain the vertical flow. Start with the leftmost column and sew your segments together from top to bottom, using a consistent 1/4 inch seam throughout the entire process.
Pressing is a vital part of this Waterfall Quilt – Tutorial. To ensure your quilt lays flat, press your seams in alternating directions for each column. For example, press the seams in column one “up” and the seams in column two “down.” This technique, known as nesting seams, allows the columns to lock together perfectly when you sew them to one another, resulting in sharp corners.
As you progress through the Waterfall Quilt – Tutorial, you will begin to see the “waterfall” emerge. When joining the columns together, use plenty of pins or clips. Because the columns are long, the fabric can easily shift or stretch, especially if you are working with cross-grain cuts. Pinning at every intersection will help you maintain the straight, vertical lines required for a high-quality finish.
A common challenge in a Waterfall Quilt – Tutorial is “bowing,” where the quilt top begins to curve because of uneven tension. To avoid this, sew your columns in alternating directions. Sew column one to column two starting from the top, then sew column three to the pair starting from the bottom. This counteracts the natural “push” of the sewing machine foot and keeps your Waterfall Quilt – Tutorial project square.
If you find that your columns are not matching up in length, don’t panic. This is a common occurrence in a Waterfall Quilt – Tutorial due to small variations in seam allowances. Simply trim the top and bottom of the quilt once all columns are joined to square up the quilt top. This ensures that your borders (if you choose to add them) will go on straight and the quilt will hang properly.
The final step of the assembly in this Waterfall Quilt – Tutorial is a thorough pressing of the entire quilt top. Use a bit of best press or starch to give the fabric some body. This makes the quilting process much easier, as the top will be less likely to shift or pucker when you add the batting and the backing fabric. Your “waterfall” is now ready for the finishing touches!
The quilting pattern you choose can either enhance or distract from the Waterfall Quilt – Tutorial design. For a modern look, straight-line quilting that follows the vertical columns is a popular choice. This emphasizes the “falling” motion. Alternatively, using a wavy line stitch can mimic the ripples in water, adding a thematic layer of texture to your work.
When choosing a thread color for the quilting phase of your Waterfall Quilt – Tutorial, you have two main options. You can use a neutral thread that blends into the background, or you can use a variegated thread that matches the colors of your “waterfall.” The latter can add a beautiful, shimmering effect that catches the light and adds to the illusion of movement.
Don’t forget the batting! For a Waterfall Quilt – Tutorial, a low-loft cotton or bamboo batting is often preferred. These materials provide a beautiful drape, allowing the quilt to flow almost like the water it represents. If you want a more structured, “puffy” look, a polyester or wool blend will make your quilting stitches pop more prominently against the fabric.
The binding is the frame of your masterpiece. For a Waterfall Quilt – Tutorial, a contrasting binding can provide a sharp edge, while a binding made from the background fabric can create a “borderless” look that feels very contemporary. Some quilters even use a scrappy binding made from the leftover “water” fabrics to tie the whole design together.
In this Waterfall Quilt – Tutorial, we recommend a double-fold binding for durability. Hand-stitching the binding to the back provides a clean, “show-quality” finish, but machine binding is perfectly acceptable for a quilt that will be used and loved daily. Whichever method you choose, make sure your corners are neatly mitered to maintain the professional standard of your work.
Finally, every Waterfall Quilt – Tutorial project deserves a label. Include your name, the date, and the name of the pattern. This not only preserves the history of your creation but also celebrates the hard work you put into mastering the Waterfall Quilt – Tutorial. Once labeled, give it one last steam press, and your beautiful, cascading quilt is ready to be displayed or gifted!
1. Is the Waterfall Quilt – Tutorial suitable for beginners?
Yes! While it looks complex, it essentially consists of sewing straight lines and strips. The most important factor is staying organized with your fabric pieces. If you can sew a consistent seam, you can complete this tutorial.
2. How much fabric do I need for a standard throw-size Waterfall Quilt?
Generally, you will need about 2 to 3 yards of background fabric and a variety of 1/4 yard cuts (or a jelly roll) for the colored “waterfall” sections. Always check your specific pattern dimensions before purchasing.
3. Can I use patterned fabrics instead of solids?
Absolutely. However, to maintain the “waterfall” effect, look for “low-volume” prints or “tone-on-tone” patterns. Very large, busy prints can sometimes break the visual illusion of the gradient.
4. What is the best way to quilt a Waterfall Quilt?
Vertical straight lines are the most popular because they reinforce the downward motion of the design. However, free-motion “swirls” can also look fantastic, resembling bubbles or eddies in a stream.
5. Do I need any special tools for this Waterfall Quilt – Tutorial?
Beyond standard quilting supplies (sewing machine, rotary cutter, mat), a long quilting ruler (24 inches) is extremely helpful for cutting the long background strips accurately.
Creating a piece using this Waterfall Quilt – Tutorial is a rewarding journey into the world of modern quilting and color theory. We have covered everything from selecting the right gradient fabrics and precise cutting techniques to the final assembly and quilting choices.
By focusing on vertical movement and color value, you can create a textile work of art that brings a sense of calm and fluidity to any room. This method is a fantastic way to practice your precision piecing while exploring your creativity with color transitions.


