
Patchwork Bird Tutorial

The cloth tortilla warmer pattern is the ultimate secret weapon for anyone who loves hosting taco nights or simply enjoys the luxury of a warm, soft tortilla with every bite. If you have ever sat down for a meal only to find your tortillas have turned into cold, stiff discs within five minutes, you know exactly why a quality warmer is essential. While plastic or ceramic versions exist, a handmade cloth version is far superior because it breathes while trapping heat, ensuring your bread stays moist rather than soggy.
Creating your own kitchen accessories allows for a level of customization that store-bought items simply cannot match. By choosing a cloth tortilla warmer pattern, you gain the ability to select heat-safe materials and vibrant fabrics that complement your kitchen decor. It is a fantastic beginner-friendly sewing project that yields a high-utility item, making it a favorite among DIY enthusiasts and culinary lovers alike. Whether you are making corn or flour tortillas, a well-insulated cloth pouch is the gold standard for temperature retention.
In this comprehensive guide, we are going to explore everything you need to know about selecting and executing the perfect cloth tortilla warmer pattern. We will dive into the technical aspects of heat-resistant batting, the best fabric choices for food safety, and the step-by-step logic of the construction process. Beyond just being a functional tool, these warmers make incredible gifts for friends and family. Let’s get started on transforming your dining experience with a touch of handmade charm and a lot of practical science.
")
The foundation of any successful cloth tortilla warmer pattern lies in the selection of 100% natural fibers. When you are dealing with heat and food, synthetic materials like polyester or nylon are a major “no-go” because they can melt or release unpleasant odors when they come into contact with steam. Always opt for high-quality cotton fabric for both the exterior and the lining to ensure safety and durability.
The “magic” ingredient in a cloth tortilla warmer pattern is the insulation layer. You must use a microwave-safe batting, specifically one made of 100% cotton without any metallic scrim or polyester glues. Brands like Pellon’s Wrap-N-Zap are industry standards for this purpose because they are designed to withstand the internal moisture and heat of a microwave without catching fire.
Thread selection is another often-overlooked detail in the cloth tortilla warmer pattern process. You should exclusively use 100% cotton thread. Most standard all-purpose threads are polyester-wrapped, which can pose a melting risk if the warmer is placed in the microwave for extended periods. Stick to cotton to keep the entire project “microwave-friendly” and long-lasting.
Before you start cutting your fabric according to the cloth tortilla warmer pattern, it is vital to pre-wash your materials. Since this item will hold hot food and generate steam, it will inevitably need to be laundered. Pre-washing prevents the finished warmer from shrinking unevenly or warping after its first trip through the washing machine, keeping your taco accessories looking sharp.
For the aesthetic side of your cloth tortilla warmer pattern, feel free to get creative with prints. Many people choose Mexican-inspired fabric or vibrant culinary prints to give the kitchen a festive feel. Just ensure that any dyes used in the fabric are colorfast so they don’t bleed onto your delicious tortillas during the steaming process.
Finally, consider the size of your cloth tortilla warmer pattern. Standard tortillas are usually 6 to 8 inches, but if you love large burritos, you might want to scale your pattern up to a 12-inch diameter. Measuring your favorite plates and tortilla brands beforehand ensures that your handmade kitchen gear is perfectly tailored to your specific household needs.
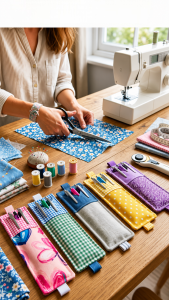
The first step in executing your cloth tortilla warmer pattern is cutting your circles. You will typically need two outer fabric circles, two lining fabric circles, and two circles of your microwave-safe insulation. A common size is a 12-inch circle, which provides ample space for even the largest flour tortillas while still fitting comfortably inside a standard microwave.
Once your pieces are cut, you will layer them to prepare for quilting. Place the insulation between the lining and the outer fabric for both halves of the cloth tortilla warmer pattern. Pinning or clipping these layers together is essential to prevent shifting while you sew, ensuring that the heat retention properties are distributed evenly across the entire surface of the pouch.
Basting or quilting the layers is the next phase of the cloth tortilla warmer pattern. You don’t need complex designs; simple straight lines or a crosshatch pattern work beautifully to secure the cotton batting to the fabric. This step is crucial because it prevents the insulation from bunching up inside the warmer during future washes.
Now, you will finish the edges of your two quilted circles. Most cloth tortilla warmer pattern instructions suggest using bias tape or a simple zig-zag stitch to encase the raw edges. Using a bias tape in a contrasting color can add a professional, “boutique” look to your DIY tortilla pouch, making it look like a high-end kitchen boutique find.
The assembly of the pouch involves placing the two finished circles on top of each other. According to the cloth tortilla warmer pattern, you should sew around the perimeter but leave a wide opening—usually about 5 to 7 inches—to allow tortillas to be slipped inside easily. Reinforce the “stress points” where the opening begins and ends to prevent the stitching from ripping over time.
The final touch in your cloth tortilla warmer pattern is the top-stitching. This adds extra durability and helps the warmer lay flat. Once completed, your insulated fabric server is ready for its first test. The beauty of this design is its simplicity; it is essentially a soft, thermal pocket that uses the tortillas’ own steam to keep them pliable.
One of the primary reasons to choose a cloth tortilla warmer pattern is the superior texture of the food. Plastic containers often trap too much moisture, leading to “sweaty” tortillas that fall apart. The breathable nature of cotton fabric allows just enough steam to escape so that the tortillas stay soft and warm without becoming waterlogged or gummy.
From an environmental perspective, making your own warmer using a cloth tortilla warmer pattern is a win for sustainability. You are creating a reusable kitchen tool that replaces the need for disposable aluminum foil or paper towels. Reducing waste in the kitchen is a major trend in eco-friendly living, and this project is a small but meaningful step in that direction.
Health and safety are also major factors. By following a cloth tortilla warmer pattern with 100% natural materials, you avoid the risk of chemicals leaching from plastics when heated. BPA and other plasticizers are a concern for many families; a natural fiber warmer provides peace of mind that your food is touching only safe, organic surfaces.
The versatility of the cloth tortilla warmer pattern extends beyond just Mexican cuisine. These pouches are excellent for keeping pita bread, naan, pancakes, or even dinner rolls warm during a meal. The thermal insulation works the same way for any flatbread, making it a multi-functional tool for a variety of international cuisines and breakfast favorites.
Storage is another area where the cloth tortilla warmer pattern shines. Unlike bulky ceramic or rigid plastic warmers, a cloth pouch is completely flexible and can be folded flat. This makes it ideal for people with small kitchens or limited cabinet space. It can easily tuck into a drawer or hang from a hook when not in use.
Finally, the cost-effectiveness of a cloth tortilla warmer pattern cannot be ignored. You can often make these using fabric scraps from other projects, meaning you are essentially creating a high-value kitchen item for the cost of a little batting and thread. It is a budget-friendly way to add professional-grade culinary tools to your home setup.
To keep the results of your cloth tortilla warmer pattern in top shape, proper cleaning is essential. Because it comes into direct contact with food, you should wash it regularly. Most handmade cotton warmers are machine washable; simply use a gentle cycle with cold water and a mild detergent to preserve the integrity of the natural cotton fibers.
Drying your warmer requires a bit of care. While you can use a dryer on a low heat setting, air-drying is often recommended to prevent any potential shrinkage of the microwave-safe batting. Simply reshape the warmer while damp and lay it flat on a drying rack. This ensures the cloth tortilla warmer pattern maintains its perfectly circular shape for years to come.
Stain removal is a common concern with a cloth tortilla warmer pattern, especially if you enjoy greasy or saucy fillings. If you get a spot on the fabric, treat it immediately with a food-safe stain remover. Because the item is 100% cotton, it can generally handle spot treatments well without losing its color or structural strength.
One important safety tip for using the finished cloth tortilla warmer pattern is to never leave it unattended in the microwave. While the materials are microwave-safe, different microwaves have different power levels. Always heat in short 30-45 second bursts. This protects the insulated fabric from overheating and ensures your tortillas are warmed evenly.
Over time, you might notice the cloth tortilla warmer pattern losing a bit of its “crispness.” This is normal for cotton items. A quick press with a warm iron (avoiding any synthetic labels or trim) will refresh the look of your kitchen accessory. Just make sure the warmer is completely dry before ironing to avoid trapping moisture in the batting.
Lastly, if you notice any frayed threads or loose seams, repair them immediately. The longevity of a cloth tortilla warmer pattern depends on the integrity of its construction. A quick minute with a needle and thread can extend the life of your handmade warmer significantly, ensuring it remains a staple of your Tuesday night taco traditions.
No, you must use 100% cotton fabric. Synthetic blends like polyester can melt or smoke in the microwave. Ensure the thread and batting are also 100% cotton to maintain safety during the heating process.
When using a well-insulated cloth tortilla warmer pattern, your tortillas can stay warm and soft for up to an hour. The cotton layers trap the steam, which is the key to maintaining temperature without drying out the bread.
Yes, provided you use the correct materials. Using microwave-safe batting (like Wrap-N-Zap) and 100% cotton components ensures the warmer can be safely used in the microwave to steam your tortillas.
Absolutely. One of the perks of a cloth tortilla warmer pattern is that it is fully washable. Use a gentle cycle and cold water, then air dry or tumble dry on low to prevent shrinkage.
A standard size is 12 inches in diameter. This allows enough room for the most common tortilla sizes (6 to 10 inches) and provides enough space for the steam to circulate effectively inside the insulated pouch.
Yes, you should use 100% cotton batting that does not contain a “scrim” (a thin polyester grid). Scrim can cause sparks in the microwave. Look for batting specifically labeled as microwave-safe for projects like potato bags or tortilla warmers.
In this article, we have explored the wonderful world of the cloth tortilla warmer pattern, covering everything from the critical importance of using 100% cotton materials to the step-by-step assembly of your own DIY kitchen accessory. We discussed why cloth is superior to plastic for maintaining the perfect tortilla texture and how to properly care for your handmade creation to ensure it lasts for years.
By following a proper cloth tortilla warmer pattern, you aren’t just sewing a pouch; you are enhancing your culinary experience and bringing a touch of artisanal quality to your home.


