
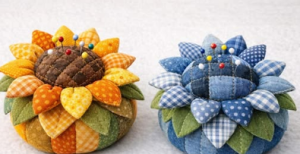
Patchwork Bird Tutorial

The Bird-shaped pincushion – Pattern is a delightful project that combines functional utility with artistic charm, making it a favorite among sewing enthusiasts and textile artists alike. Creating a handmade tool for your sewing room is not just about organization; it is about infusing your workspace with personality and a touch of nature-inspired beauty. This specific design allows you to transform small fabric scraps into a three-dimensional avian companion that keeps your pins secure and your creative energy high.
Working with a Bird-shaped pincushion – Pattern offers a fantastic opportunity to practice precision sewing and delicate stuffing techniques. Unlike standard square cushions, the curves of a bird’s silhouette require a bit of patience and attention to detail, especially when navigating the beak and tail sections. In this guide, we will explore how to select the right materials, master the assembly process, and finish your project with a professional look that stands the test of time.
Whether you are looking to gift a fellow crafter or upgrade your own kit, the Bird-shaped pincushion – Pattern serves as a versatile blueprint for endless customization. By choosing different textures and colors, you can create a variety of species, from bright tropical parrots to soft, muted garden sparrows. Our goal today is to provide a comprehensive, SEO-optimized walkthrough that ensures your sewing experience is as smooth as the final product is beautiful, adhering to the best practices of digital publishing.

The foundation of any successful Bird-shaped pincushion – Pattern begins with the choice of fabric. While many crafters reach for standard quilting cotton due to its ease of use, you might consider felted wool or linen for a more sophisticated texture. These fabrics hold their shape well and provide a sturdy base that won’t show pinholes over time, which is crucial for a tool that will be used daily.
When selecting the filling for your Bird-shaped pincushion – Pattern, think beyond standard polyester fiberfill. Many professional sewists prefer crushed walnut shells or emery sand because the added weight provides stability on the sewing table. Furthermore, these mineral-based fillings can help keep your pins sharp and clean, acting as a functional abrasive every time you insert a needle.
To give your bird its distinctive personality, you will need a few specialized notions. Small glass beads or safety eyes are perfect for creating an expressive gaze, while contrasting fabric scraps can be used for the wings and beak. Ensure you have high-quality all-purpose thread that matches your main fabric to keep the seams nearly invisible and strong enough to withstand the pressure of tight stuffing.
The Bird-shaped pincushion – Pattern often involves tight curves, so having the right tools is essential. A pair of sharp embroidery scissors will help you clip into the seam allowances without damaging the integrity of the stitch line. Additionally, a wooden turning tool or a simple chopstick will be your best friend when pushing the fabric out at the beak and tail to ensure a crisp, defined shape.
Don’t overlook the importance of interfacing if you are using lightweight fabrics. A thin layer of iron-on stabilizer can prevent the fabric from stretching out of proportion as you pack the stuffing inside. This step ensures that your Bird-shaped pincushion – Pattern maintains its anatomical accuracy and doesn’t become lumpy or distorted after a few weeks of use in your studio.
Lastly, consider the base of your bird. Some versions of a Bird-shaped pincushion – Pattern include a flat bottom reinforced with a piece of heavy cardboard or plastic. This allows the bird to sit upright without tipping over. If you prefer a more organic look, you can skip the rigid base and simply use a slightly heavier filling at the bottom to create a self-balancing “roly-poly” effect.
Once you have your Bird-shaped pincushion – Pattern pieces cut out, the first step is usually attaching the wings. Appliquéing the wings onto the side panels before sewing the body together is much easier than trying to add them later. You can use a simple topstitch or a decorative blanket stitch to give the bird a more “handmade” and rustic aesthetic that highlights your craftsmanship.
Sewing the main body of the Bird-shaped pincushion – Pattern requires a short stitch length. Because you will be stuffing the bird quite firmly, a standard stitch might pull apart under pressure. By setting your machine to a 2.0mm stitch length, you create a reinforced seam that can handle the internal force of the filling without showing the white of the thread or the stuffing inside.
The most challenging part of a Bird-shaped pincushion – Pattern is typically the underbelly or the “gusset.” This piece connects the two side panels and gives the bird its three-dimensional volume. Pinning is vital here; use plenty of fine sewing pins to match the notches and ensure the fabric doesn’t shift as you sew around the curves of the breast and tail.
Leaving an opening for turning is a strategic decision. Most makers find that leaving a 2-inch gap along the bottom of the Bird-shaped pincushion – Pattern is the most discreet location. This allows you to turn the bird right-side out and stuff it fully before closing the gap with a ladder stitch. This invisible hand-sewing technique is a hallmark of high-quality plushie and pincushion construction.
Stuffing your Bird-shaped pincushion – Pattern should be done in small increments. If you try to shove large clumps of fiberfill inside at once, the bird will end up lumpy. Start by filling the beak and head firmly, then move toward the tail. Use your turning tool to move the stuffing into the corners, ensuring the bird is firm enough to support pins but soft enough to be pleasant to the touch.
The final structural check involves ensuring the bird sits level. If your Bird-shaped pincushion – Pattern leans to one side, you can often massage the stuffing around with your fingers to redistribute the weight. Once you are satisfied with the shape, sew the opening shut with tight, even stitches, securing the knot inside the body of the bird so it remains completely hidden from view.
Personalization is where the Bird-shaped pincushion – Pattern truly shines as a creative project. You can use embroidery floss to add decorative feathers to the wings or a small tuft of yarn on the head for a whimsical “crested” look. These small details transform a simple sewing tool into a piece of art that reflects your unique style and love for the craft.
If you enjoy a vintage aesthetic, consider using repurposed materials for your Bird-shaped pincushion – Pattern. An old wool sweater or a scrap of floral silk from a discarded scarf can give the project a nostalgic feel. Upcycling not only makes your pincushion unique but also contributes to a more sustainable sewing practice by keeping small fabric scraps out of the landfill.
The color palette you choose for your Bird-shaped pincushion – Pattern can set the mood for your entire sewing space. Bright, neon colors can provide a modern, energetic vibe, while soft pastels or earth tones can create a calming environment. Some sewists even make seasonal birds, such as a red robin for winter or a bright yellow goldfinch for the spring and summer months.
Adding a “tail” made of ribbon or lace can add a functional element to your Bird-shaped pincushion – Pattern. This loop can be used to hang the pincushion from your sewing machine or a pegboard, keeping it within reach but off the crowded tabletop. It’s a smart modification for those with limited workspace who still want to enjoy the beauty of a handmade accessory.
For those who love a bit of sparkle, you can incorporate sequins or metallic thread into your Bird-shaped pincushion – Pattern. These can represent shimmering feathers or simply add a bit of joy to your sewing routine. Just be sure to place decorative elements where they won’t interfere with the areas where you plan to stick your pins and needles.
You can also experiment with the size of the Bird-shaped pincushion – Pattern. By scaling the template up on a photocopier, you can create a larger version that serves as a doorstop or a decorative plush. Conversely, shrinking the pattern allows you to make tiny “finger pincushions” or ornaments for a sewing-themed holiday tree, proving how adaptable this design can be.
To keep your Bird-shaped pincushion – Pattern in top condition, it is important to treat it with care. Over time, the fabric may collect dust or lint from your sewing projects. A light brushing with a soft lint roller or a damp cloth is usually enough to keep the surface clean. Avoid submerging the bird in water, especially if you used organic fillings like walnut shells, as they can mold.
If you find that your pins are becoming dull, it might be time to “refill” the abrasive qualities of your Bird-shaped pincushion – Pattern. While you can’t easily replace the internal filling, you can keep a small piece of emery cloth nearby to sharpen your needles. However, if you used a high-quality filling initially, your pincushion should remain functional for many years without intervention.
The structural integrity of your Bird-shaped pincushion – Pattern depends on the quality of your seams. If you notice a stitch starting to pop, address it immediately with a quick hand-sewn repair. Keeping your sewing tools in good repair is a sign of a disciplined crafter and ensures that your favorite accessories don’t fall apart at the peak of a big project.
Store your Bird-shaped pincushion – Pattern in a dry, cool place when not in use. Exposure to direct sunlight for long periods can fade the colors of the fabric, especially if you used natural fibers like cotton or silk. A dedicated spot on your sewing desk or inside a decorative sewing box will protect the bird from fading and accidental spills.
As you use your Bird-shaped pincushion – Pattern, you may find that the stuffing settles. This is natural for any plush item. You can “fluff” the bird by gently squeezing it from different angles, which helps redistribute the fiberfill and restores the original plumpness. This simple maintenance task keeps the bird looking fresh and ready for your next set of pins.
Sharing your Bird-shaped pincushion – Pattern results on social media is a great way to connect with the community. When posting, mention the specific fabrics and fillings you used, as this helps other crafters learn from your experience. Contributing to the collective knowledge of the sewing world is part of what makes the fiber arts community so vibrant and supportive for everyone involved.
Which fabric is best for a Bird-shaped pincushion – Pattern?
Woven fabrics like cotton, linen, or wool felt are the most popular choices. These fabrics are stable and won’t stretch too much when stuffed. Avoid knit fabrics or anything with too much “give,” as they can make the bird look lumpy and distorted rather than smooth and sleek.
Can I use rice as a filling for my Bird-shaped pincushion – Pattern?
While rice is a common DIY filling, it isn’t the best for long-term use. Rice can attract moisture and pests, and it doesn’t have the sharpening qualities of crushed walnut shells or emery sand. If you do use rice, ensure it is completely dry and kept in a low-humidity environment.
How do I make the beak of the bird look sharp?
The secret to a sharp beak in a Bird-shaped pincushion – Pattern is clipping the seam allowance. Once you sew the beak, cut the excess fabric very close to the point (without cutting the thread) and use a turning tool to gently push the point out. A tiny bit of fabric glue can also help stiffen the point.
Is this pattern suitable for sewing machine beginners?
Yes, but it requires a bit of focus. The curves of the Bird-shaped pincushion – Pattern are small, so beginners should sew slowly and use the handwheel on their machine for the tightest turns. It is an excellent project for learning how to control fabric movement and manage seam allowances.
How many pins can a Bird-shaped pincushion – Pattern hold?
A standard-sized bird (about 4 inches long) can comfortably hold 50 to 100 pins. It is best not to overcrowd the cushion, as this can make it difficult to grab a single pin quickly. Using different areas of the bird for different types of needles is a great way to stay organized.
Can I wash my Bird-shaped pincushion – Pattern in the machine?
It is highly recommended to only spot-clean your pincushion. Machine washing can clump the stuffing and ruin the shape of the bird. If the fabric is very dirty, use a damp cloth with a drop of mild soap and air-dry the bird completely before using it again with your pins.
Creating a Bird-shaped pincushion – Pattern is a rewarding journey that blends technical sewing skills with artistic expression. Throughout this article, we have explored the importance of selecting high-quality materials like wool felt and walnut shells, the nuances of assembling a three-dimensional gusset, and the joy of adding personal touches through embroidery and color selection.
This project results in a durable, charming tool that not only organizes your workspace but also brings a smile to your face every time you reach for a pin.


