
Patchwork Bird Tutorial

Sunshine Mat Centerpiece – Tutorial is a fantastic way to brighten up any dining space or coffee table with a burst of handmade warmth and creative energy. If you are looking for a project that combines functionality with a cheerful aesthetic, this Sunshine Mat Centerpiece – Tutorial will guide you through the process of creating a radiant, circular textile piece that mimics the glow of a summer sun. It is a perfect project for those who enjoy home decor and want to add a personal, artisanal touch to their living environment using simple yet effective crafting techniques.
Whether you are an experienced fiber artist or a curious beginner, following a Sunshine Mat Centerpiece – Tutorial provides a structured path to mastering circular patterns and textured edges. This specific design focuses on symmetry and vibrancy, ensuring that the final product is not only a protective mat for your surfaces but also a conversational centerpiece. By selecting the right materials and maintaining consistent tension, your Sunshine Mat Centerpiece – Tutorial project will result in a durable, high-quality item that can withstand daily use while maintaining its brilliant visual appeal.
As we dive into this Sunshine Mat Centerpiece – Tutorial, it is important to embrace the meditative nature of the process, as the repetitive circular motions can be incredibly relaxing. We will explore how to choose the best color gradients, how to handle different yarn weights, and how to finish your edges with a professional flare. This Sunshine Mat Centerpiece – Tutorial is designed to be comprehensive, ensuring that by the time you reach the final stitch, you will have a stunning handmade centerpiece that brings a sense of sunshine indoors regardless of the weather outside.

The foundation of a successful Sunshine Mat Centerpiece – Tutorial begins with the selection of high-quality yarn that can handle the heat of a teapot or the weight of a flower vase. I highly recommend using a 100% cotton yarn or a sturdy macramé cord because these fibers are heat-resistant and have very little stretch. Using a cotton blend ensures that your table mat stays flat and doesn’t warp over time, which is a common issue with purely synthetic fibers.
In this Sunshine Mat Centerpiece – Tutorial, the color palette is just as important as the fiber itself, as you want to evoke the feeling of sunlight. Opt for a range of yellows, oranges, and even a touch of creamy white to create a “gradient sun” effect. Using mercerized cotton can add a slight shimmer to the piece, making the “sunbeams” at the edge of the mat catch the light beautifully during a sunny brunch or afternoon tea.
The tool of choice for this Sunshine Mat Centerpiece – Tutorial is a ergonomic crochet hook that matches your yarn weight perfectly. Typically, a 4.0mm or 5.0mm hook works best for medium-weight cotton, providing enough stiffness for the mat to lie perfectly flat. If your stitches are too loose, the mat will become “wavy,” and if they are too tight, it may bowl upward; finding that “Goldilocks” tension is a key skill we emphasize here.
Don’t forget to have a set of stitch markers and a sharp pair of craft scissors ready before you start the first loop. In a circular project like this Sunshine Mat Centerpiece – Tutorial, it is very easy to lose track of where a round begins and ends. Marking the first stitch of every round will save you from the frustration of having to pull out your work later because the count was off by one or two stitches.
For those who want a more rustic look in their Sunshine Mat Centerpiece – Tutorial, consider using a jute twine or a hemp cord for the outer sunbeams. This adds a wonderful organic texture and a “boho-chic” vibe to the centerpiece. Combining different textures—like smooth cotton in the center and rougher jute on the edges—creates a sophisticated, multi-dimensional look that is very popular in modern interior design trends.
Lastly, ensure you have a large-eye tapestry needle for weaving in your ends securely at the conclusion of the project. A well-finished Sunshine Mat Centerpiece – Tutorial means no visible knots or loose threads, giving your handmade item a store-bought quality. Preparation is half the battle, and having these materials organized will make the actual crafting process much more enjoyable and efficient for any artisan.
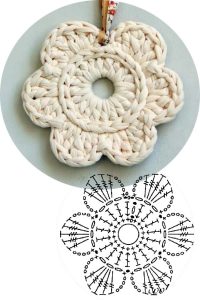
Every great Sunshine Mat Centerpiece – Tutorial starts with the “Magic Ring” or “Magic Circle” technique, which allows for a completely closed center hole. Unlike a traditional chain start, the magic ring can be pulled tight, ensuring that the very middle of your sun is solid and professional-looking. This is the first step in creating a circular crochet mat that looks seamless and high-end rather than amateur.
As you move into the second and third rounds of this Sunshine Mat Centerpiece – Tutorial, the concept of mathematical increases becomes the most important factor. To keep a circle flat, you must add a specific number of stitches in each round—usually 6, 8, or 12 depending on the stitch height. Understanding this formula is the “secret sauce” of any Sunshine Mat Centerpiece – Tutorial, as it prevents the edges from curling or ruffling prematurely.
Using double crochet stitches is a popular choice for the body of the mat because they provide good height and a classic textile look. In this Sunshine Mat Centerpiece – Tutorial, we recommend working in the back loops only for a few rounds to create decorative ridges. These ridges look like concentric circles and add a level of detail that makes the centerpiece look much more intricate than a standard flat mat would.
Consistency is your best friend during these middle rounds of the Sunshine Mat Centerpiece – Tutorial. If you find that your mat is starting to look like a bowl, it means you aren’t increasing enough; if it looks like a wavy potato chip, you are increasing too much. This stage of the Sunshine Mat Centerpiece – Tutorial is where you develop a “feel” for the yarn and how it interacts with the circular geometry of the pattern.
Transitioning colors in a Sunshine Mat Centerpiece – Tutorial should be done using the invisible join method. By changing colors at the start of a new round, you can create distinct rings of color that represent the different layers of a sunset. For a truly radiant effect, start with a pale lemon yellow in the center and gradually move toward a deep, fiery burnt orange as you reach the outer diameter of the mat.
The diameter of your Sunshine Mat Centerpiece – Tutorial is entirely up to you, but a standard centerpiece usually measures between 10 and 14 inches. Once the main body of the mat reaches your desired size, you are ready to transition to the most exciting part: the sunbeams. This foundational work ensures that the base is strong enough to support the decorative edges that will define the “Sunshine” aspect of your project.
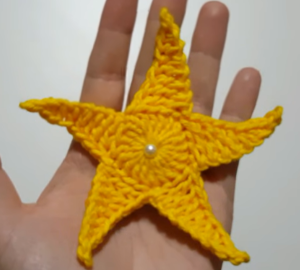
The hallmark of the Sunshine Mat Centerpiece – Tutorial is the unique “sunbeam” edging that gives the piece its name. This is usually achieved through a series of picot stitches or pointed clusters that fan out from the final round. These points mimic the rays of the sun and provide a stunning visual contrast to the solid, circular interior that you worked on in the previous sections of the guide.
To create these rays in our Sunshine Mat Centerpiece – Tutorial, you will use a combination of different stitch heights within a single space. By working a single crochet, then a half-double, a double, a treble, and then going back down, you create a natural triangular peak. Repeating this pattern around the entire circumference of the mat transforms a simple circle into a vibrant, glowing sunflower-style centerpiece.
For added drama in your Sunshine Mat Centerpiece – Tutorial, you can use “extended” sunbeams by adding a chain-3 picot at the very tip of each ray. This creates a sharp, crisp point that holds its shape well. If you are using a stiffer cord, these points will stand out proudly; if you are using a softer yarn, they will have a gentle, organic drape that looks beautiful under a glass centerpiece.
During this stage of the Sunshine Mat Centerpiece – Tutorial, it is important to check your stitch count one last time. The sunbeams need to be spaced evenly to avoid a lopsided look. If you have 60 stitches in your final round and your sunbeam pattern takes 5 stitches, you will end up with 12 perfect rays. This level of precision is what makes the Sunshine Mat Centerpiece – Tutorial such a satisfying project to complete.
If you want to add even more texture, consider a “fringe” effect by looping short lengths of yarn through the tips of the sunbeams. This creates a “shaggy sun” look that is incredibly popular in modern boho decor. In this Sunshine Mat Centerpiece – Tutorial, we encourage you to experiment with these decorative flourishes to make the piece truly your own and reflective of your personal style.
Finally, the edging is where you can introduce a “pop” of a contrasting color, like a bright gold or even a metallic thread. A metallic gold border on the sunbeams can make the entire Sunshine Mat Centerpiece – Tutorial project sparkle when it catches the light of a nearby window. This final touch is what turns a functional household item into a genuine work of art that you will be proud to display.
Many crafters skip the blocking stage, but in this Sunshine Mat Centerpiece – Tutorial, we consider it an essential step for a professional finish. Steam blocking involves using a bit of moisture and heat to “set” the stitches into their final position. This process flattens any minor puckering and ensures that the sunbeams stay pointed and crisp rather than curling inward toward the center.
To block your Sunshine Mat Centerpiece – Tutorial project, pin the mat to a foam board, carefully stretching each sunbeam out to its full length. Use stainless steel pins to avoid any rust stains on your beautiful yarn. Once pinned, a light hover with a steam iron (without touching the yarn directly) will work wonders. Let it dry completely before unpinning, and you will notice a massive difference in the “drape” and “flatness” of the mat.
Weaving in the ends is the next crucial step in our Sunshine Mat Centerpiece – Tutorial. Use your tapestry needle to “thread” the yarn tails back through the dense stitches of the previous rounds. A good rule of thumb is to weave in three different directions to ensure the yarn never pops out, even after multiple washes. This attention to detail is a hallmark of high-quality fiber arts.
If your Sunshine Mat Centerpiece – Tutorial is intended for heavy use, you might consider applying a fabric protector spray. This helps the cotton fibers repel liquids and prevents staining from coffee or tea spills. It’s a practical addition to the tutorial that ensures your hard work remains beautiful for years. Always test the spray on a small yarn scrap first to ensure it doesn’t change the color.
Another professional tip included in this Sunshine Mat Centerpiece – Tutorial is the addition of a non-slip backing if the mat is going on a very smooth surface like polished wood or glass. You can use small dots of clear silicone or a piece of felt cut to size and glued to the bottom. This keeps the centerpiece from sliding around when you place items on top of it, adding a layer of safety and stability.
Once your Sunshine Mat Centerpiece – Tutorial is blocked, finished, and protected, it’s time to style it! Place it in the center of your table with a vase of fresh daisies or a bowl of lemons to enhance the “sunny” theme. You have now completed a complex, beautiful, and functional piece of decor. Congratulations on finishing this journey and bringing a little more light into your home through the art of crafting!
1. Can I use acrylic yarn for the Sunshine Mat Centerpiece – Tutorial?
While you can use acrylic, it is not recommended if you plan to place hot items (like a hot teapot) on the mat. Acrylic is essentially plastic and can melt or deform under high heat. For a decorative mat that won’t touch heat, acrylic is fine, but 100% cotton is the gold standard for functional table centerpieces.
2. How do I clean my finished Sunshine Mat Centerpiece?
If you used cotton, your centerpiece is likely machine washable on a gentle cycle. However, to keep the sunbeams looking sharp, I recommend hand washing in cool water with a mild detergent. Lay it flat to dry and give it a quick steam block to restore its shape afterward.
3. My mat is curling at the edges, what happened?
This usually means there weren’t enough increases in the final rounds. Circular geometry requires a steady increase in the number of stitches to stay flat. If you followed the Sunshine Mat Centerpiece – Tutorial and it’s still curling, try using a larger hook size for the outer rounds to give the stitches more “breathing room.”
4. Is this project suitable for a total beginner?
Yes! As long as you know the basic stitches (single, half-double, and double crochet), you can complete this Sunshine Mat Centerpiece – Tutorial. The “Magic Ring” might take a few tries to master, but once you get past the center, the pattern is very repetitive and beginner-friendly.
5. How long does it take to complete the Sunshine Mat Centerpiece – Tutorial?
Depending on your speed and the size of the mat, most crafters can finish this project in 2 to 4 hours. It is an excellent “weekend project” that provides instant gratification and a beautiful new addition to your home in a very short amount of time.
In this Sunshine Mat Centerpiece – Tutorial, we have explored the entire creative process of bringing a radiant textile sun into your home decor. From selecting the perfect heat-resistant cotton yarn and mastering the magic ring, to calculating precise increases and crafting those iconic sunbeam edges, you now have the skills to create a stunning, professional-grade centerpiece.
We also touched on the vital importance of blocking and finishing, which are the secrets to turning a simple crochet project into a durable work of art that can grace your table for years to come.


