
Tricks for Disappearing Blocks - Tutorial

Tricks for Disappearing Blocks – Tutorial is one of the most fascinating techniques in the world of modern quilting because it allows a simple design to transform into something complex and professional with just a few strategic cuts. By mastering these Tricks for Disappearing Blocks – Tutorial, quilters of all skill levels can elevate their projects from basic grids to intricate-looking masterpieces that deceive the eye and capture the imagination. Whether you are working with scraps or a coordinated fabric bundle, the magic lies in the precision of the process and the creative rearrangement of the segments.
In this comprehensive Tricks for Disappearing Blocks – Tutorial, we will explore how the “disappearing” method works and why it remains a favorite among fiber arts enthusiasts and content creators. The beauty of this method is its versatility; a single Nine-Patch or Four-Patch block can be sliced into various configurations to create entirely different visual movements. This approach not only saves time but also adds a layer of “humanized” artistry to your work, making every quilt feel unique and meticulously planned.
As we dive into the technical details of this Tricks for Disappearing Blocks – Tutorial, it is essential to focus on -optimized quilting techniques that ensure your final project is both beautiful and structurally sound. Accuracy is the cornerstone of successful patchwork, especially when you are cutting into a block that has already been sewn. We will cover the essential tools, the step-by-step cutting guides, and the secrets to keeping your seams aligned throughout the entire transformation process.
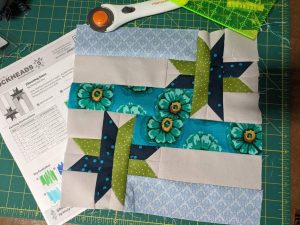
The foundation of the Tricks for Disappearing Blocks – Tutorial begins with a standard pieced block, most commonly a Nine-Patch or a Shoofly block. The “disappearing” effect occurs when you take this finished square and cut it into smaller sections, effectively “making the original block disappear” into a new arrangement. This technique is highly valued in traditional quilting because it allows for high-level complexity without the need for difficult templates or Y-seams.
To succeed with Tricks for Disappearing Blocks – Tutorial, you must start with a perfectly squared-off initial block. If your starting piece is wonky, the secondary cuts will amplify those errors, making it difficult to match your quilt seams later on. Professional quilters recommend using a rotating cutting mat and a sharp rotary blade to ensure every slice is clean and perpendicular to the previous seam lines.
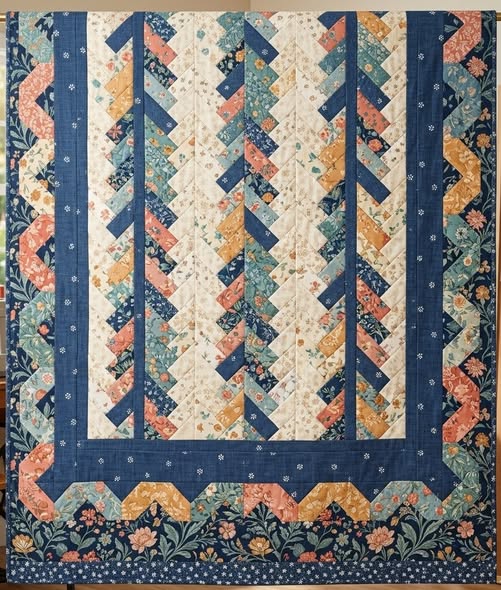
Color value plays a massive role in how the Tricks for Disappearing Blocks – Tutorial translates to the final quilt top. By using high-contrast fabrics—such as a deep navy against a crisp white—the “disappearing” segments will create sharp, geometric shapes that pop. If the colors are too similar, the intricate details of the patchwork pattern may get lost, resulting in a muddy appearance rather than a striking design.
Once the block is sliced, the fun part of the Tricks for Disappearing Blocks – Tutorial begins: the rotation. By turning individual sub-units 90 or 180 degrees, you create a secondary pattern that often looks like intricate stars or woven ribbons. This stage requires a bit of “humanized” intuition, where you can play with the layout on a design wall before committing to the final stitch.
Many beginners find that the Tricks for Disappearing Blocks – Tutorial is the best way to practice precision cutting. Because you are cutting through existing seams, you get a clear visual of whether your 1/4-inch seam allowance was consistent. It is a fantastic educational tool for those looking to improve their technical skills while producing a functional piece of art like a denim upcycled quilt or a cotton throw.
Finally, the Tricks for Disappearing Blocks – Tutorial is highly efficient for digital entrepreneurs in the craft niche. It allows for the creation of multiple blog posts or video tutorials based on a single technique. By changing the initial block or the cutting measurements, you can generate endless variations of the “disappearing” style, keeping your audience engaged with fresh, SEO-friendly craft content.
Before starting the Tricks for Disappearing Blocks – Tutorial, gathering the right equipment is non-negotiable for a professional finish. You will need a high-quality rotary cutter, a long acrylic ruler (6″ x 24″ is ideal), and a fabric marking pen. These tools ensure that your measurements are exact, which is the most critical factor when executing the Tricks for Disappearing Blocks – Tutorial on a large scale.
Preparation begins with starching your fabric, a secret often omitted in basic guides but highlighted in this Tricks for Disappearing Blocks – Tutorial. Starching gives the fabric “body” and prevents it from stretching when you make those crucial secondary cuts. Since you will be dealing with bias edges after some cuts, the extra stability provided by the starch will save you from a distorted quilt top.
In this Tricks for Disappearing Blocks – Tutorial, we recommend using a neutral-colored polyester or cotton thread. Since you will be sewing through multiple layers of fabric and intersecting seams, a strong but fine thread prevents bulk. Reducing bulk is essential for the “disappearing” units to lay flat, which is a key indicator of high-level craftsmanship in the quilting community.
Setting your sewing machine stitch length to a slightly smaller setting (around 2.0mm) is another pro tip for the Tricks for Disappearing Blocks – Tutorial. Because you will be cutting across seams, a tighter stitch ensures that the threads don’t unravel at the edges of your new segments. This small adjustment adds durability to your patchwork blocks and makes the assembly process much smoother.
The Tricks for Disappearing Blocks – Tutorial also requires a clear workspace. Having a dedicated cutting station separate from your sewing machine allows you to move freely and maintain focus. Accuracy in the disappearing block method depends on your ability to see the alignment of the ruler against the existing seams, so good lighting is a must-have for your studio.
Lastly, always perform a “test block” before cutting into your precious designer fabric. Even the best Tricks for Disappearing Blocks – Tutorial can result in unexpected outcomes if your seam allowance is slightly off. Making a sample with scrap fabric or old denim allows you to verify the final size and the visual impact of the rotated segments before you begin the full production.
The most popular version of the Tricks for Disappearing Blocks – Tutorial involves the Disappearing Nine-Patch. To start, sew nine squares together into a large grid. In this Tricks for Disappearing Blocks – Tutorial, the key is to cut the block exactly down the center, both vertically and horizontally. This creates four equal quadrants, each containing a piece of the original center square.
Another advanced variation in the Tricks for Disappearing Blocks – Tutorial is the “double slice” method. Instead of cutting through the center, you cut a specific distance (for example, 1 inch) away from the center seam on all four sides. This produces a complex geometric design with thin accent strips that frame the original pieces, adding a modern aesthetic to the quilt layout.
When executing the Tricks for Disappearing Blocks – Tutorial, placement of the ruler is vital. You should align the lines on your ruler with the seam lines of the block rather than the outer edges of the fabric. This compensates for any minor deviations in the fabric’s edge and ensures that the “disappearing” elements remain symmetrical throughout the transformation.
Safety is a priority in any Tricks for Disappearing Blocks – Tutorial. Always cut away from your body and keep your fingers well away from the edge of the ruler. If you find yourself having to lean or stretch to make a cut, stop and rotate the mat instead. A rotating cutting mat is the best investment for someone regularly performing Tricks for Disappearing Blocks – Tutorial techniques.
For those interested in upcycling, the Tricks for Disappearing Blocks – Tutorial works beautifully with repurposed jeans. Because denim is thicker, you may need to adjust your cutting pressure. The resulting “disappearing denim” blocks are incredibly durable and perfect for functional items like heavy-duty bags or floor cushions, adding a “humanized” touch to eco-friendly crafting.
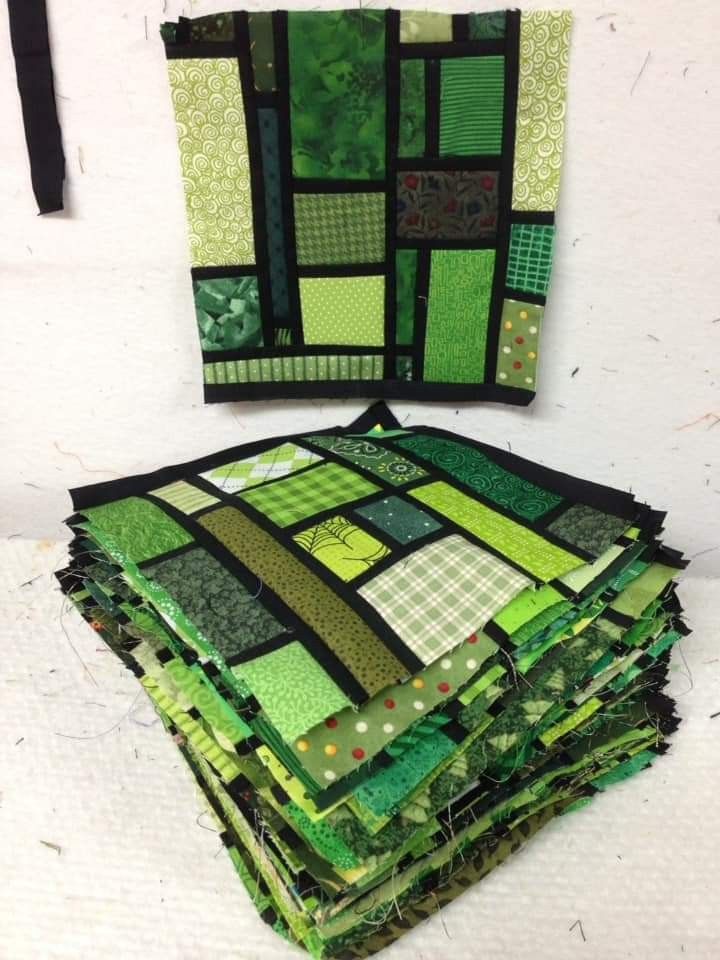
As you finish your cuts, keep the segments organized. It is easy to get confused once the original block is in pieces. In this Tricks for Disappearing Blocks – Tutorial, we suggest using clover clips or numbered pins to mark the order of the units. This organization is what separates a frustrating afternoon from a successful creative quilting session.
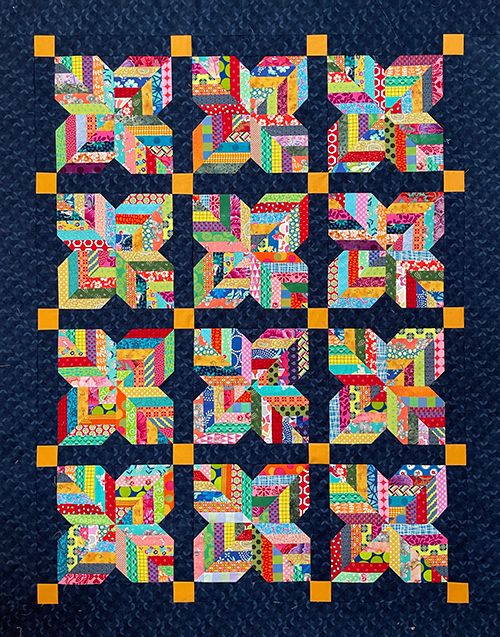
Reassembling the pieces is where the Tricks for Disappearing Blocks – Tutorial truly shines. You can arrange the new segments in a “pinwheel” fashion, or flip them to create a “woven” look. The Tricks for Disappearing Blocks – Tutorial offers endless possibilities; by simply changing the orientation of two blocks, the entire flow of the quilt design changes from static to dynamic.
Pressing is the final secret to a professional result in this Tricks for Disappearing Blocks – Tutorial. Always press your seams to the side, following the “dark side” rule whenever possible. However, when dealing with the complex intersections of a disappearing block, “pressing open” can sometimes help reduce the bump where four or more seams meet, ensuring a flat and quiltable surface.
If you are following this Tricks for Disappearing Blocks – Tutorial for a blog or social media, take photos of each variation. The “disappearing” technique is highly “pinnable” and visually engaging for craft communities. Showing the transformation from a simple block to a complex one is a powerful way to demonstrate your content creation skills and technical expertise.
In terms of SEO for quilters, remember to use descriptive titles for your variations. For example, a “Disappearing Hourglass” or a “Disappearing Pinwheel” are specific terms that users search for. By applying the Tricks for Disappearing Blocks – Tutorial to different base blocks, you expand your repertoire and your digital reach within the fiber arts niche.
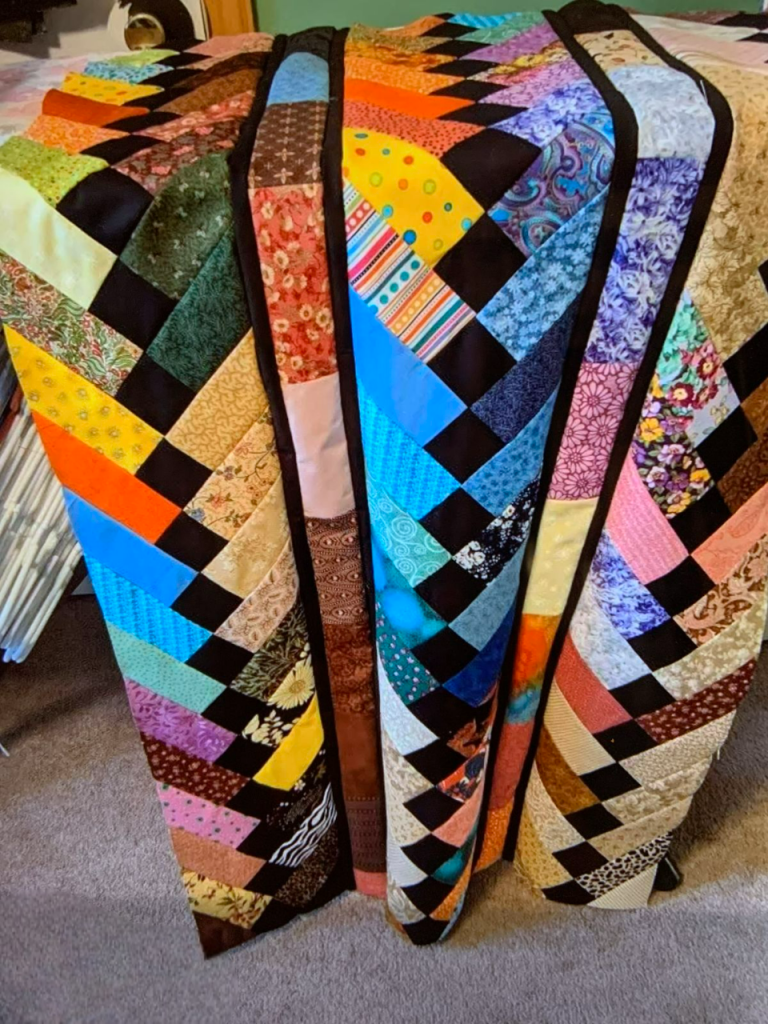
Don’t be afraid to mix and match different disappearing blocks in one quilt. A combination of techniques from this Tricks for Disappearing Blocks – Tutorial can create a “sampler quilt” look that is both modern and eclectic. This approach is perfect for using up fabric stashes and experimenting with color theory in a low-pressure way.
To conclude the assembly portion of the Tricks for Disappearing Blocks – Tutorial, always “square up” your final blocks to a consistent size. Even with perfect cutting, the process of sewing the segments back together can lead to minor size differences. Squaring up ensures that when you join the blocks into rows, everything aligns perfectly, resulting in a professional-grade quilt.
1. What is the best block to start with for the Tricks for Disappearing Blocks – Tutorial?
The Nine-Patch is the most beginner-friendly block. It provides clear grid lines and yields four beautiful, symmetrical units that are easy to rearrange.
2. Can I use this technique with old clothes or denim?
Yes! The Tricks for Disappearing Blocks – Tutorial is excellent for upcycling. Just ensure you use a fresh rotary blade and consider the thickness of the seams when reassembling.
3. Does the size of the initial block matter?
The technique works with any size, but larger blocks (10-12 inches) are easier to handle when you are first learning the Tricks for Disappearing Blocks – Tutorial.
4. How do I prevent my corners from getting cut off?
Accuracy in your 1/4-inch seam allowance is key. If your seams are consistent, your corners will naturally align during the rotation and reassembly phases.
5. What is the “Double Disappearing” method?
This is when you take a block that has already “disappeared” once and repeat the cutting and rotating process a second time for even more complexity.
6. Do I need special rulers for these tricks?
While a standard square ruler works, a rotating mat is highly recommended to keep the block perfectly still during the multiple cuts required in this Tricks for Disappearing Blocks – Tutorial.
In this article, we have explored the innovative world of Tricks for Disappearing Blocks – Tutorial, covering everything from the initial concept and essential tools to the technical cutting steps and final assembly.
We learned that the “disappearing” method is not just about cutting fabric; it is about seeing the hidden potential within a simple design and using precision quilting to bring it to life. By focusing on color contrast, starching for stability, and accurate measurements, anyone can master these Tricks for Disappearing Blocks – Tutorial to create stunning, professional-level quilts.


