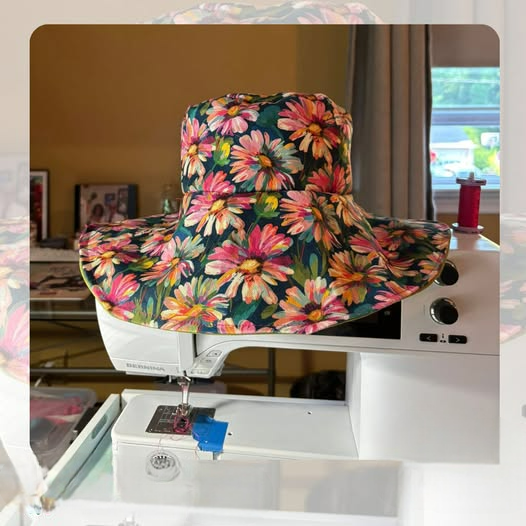
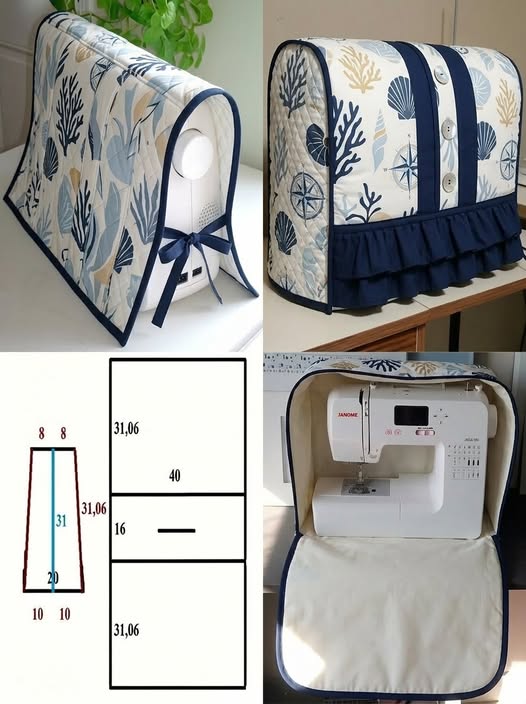
Fabric Hat - Tutorial

A fabric bag tutorial is one of the most rewarding projects you can undertake, combining utility with the joy of personal expression. Creating your own fabric bag allows you to move away from disposable plastics while mastering fundamental sewing techniques that can be applied to countless other DIY crafts. Whether you are looking to create a sturdy tote bag, a delicate drawstring pouch, or a professional market bag, understanding the basics of fabric selection, pattern cutting, and machine stitching is essential for a high-quality finish.
When you follow a well-structured fabric bag tutorial, you gain the freedom to customize every detail, from the length of the straps to the addition of inner pockets and magnetic snaps. This sewing guide is designed to take you through the entire process, ensuring that your finished handcrafted bag is both durable and aesthetically pleasing. Using high-quality cotton canvas, interfacing, and polyester thread, we will explore how to transform simple fabric scraps or new yardage into a functional accessory that reflects your unique style.
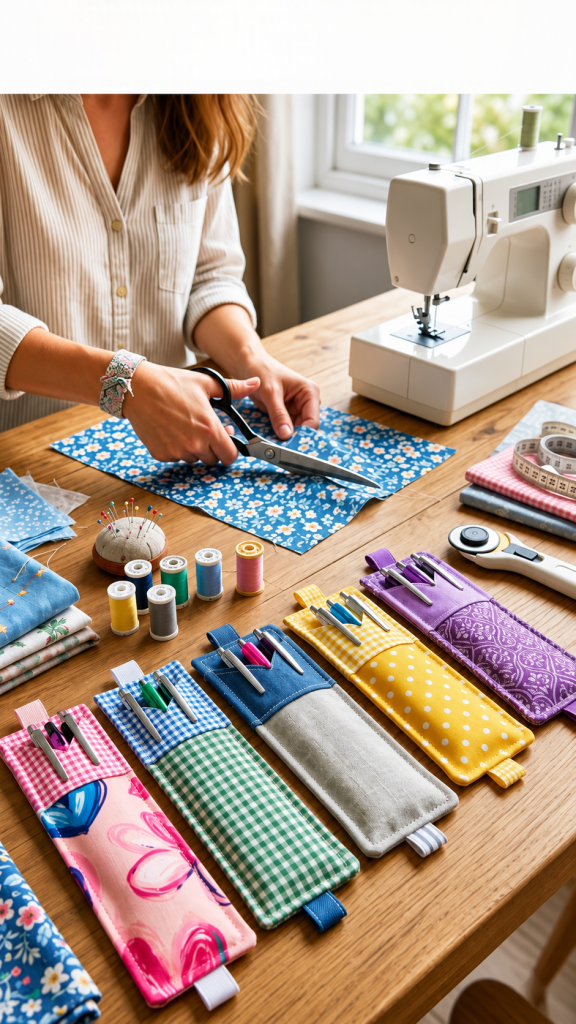
Before diving into the stitching process, it is vital to prepare your workspace and gather all necessary quilting supplies and sewing notions. A successful fabric bag tutorial relies heavily on precision; therefore, having a sharp rotary cutter, a reliable measuring tape, and a well-maintained sewing machine will make the experience much smoother. In the following sections, we will break down the construction into manageable steps, focusing on SEO-friendly sewing tips that help both beginners and experienced makers achieve professional-grade results in their handmade projects.
The foundation of any great fabric bag tutorial starts with the choice of textiles. For a sturdy bag that can hold groceries or books, heavyweight fabrics like duck canvas, denim, or twill are highly recommended. These materials provide the structural integrity needed to withstand daily wear and tear while maintaining the bag’s shape over time.
In addition to the main outer fabric, you must consider the lining. A lighter cotton calico or poplin works beautifully for the interior, providing a smooth finish that doesn’t add too much bulk to the seams. Choosing a contrasting color or a fun print for the bag lining can add a professional “boutique” feel to your DIY sewing project.
Interfacing is the secret ingredient that many beginners overlook in a fabric bag tutorial. By applying fusible fleece or heavyweight interfacing to the wrong side of your fabric, you give the bag a crisp, upright appearance. This prevents the bag from looking “slumped” when it is empty and adds an extra layer of protection for the items inside.
Don’t forget the importance of thread selection. A heavy-duty polyester thread is often better than 100% cotton for bags, as it has more “give” and is less likely to snap under the pressure of heavy loads. Matching your thread color to your fabric—or choosing a bold topstitching thread for a decorative look—is a key part of the creative design.
Hardware and notions also play a significant role in the functionality of your fabric bag. Depending on the complexity of the pattern, you might need D-rings, swivel hooks, or zippers. For this specific fabric bag tutorial, we will focus on a classic design that uses reinforced fabric handles, which are comfortable for the user.
Finally, always pre-wash your fabric. Natural fibers like cotton can shrink significantly during the first wash. By laundering and pressing your material before you start the cutting process, you ensure that your sewn bag won’t warp or change size the first time you need to clean it after use.
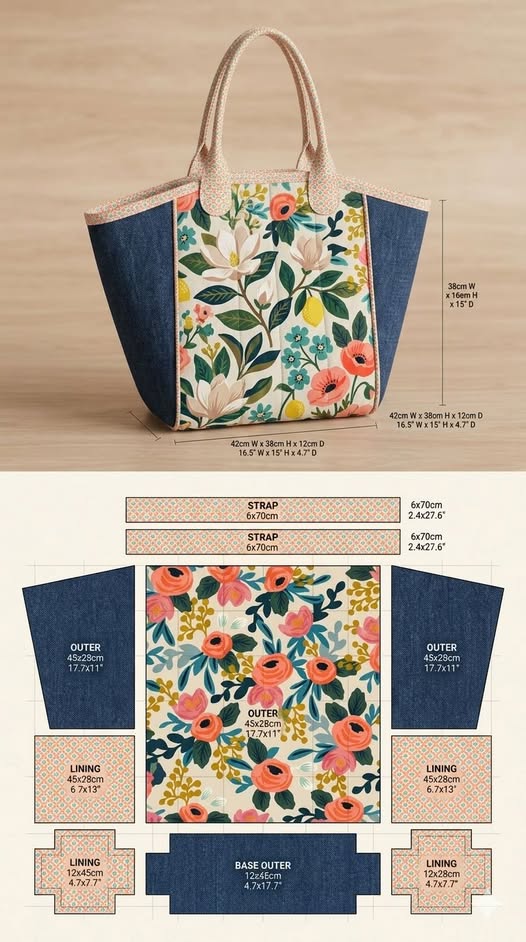
The next phase of our fabric bag tutorial involves the layout and cutting of your pattern pieces. Accuracy at this stage is what separates a homemade-looking bag from a handmade masterpiece. You will need to cut two large rectangles for the bag body, two for the lining, and two long strips for the handles.
Using a clear acrylic ruler and a self-healing cutting mat is the best way to ensure your edges are perfectly square. In this fabric bag tutorial, we recommend a standard size of 15 by 17 inches for the main body. If you want a deeper bag, you can incorporate boxed corners, which we will discuss in the assembly section of this sewing tutorial.
When cutting your straps, remember that they need to be twice the width of the finished handle plus seam allowance. For a 1-inch wide strap, you should cut your fabric 4 inches wide. This allows you to fold the edges toward the center and then fold again, hiding all raw edges inside for a clean, professional finish.
Marking your fabric is another crucial step in the fabric bag tutorial. Use tailor’s chalk or a water-soluble fabric pen to mark the placement of the handles and any interior pockets. Placing these marks on the wrong side of the fabric ensures they won’t be visible on the finished product but will guide your stitching lines perfectly.
If you are using a directional print (a fabric where the pattern has a clear “up” and “down”), be extremely careful during the cutting phase. Ensure that the pattern on both the front and back pieces of your fabric bag faces the right way. There is nothing more frustrating than finishing a tutorial only to realize your flowers are upside down on one side!
Once all pieces are cut, it is time to apply the fusible interfacing. Follow the manufacturer’s instructions, usually involving a hot iron and a bit of steam. This step in the fabric bag tutorial bonds the reinforcement to your fabric, creating a stable base that is much easier to sew and results in a much more durable tote.
Now we move to the most exciting part of the fabric bag tutorial: the actual construction. Start by placing your two outer fabric pieces right sides together. Pin or clip along the sides and the bottom. Using a 3/8-inch seam allowance, sew down the sides and across the bottom, making sure to backstitch at the beginning and end.
To give your bag a professional three-dimensional shape, this fabric bag tutorial utilizes boxed corners. At the bottom corners, pinch the fabric so the side seam aligns perfectly with the bottom seam, creating a triangle shape. Mark a line perpendicular to the seam, sew across it, and trim the excess. This creates a flat bottom for your tote bag.
Repeat the exact same process for the lining fabric. However, there is a vital “pro tip” for this fabric bag tutorial: leave a 4-inch gap in the bottom seam of the lining. This hole, often called a turning gap, is essential for flipping the bag right-side out later in the sewing process.
Now, let’s prepare the handles. Fold your long fabric strips in half lengthwise and press. Open them up and fold the raw edges into the center crease, press again, and fold the whole thing in half. Topstitch down both sides of the strap. This technique ensures your bag handles are strong and look identical to store-bought versions.
Basting the handles is the next step in our fabric bag tutorial. Place your outer bag right-side out and pin the ends of the handles to the top edge, facing downward. Space them about 5 inches apart. Baste stitch them in place within the seam allowance to keep them from shifting when you attach the lining.
The final assembly involves nested layers. Insert the outer bag (which is right-side out) into the lining (which is inside out). The right sides of the fabric should be touching. Align the top edges, match the side seams, and pin heavily. Sew all the way around the top circumference, securing the outer bag, handles, and lining together in one continuous loop.
With the top seam finished, reach through the gap you left in the lining and gently pull the outer fabric through. This is the “magic” moment of the fabric bag tutorial where the project finally looks like a real bag. Wiggle the corners out with a point turner or a blunt pencil to ensure they are crisp and sharp.
Once the bag is turned, tuck the lining inside the outer bag and head to the ironing board. Pressing is the most important part of finishing your fabric bag tutorial. Roll the top seam between your fingers to ensure the lining doesn’t peek out over the top, then press it flat with plenty of steam for a crisp edge.
Before closing the gap, you must perform topstitching. This involves sewing a line about 1/8 or 1/4 inch from the top edge of the bag. Not only does topstitching look beautiful, but it also secures the lining in place and provides extra reinforcement for the bag straps, which take the most strain during use.
Now, pull the lining back out slightly to close the turning gap. You can do this quickly with a topstitch on your sewing machine, or for a truly invisible finish, use a ladder stitch (hand sewing). Once closed, push the lining back into the bag and give the entire project one final, thorough press.
If you want to take this fabric bag tutorial to the next level, consider adding a decorative label or some embroidery. A small “handmade” tag sewn into the side seam adds a wonderful personalized touch that makes the bag feel like a high-end gift or a designer accessory.
Congratulations! You have completed the fabric bag tutorial. You now possess a custom, eco-friendly bag that is perfect for shopping, carrying craft supplies, or gifting to a friend. The skills you learned here—seam finishing, boxing corners, and topstitching—are the building blocks of all advanced bag making.
Q: What is the best fabric for a beginner’s fabric bag tutorial?
A: For beginners, 100% cotton quilting fabric or cotton canvas is best. These fabrics are “stable,” meaning they don’t slip or stretch while you are sewing, making it much easier to maintain straight lines and accurate seam allowances.
Q: Do I really need to use interfacing?
A: While not strictly mandatory for a very simple bag, interfacing is highly recommended in any fabric bag tutorial. it provides the “body” and professional structure that prevents the bag from looking like a shapeless sack. It also reinforces the fabric where the handles are attached.
Q: How do I make the bag handles stronger?
A: To reinforce bag handles, you can sew a small “X” inside a square at the point where the handle meets the bag body. Additionally, using nylon webbing inside your fabric tubes can provide industrial-strength durability for heavy lifting.
Q: Can I wash my handmade fabric bag?
A: Yes, provided you pre-washed your fabrics before sewing. Most handmade bags can be machine-washed on a gentle cycle and air-dried. If you used fusible interfacing, avoid high-heat dryers as the glue might delaminate over time.
Q: What size needle should I use for sewing canvas bags?
A: When following a fabric bag tutorial with heavier materials, switch to a 90/14 or 100/16 universal needle. If you are sewing multiple layers of denim, a specific jeans needle will help prevent skipped stitches and broken needles.
Q: How can I add a zipper to this fabric bag tutorial?
A: Adding a zippered closure requires an intermediate skill level. You would typically sew the zipper between the outer fabric and the lining at the top edge. Many makers prefer starting with this open-top tote before moving on to zippered pouches or handbags.
In this fabric bag tutorial, we have covered everything from the initial material selection to the final topstitching techniques that ensure a professional look. We learned that the secret to a great DIY bag lies in the details: choosing the right weight of fabric, applying interfacing for structure, and being precise with your measurements.
By mastering the boxed corner and the turning gap, you can now create bags of various sizes and shapes for any occasion. This project is not only a fantastic way to reduce your environmental footprint by replacing plastic bags, but it is also a gateway into the expansive world of fiber arts and functional sewing.


