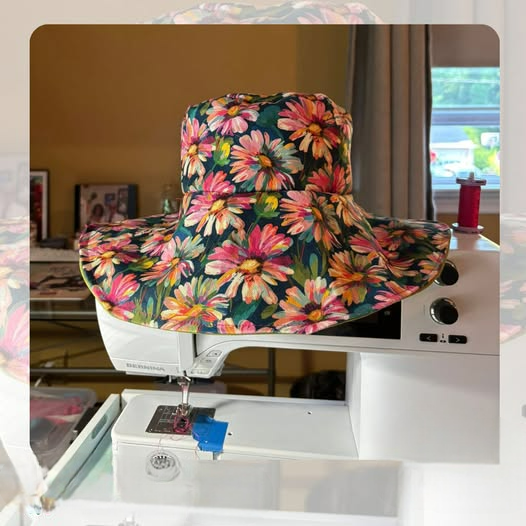
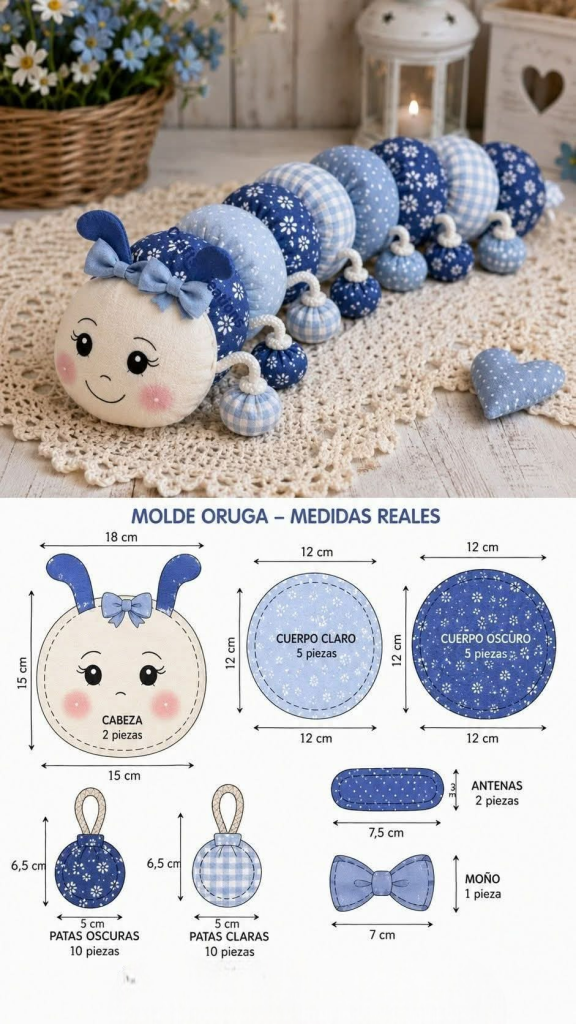
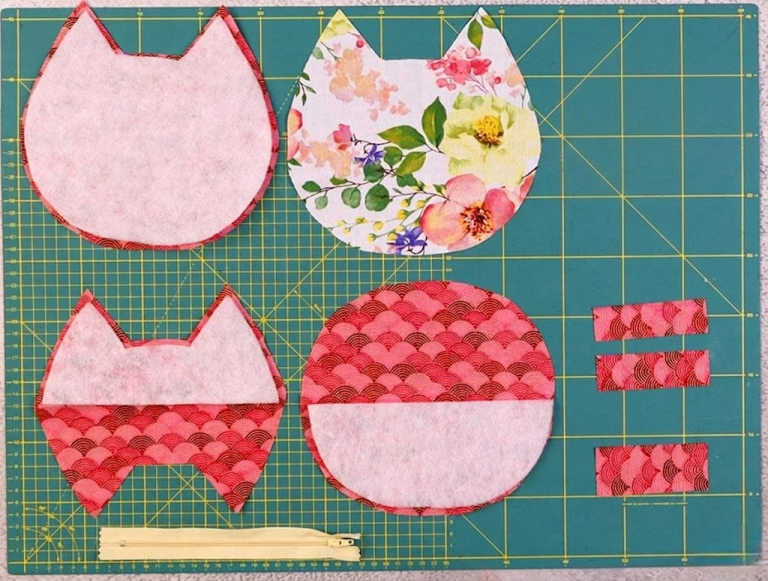
Fabric Hat - Tutorial

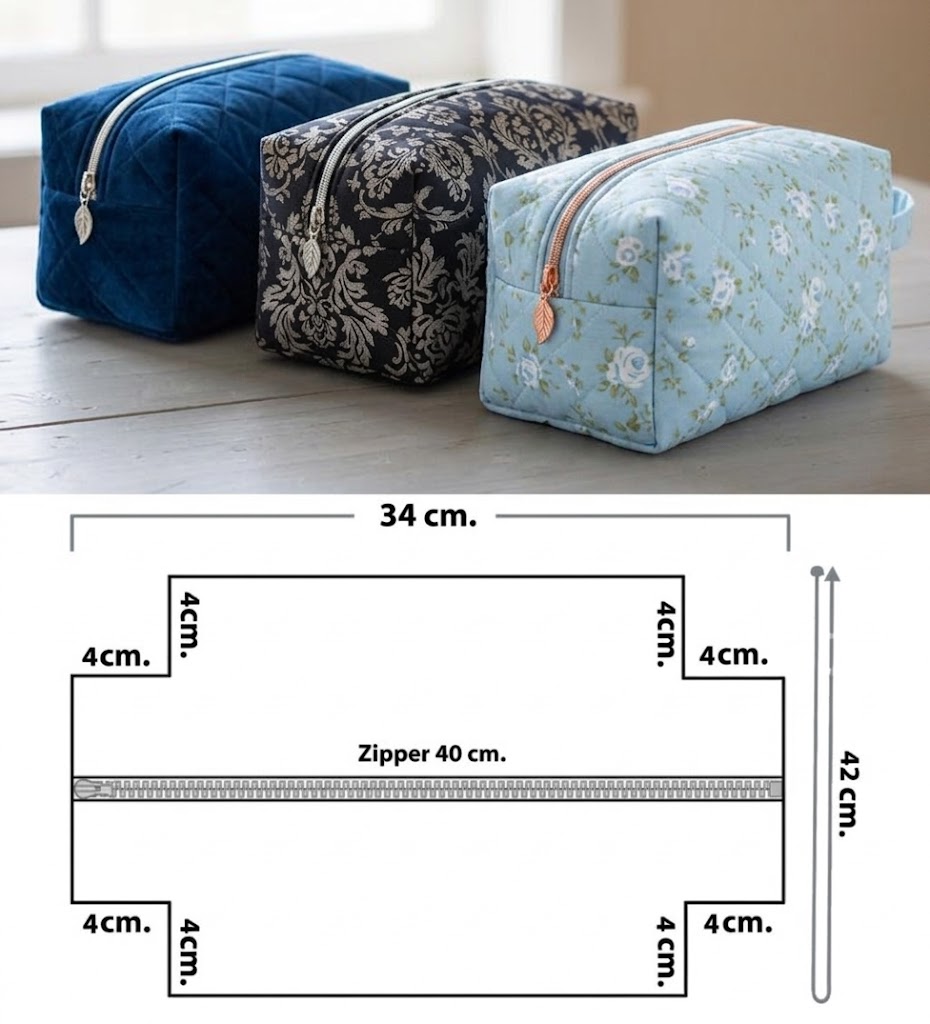
The Fabric Toiletry Bag – Tutorial is your gateway to creating a practical and stylish accessory that simplifies organization while allowing for personal creative expression. Whether you are prepping for a weekend getaway or looking for a way to declutter your bathroom counter, a handmade toiletry bag offers the durability and customization that store-bought versions often lack. By following this step-by-step guide, you will learn how to transform simple cotton fabric and basic sewing supplies into a professional-grade organizer that reflects your unique aesthetic.
Creating your own fabric toiletry bag is not just about the final product; it is about the sustainable journey of DIY crafting and the satisfaction of mastering a new sewing project. In today’s world of mass production, choosing your own high-quality fabrics and heavy-duty zippers ensures that your gear lasts longer and performs better under the rigors of travel. This Fabric Toiletry Bag – Tutorial is designed to be accessible for beginners while providing enough technical detail to keep experienced sewists engaged and inspired.
In this comprehensive guide, we will dive deep into every stage of the process, from selecting the right interfacing for structural integrity to mastering the boxed corner technique that gives your bag its volume. We have optimized this sewing tutorial to ensure you understand the “why” behind each step, making the assembly process smooth and enjoyable. Get your sewing machine ready and your iron heated, as we embark on this creative adventure to craft the ultimate travel organizer using our Fabric Toiletry Bag – Tutorial.
Selecting the right materials is the cornerstone of any successful sewing project, especially when durability is a priority. For this Fabric Toiletry Bag – Tutorial, we recommend using 100% cotton canvas or a heavy-duty upholstery fabric for the exterior to ensure the bag can withstand frequent handling. The interior should ideally be lined with a water-resistant fabric or a laminated cotton, which makes cleaning up accidental spills from shampoos or lotions much easier.
Structure is what differentiates a flimsy pouch from a professional travel case, so do not skip the fusible fleece or woven interfacing. These stabilizers are ironed onto the wrong side of your exterior fabric to provide body and help the bag maintain its shape even when it is empty. You will also need a nylon coil zipper that is at least two inches longer than the width of your fabric pieces, as this makes the installation process much more forgiving for beginners.
Precision is key when cutting your pieces, so gather your rotary cutter, an acrylic ruler, and a self-healing cutting mat. These tools allow for perfectly straight edges and accurate measurements, which are vital when you start aligning the zipper tape with the fabric edges. If you prefer a more traditional approach, sharp fabric shears and a clear marking pen will work just as well to outline your rectangles before cutting.
Don’t forget the small but mighty sewing notions that make the assembly process seamless. You will need wonder clips or fine glass-head pins to hold the layers together without shifting, and a zipper foot for your sewing machine is absolutely essential for getting close to the zipper teeth. Using a high-quality polyester thread is also recommended over cotton thread for this project because it offers more strength and flexibility for items that will be stuffed into a suitcase.
If you want to add a touch of luxury to your handmade toiletry bag, consider incorporating a leather pull tab or a woven ribbon handle. These small details not only improve the functionality of the bag, making it easier to grab from a deep luggage compartment, but they also elevate the overall aesthetic appeal. Adding a custom woven label inside the lining is another great way to personalize the project or brand it if you intend to give it as a personalized gift.
Finally, ensure you have a reliable steam iron and an ironing board nearby throughout the entire Fabric Toiletry Bag – Tutorial. Pressing your seams as you go is the “secret ingredient” that takes a project from looking homemade to looking professionally manufactured. Every time you sew a seam, taking a moment to press it open or to one side ensures that the fabric lays flat and the final dimensions of the bag remain consistent with your pattern.
The first technical step in this Fabric Toiletry Bag – Tutorial is preparing your fabric by pre-washing and pressing. Pre-washing is vital for natural fibers like cotton to prevent the bag from shrinking or warping the first time it gets wet. Once dry, use a hot iron to remove all wrinkles, providing a smooth surface for your pattern placement and ensuring that your measurements are as precise as possible.
For a standard-sized bag, you will need to cut two rectangles for the outer fabric, two for the lining, and two pieces of fusible interfacing. A common and versatile size is 12 inches by 9 inches, which provides ample room for full-sized bottles while remaining compact enough for a carry-on. If you are using a directional print, be very careful to ensure the pattern is oriented correctly so that your design doesn’t end up upside down on one side of the bag.
Once your pieces are cut, it is time to apply the stabilizer. Lay your exterior fabric pieces face down on the ironing board and place the fusible fleece on top with the glue side (the shiny, textured side) touching the fabric. Press firmly with a hot iron, moving slowly across the surface to ensure a permanent bond. This step is a highlight of our Fabric Toiletry Bag – Tutorial because it gives the fabric a quilted, high-end feel that protects your toiletries inside.
Marking the boxed corners early can save a lot of time later in the construction process. On the bottom two corners of each of your four fabric rectangles (outer and lining), use a fabric pen to draw a 2-inch square. You can cut these squares out now or wait until after the side seams are sewn; however, cutting them now often makes it easier to visualize how the three-dimensional shape of the bag will come together during the final assembly.
If you have chosen to add a carrying handle, cut a strip of fabric measuring 4 inches by 10 inches. Fold this strip in half lengthwise, press, then fold the raw edges into the center crease and press again, creating a sturdy 1-inch wide strap. Topstitch down both long edges to secure the folds. This durable handle should be basted onto the short side of one of your exterior pieces, about 2 inches down from the top edge, before you begin the zipper installation.
The final part of the preparation phase involves checking your zipper length. If your zipper is too long, do not cut it yet! In this Fabric Toiletry Bag – Tutorial, we use the extra length as “tails” that stay outside the stitching line, which prevents the bulky zipper slider from getting in the way of your needle. Once you have double-checked that all your pieces are accounted for and properly interfaced, you are ready to move to the most rewarding part: the actual sewing.
Many crafters find zippers intimidating, but this Fabric Toiletry Bag – Tutorial breaks it down into a simple “sandwich” method that guarantees success. Start by laying one exterior fabric piece right side up. Place your zipper face down along the top edge, aligning the zipper tape with the raw edge of the fabric. Then, place one lining piece face down on top of the zipper. Pin or clip all three layers together securely.
Using your zipper foot, sew along that top edge with a 1/4-inch seam allowance. As you approach the zipper slider, keep the needle down, lift the presser foot, and carefully slide the zipper pull out of the way before continuing your stitch. Once finished, flip both fabric pieces away from the zipper so they are wrong sides together and press the seam flat. This creates a clean, professional finish where the zipper is neatly encased between the two layers.
Repeat this exact process for the other side of the zipper using the remaining outer fabric and lining pieces. It is crucial during this stage of the Fabric Toiletry Bag – Tutorial to ensure that your fabric rectangles line up perfectly at the sides. If the edges are staggered, the bag will look lopsided. Take your time to align the tops and bottoms of the rectangles before you commit to the second line of stitching.
After both sides are attached, we highly recommend topstitching through the fabric and lining, about 1/8-inch away from the zipper teeth. This isn’t just for looks; it prevents the lining from getting caught in the zipper teeth when you are opening and closing the bag. Use a slightly longer stitch length for a decorative effect and ensure your thread color matches or complements your fabric design for the best visual impact.
Now comes the critical “turn” of the project. Open the zipper at least halfway—this is the most important rule in this Fabric Toiletry Bag – Tutorial! If the zipper is closed, you won’t be able to turn the bag right side out later. Match the two exterior pieces right sides together and the two lining pieces right sides together. Pin all the way around the perimeter, making sure the zipper teeth are pushed toward the lining to keep the corners crisp.
Sew around the outside, but leave a 4-inch opening at the bottom of the lining fabric. This gap is necessary for turning the bag later. Use a 1/2-inch seam allowance for these main structural seams to provide extra strength. Backstitch at the beginning and end of each section, especially where you cross over the zipper tape, as these areas will experience the most stress when the bag is being used and filled with heavy items.
The magic of our Fabric Toiletry Bag – Tutorial happens during the “boxing” of the corners, which turns a flat pouch into a roomy container. Reach into the corner gaps you cut earlier (the 2-inch squares). Pull the fabric apart and flatten it so that the side seam aligns perfectly with the bottom seam. This creates a straight line of raw edges. Pin this line carefully, ensuring the seams are “nested”—meaning one seam allowance points left and the other points right to reduce bulk.
Sew across this flattened edge with a very sturdy straight stitch, and then go over it a second time with a zigzag stitch for reinforcement. Repeat this for all four corners: the two on the exterior and the two on the lining. This technique creates a flat bottom for your toiletry bag, allowing it to stand upright on a counter, which is a key feature for any high-quality handmade organizer.
Once all corners are boxed, reach through the opening you left in the lining and carefully pull the outer fabric through. This is why we left the zipper open! Take your time to push out the corners using a point turner or a blunt chopstick. Be gentle so you don’t poke a hole through your hard work. Once the bag is right side out, you will see the beautiful three-dimensional structure you’ve created following this Fabric Toiletry Bag – Tutorial.
Now, look at the opening in the lining. Tuck the raw edges inside by about 1/2-inch and press them flat. You can close this gap using a hidden ladder stitch by hand for a completely invisible finish, or simply topstitch it closed with your machine for speed. Since this seam is at the bottom of the inside of the bag, a machine stitch is perfectly acceptable and very durable for a utility item like this.
Push the lining down into the bag and give the entire project a final, thorough press with your steam iron. Pay close attention to the top edges near the zipper and the boxed corners at the bottom. A good press sets the stitches into the fabric and gives the bag that “crisp” look associated with high-end retail products. If your zipper pull feels a bit small, you can add a piece of matching fabric or a cord to make it more ergonomic.
Congratulations on completing the Fabric Toiletry Bag – Tutorial! You now have a custom, hand-sewn travel bag that is perfectly tailored to your needs. This project is a fantastic base for further customization—you can add interior pockets, elastic loops for brushes, or even try different sizes to create a matching travel set. The skills you’ve learned here, from zipper installation to structural interfacing, are transferable to countless other sewing crafts.
1. What is the best fabric for a toiletry bag?
The best choice for the exterior is a durable cotton canvas or denim because they can handle the weight of toiletries. For the interior, laminated cotton or ripstop nylon is ideal because it is waterproof and easy to wipe clean if a bottle leaks.
2. Can I make this bag without a sewing machine?
While you can sew a Fabric Toiletry Bag – Tutorial by hand using a backstitch for strength, it is much faster and more durable when done with a sewing machine. If sewing by hand, ensure your stitches are small and very tight to support the weight of the bag’s contents.
3. Why do I need to use interfacing?
Interfacing provides the “skeleton” for your bag. Without it, the fabric would be too floppy and wouldn’t stand up on its own. Using fusible fleece adds a layer of padding that protects glass perfume bottles or delicate items inside your handmade case.
4. How do I clean my handmade toiletry bag?
If you used 100% cotton and quality interfacing, most bags can be machine washed on a gentle cycle and air-dried. However, if you used specialized waterproof linings, it is better to spot clean the interior with a damp cloth and mild soap to preserve the coating.
5. My zipper is too long, what should I do?
In this Fabric Toiletry Bag – Tutorial, a long zipper is actually a benefit! You can sew right over the nylon teeth of the zipper, and then trim the excess tape once the side seams are secure. Just make sure the zipper pull is inside the sewing area before you trim!
In this Fabric Toiletry Bag – Tutorial, we have covered everything from material selection and fabric preparation to the technical details of zipper installation and creating boxed corners.
We hope this guide has inspired you to create your own custom travel gear and helped you feel more confident in your sewing skills. By choosing your own materials and focusing on SEO-friendly techniques, you’ve created an item that is both functional and uniquely yours.
