
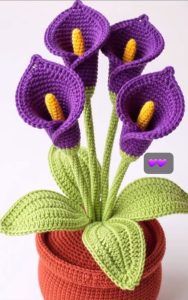
Crochet Flower - Tutorial

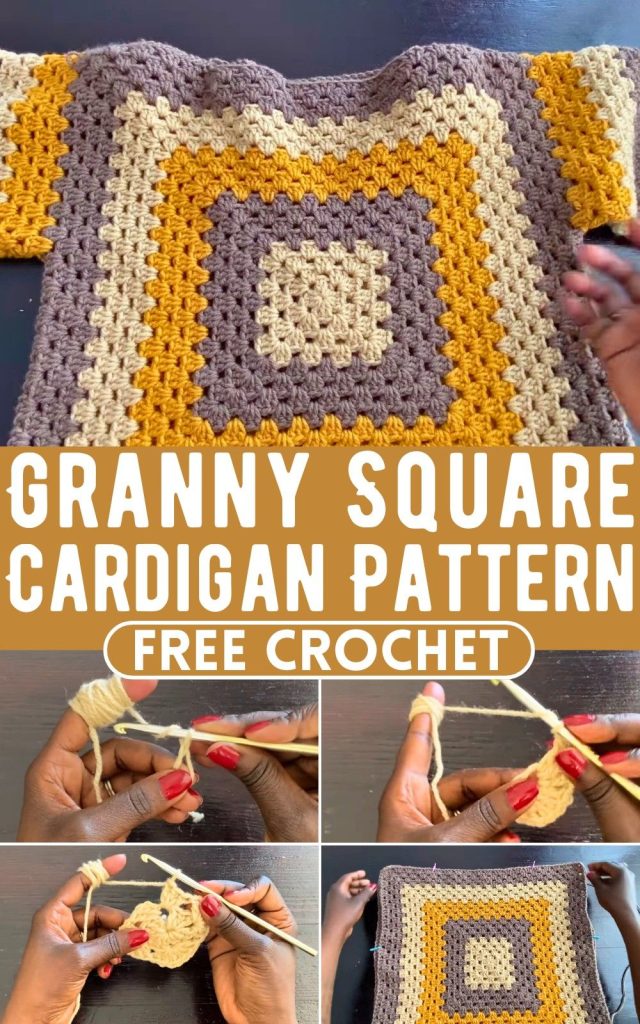
The Granny Square Cardigan Crochet – Pattern is a timeless masterpiece that captures the essence of vintage charm while perfectly fitting into modern fashion trends. Whether you are a beginner looking to expand your skills or a seasoned crafter, this specific Granny Square Cardigan Crochet – Pattern offers a versatile canvas to play with colors, textures, and silhouettes. The beauty of the granny square lies in its modularity; you can create a stunning garment by simply joining small, manageable pieces of art together, making it an ideal project for those who enjoy “portable” crafting.
Starting a Granny Square Cardigan Crochet – Pattern is an exciting journey that allows you to express your unique personality through every stitch. These cardigans have seen a massive resurgence in popularity, appearing on runways and in high-end boutiques, yet nothing compares to the quality and sentiment of a handmade version. By following a structured crochet tutorial, you can customize the fit, length, and sleeve style to create a piece that looks professional and feels incredibly cozy, ensuring your Granny Square Cardigan Crochet – Pattern becomes a staple in your autumn and winter wardrobe.
In this comprehensive guide, we will dive deep into everything you need to know about mastering the Granny Square Cardigan Crochet – Pattern. We will discuss the best yarn types to use, the technical construction methods for joining squares, and how to add professional finishes like ribbed cuffs and necklines. Our goal is to provide you with the confidence to tackle this iconic project, transforming simple skeins of yarn into a wearable work of art. Let’s explore the intricate world of the Granny Square Cardigan Crochet – Pattern and discover the joy of creating a garment that is as fun to make as it is to wear.
The success of your Granny Square Cardigan Crochet – Pattern begins with selecting the right fiber for your project. For a classic, breathable cardigan, many crafters opt for 100% cotton yarn or a cotton-acrylic blend, which provides excellent stitch definition and keeps the squares from losing their shape. If you prefer a warmer, fluffier garment, a merino wool or a high-quality soft acrylic will give your Granny Square Cardigan Crochet – Pattern a cozy, rustic feel that is perfect for colder climates.
Your choice of crochet hook size is the next critical factor in achieving the correct drape. A 5.0mm (H) or 5.5mm (I) hook is standard for medium-weight yarn, ensuring that the squares are firm enough to hold together but flexible enough to move with the body. When working on a Granny Square Cardigan Crochet – Pattern, it is always wise to crochet a gauge swatch first; if your squares are too stiff, the cardigan will look boxy, whereas squares that are too loose may sag over time.
Color theory plays a massive role in the visual impact of your Granny Square Cardigan Crochet – Pattern. You can choose a “scrappy” look by using leftover yarn bits for a bohemian vibe, or a monochromatic palette for a more sophisticated, modern appearance. Using a consistent “joining color”—usually a neutral like cream, black, or grey—can help unify diverse colors within your Granny Square Cardigan Crochet – Pattern, making the individual squares pop while maintaining a cohesive overall design.
In addition to yarn and hooks, you will need several crochet notions to finish your cardigan professionally. A set of stitch markers is indispensable for planning the layout of your squares and marking where the sleeves will attach. For a Granny Square Cardigan Crochet – Pattern, you will also need a sharp pair of scissors and a large-eye tapestry needle for the inevitable task of weaving in ends, especially if you change colors in every round of your squares.
Don’t forget the importance of a flexible measuring tape throughout the process. Since everyone’s tension is different, measuring your squares frequently ensures that they are uniform in size. In a Granny Square Cardigan Crochet – Pattern, if one square is even a half-inch larger than the others, it can throw off the alignment of the entire garment. Consistency is the secret ingredient that transforms a simple DIY project into a high-quality fashion piece.
Finally, consider the weight of the finished garment when choosing your materials. A Granny Square Cardigan Crochet – Pattern can become quite heavy if you use bulky yarn or very dense stitches. To ensure comfort, aim for a light-to-medium weight yarn (Category 3 or 4). This allows the cardigan to hang gracefully from the shoulders and prevents it from feeling cumbersome, ensuring you actually enjoy wearing your handmade Granny Square Cardigan Crochet – Pattern out in the world.
The foundation of the Granny Square Cardigan Crochet – Pattern is the classic granny square, which usually consists of “clusters” of three double crochet stitches. To begin, you create a magic ring or a small chain circle, then work in rounds, adding corner increases to create a perfect square. Learning to keep your corners sharp and your edges straight is the most important skill for a beautiful Granny Square Cardigan Crochet – Pattern, as it makes the later assembly process much smoother.
Once you have mastered the basic square, you need to decide on the assembly method for your Granny Square Cardigan Crochet – Pattern. Many quilter-style crocheters prefer the “Join-As-You-Go” (JAYG) technique, which involves connecting the squares during the final round of crochet. This method is highly efficient because it eliminates the need for heavy seaming at the end and gives the Granny Square Cardigan Crochet – Pattern a very flexible, lace-like connection between the blocks.
Alternatively, you can use the Mattress Stitch or a Slip Stitch Join to connect your pieces after they are all finished. The Mattress Stitch creates an invisible seam, which is ideal if you want a clean, tailored look for your Granny Square Cardigan Crochet – Pattern. On the other hand, a visible Slip Stitch join can add an extra decorative element, creating a “braided” ridge between the squares that emphasizes the patchwork aesthetic of the garment.
Planning the layout is a creative highlight of the Granny Square Cardigan Crochet – Pattern. Before joining, lay your squares out on a flat surface to arrange the colors. A standard cardigan usually requires two large panels for the front, one wide panel for the back, and two rectangular sections for the sleeves. Using a diagram or layout chart for your Granny Square Cardigan Crochet – Pattern helps you visualize the final product and ensures that you don’t end up with two clashing colors right next to each other.
The “Armhole Shaping” is where the Granny Square Cardigan Crochet – Pattern transitions from simple squares into a wearable garment. Most patterns use a “drop shoulder” design, which is beginner-friendly because it doesn’t require complex decreasing. You simply leave a gap in the side seams of the body panels to attach the sleeves. This creates a relaxed, oversized fit that is very popular in current fashion trends and makes the cardigan incredibly comfortable for everyday wear.
Blocking your squares before assembly is a professional step that shouldn’t be skipped in a Granny Square Cardigan Crochet – Pattern. By pinning your squares to a blocking board and lightly steaming them, you ensure they are all exactly the same size and have perfectly straight edges. This “sets” the stitches and makes the joining process much more precise. A blocked Granny Square Cardigan Crochet – Pattern has a much better drape and looks significantly more expensive than one that hasn’t been treated.
One of the best parts of a Granny Square Cardigan Crochet – Pattern is the ability to adjust the length to your liking. If you prefer a “cropped” look, you can stop after three or four rows of squares. For a “duster” style or long cardigan, you can continue adding rows of squares until it reaches your knees. This modular customization is why the Granny Square Cardigan Crochet – Pattern is so beloved; it truly fits every body type and style preference effortlessly.
Adding a ribbed border to the bottom and front edges will elevate your Granny Square Cardigan Crochet – Pattern instantly. Ribbing is typically achieved by alternating Front Post and Back Post double crochet stitches. This adds a bit of “stretch” and weight to the edges, preventing the cardigan from curling and giving it a finished, “store-bought” look. The ribbing also helps pull the Granny Square Cardigan Crochet – Pattern together, providing a structured frame for the colorful squares.
Sleeve customization is another area where your Granny Square Cardigan Crochet – Pattern can shine. You can make wide, “bell sleeves” for a 70s retro look, or tapered sleeves with a tight ribbed cuff for a more modern, practical feel. When attaching the sleeves to the Granny Square Cardigan Crochet – Pattern, make sure to match the center of the sleeve with the shoulder seam to ensure the garment hangs symmetrically on your arms.
The neckline of your Granny Square Cardigan Crochet – Pattern can also be modified for comfort. You can create a simple V-neck by omitting a square at the top front, or a “shawl collar” by adding extra rows of ribbing around the neck. A well-constructed neckline ensures the Granny Square Cardigan Crochet – Pattern sits securely on your shoulders without sliding off, which is a common issue with handmade sweaters if the neck is too wide.
Buttons and closures are the final functional details of your Granny Square Cardigan Crochet – Pattern. You can sew on large wooden buttons for a natural look, or use a simple tie-front design. Because the granny squares naturally have small holes, you often don’t even need to crochet specific buttonholes; the buttons can simply slip through the natural gaps in the stitch pattern. This makes the Granny Square Cardigan Crochet – Pattern incredibly easy to finish.
Finally, consider adding functional pockets to your cardigan. You can simply crochet two extra squares and sew them onto the front panels. Pockets add a layer of utility to your Granny Square Cardigan Crochet – Pattern, making it perfect for carrying your phone or keeping your hands warm. This small addition makes the garment feel much more “complete” and adds to the overall cozy, lived-in charm of a handmade crochet cardigan.
A common challenge when working on a Granny Square Cardigan Crochet – Pattern is dealing with “wonky” squares that seem to twist. This usually happens if your tension changes as you get tired. To fix this, try to work in “batches” and check your square measurements every few hours. In a Granny Square Cardigan Crochet – Pattern, if you notice a square is pulling to one side, you can often correct it during the blocking phase, but it’s always better to maintain a steady hand while stitching.
Dealing with hundreds of yarn tails is perhaps the most daunting part of any Granny Square Cardigan Crochet – Pattern. To make this easier, weave in your ends as you go—after finishing each square. If you wait until the very end to weave in all the tails of your Granny Square Cardigan Crochet – Pattern, you might feel overwhelmed. Using a “doubled-over” weaving technique ensures that the ends won’t pop out after the first time you wash the garment.
If you find that your Granny Square Cardigan Crochet – Pattern is too heavy and stretches out of shape when hanging, it is likely a matter of the yarn’s “memory.” Natural fibers like cotton have less spring than wool. To prevent stretching, always store your Granny Square Cardigan Crochet – Pattern folded in a drawer rather than on a hanger. This preserves the structural integrity of the squares and ensures the shoulders don’t become elongated and misshapen over time.
Washing your Granny Square Cardigan Crochet – Pattern requires a gentle touch to protect the delicate joins. Hand washing in cool water with a mild “wool wash” detergent is the safest method. If you must use a machine, place the cardigan in a large mesh laundry bag and use the most delicate cycle. Never put your Granny Square Cardigan Crochet – Pattern in a tumble dryer; instead, lay it flat on a clean towel to air dry, reshaping it while it is damp.
Another frequent issue is the “slumping” of the underarm area. This can happen if the sleeve is too heavy for the side seam. To reinforce this area in your Granny Square Cardigan Crochet – Pattern, you can sew a small piece of clear elastic or a scrap of sturdy yarn into the underarm join. This provides extra support and ensures that your Granny Square Cardigan Crochet – Pattern maintains its shape even after months of frequent wear and movement.
Lastly, be mindful of “pilling,” which are the small fuzz balls that can form on the surface of the yarn. This is common with acrylic and wool blends used in a Granny Square Cardigan Crochet – Pattern. You can easily remove these with a small battery-operated fabric shaver. Keeping your cardigan clean and well-groomed ensures that the vibrant colors and intricate textures of your Granny Square Cardigan Crochet – Pattern continue to look fresh and beautiful for many years to come.
How many squares do I need for a Granny Square Cardigan Crochet – Pattern?
For a standard medium-sized cardigan, you will typically need between 30 and 45 squares, depending on the size of each square (usually 5 to 6 inches). If you are making an oversized or long version, you may need up to 60 squares.
Is this pattern suitable for a total beginner?
Yes! If you know how to make a basic granny square, you can make this cardigan. The most challenging part is the assembly, but if you take it slow and follow a joining guide, it is a very achievable first garment for any new crocheter.
What is the best yarn for a summer version of this cardigan?
For a lightweight, summer-ready Granny Square Cardigan Crochet – Pattern, use a Category 2 (Fine) cotton or bamboo yarn. This will result in a “lacy” and breathable garment that is perfect for beach cover-ups or light evening layers.
How do I make the cardigan larger or smaller?
The easiest way to adjust the size in a Granny Square Cardigan Crochet – Pattern is to change the number of rounds in each square. Adding one extra round to every square can increase the overall width of the cardigan by several inches without needing to change the layout.
Can I use different types of squares in one cardigan?
Absolutely! Mixing classic granny squares with “Sunburst” squares or “Daisy” squares is a popular way to customize the Granny Square Cardigan Crochet – Pattern. Just make sure all the different styles end up with the same final stitch count per side so they join together evenly.
How long does it take to finish a Granny Square Cardigan Crochet – Pattern?
For an intermediate crocheter, a full cardigan usually takes between 20 and 40 hours of work. It’s a perfect “long-term” project that you can work on bit by bit, making a few squares each evening until you are ready for assembly.
Creating a Granny Square Cardigan Crochet – Pattern is a deeply rewarding experience that combines the heritage of crochet with modern wearable art. In this guide, we have explored the essential materials and hooks needed to start, the technical nuances of the classic granny square, and the various methods for joining your pieces into a cohesive garment.
We also discussed how to customize the fit with ribbing and cuffs, and how to properly care for your finished masterpiece to ensure it lasts for generations. The versatility of this pattern means that no two cardigans will ever be the same, as each reflects the unique color choices and tension of its maker.


