
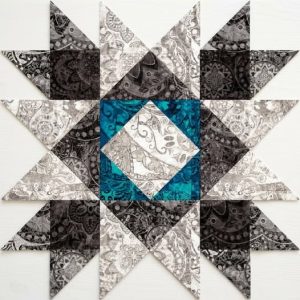
Crochet Flower - Tutorial

Learning how to create a beautiful crochet flower tutorial is one of the most rewarding journeys you can embark on as a crafting enthusiast. Whether you are a seasoned expert looking to use up your yarn stash or a complete beginner picking up a hook for the very first time, crafting delicate blooms allows you to express your creativity in endless ways. This comprehensive guide is designed to walk you through the entire process, ensuring you can create stunning floral embellishments with ease.
The beauty of mastering a crochet flower tutorial lies in the sheer versatility of the finished project. These handmade textile blossoms can be used to elevate your existing wardrobe, decorate cozy home accessories, or serve as the perfect personalized touch on gifts for loved ones. Throughout this article, we will explore the essential techniques, materials, and step-by-step methods required to bring these vibrant yarn creations to life.
By focusing on a structured, easy-to-follow crochet flower tutorial, you will not only learn how to form basic petals but also gain the confidence to experiment with different textures and dimensions. We have optimized this guide with the best industry insights to ensure your crafting experience is smooth, relaxing, and incredibly productive. Grab your favorite yarn, select the perfect hook, and let’s dive deep into the wonderful world of fiber art florals.
Selecting the perfect yarn weight and fiber composition is the fundamental first step in achieving success with your crochet flower tutorial. For beginners, a smooth, worsted-weight cotton or acrylic yarn is highly recommended because it offers excellent stitch definition and does not split easily. Cotton yarn is particularly fantastic for floral designs because it provides a sturdy structure that helps the delicate petals maintain their shape over time.
Equally important to your crochet flower tutorial success is matching your chosen yarn with the correct crochet hook size. If your stitches are too loose, the floral petals may sag and lose their distinct definition; if they are too tight, the bloom can become stiff and distorted. Always check the yarn manufacturer’s label for recommended hook sizes, but feel free to drop down a hook size if you want a tighter, more cohesive fabric.
In addition to your primary yarn and hook, you will need a few essential notions to complete this crochet flower tutorial professionally. A sharp pair of crafting scissors is necessary for clean yarn cuts, preventing frayed ends that can ruin the look of your project. You will also need a sturdy tapestry needle with a large eye to seamlessly weave in your loose yarn ends when finishing your work.
Stitch markers can also play a vital role in keeping your placement accurate during the initial rounds of your crochet flower tutorial. When working in tight spaces or creating a central ring, marking the first stitch of each round ensures you do not accidentally add or lose stitches. Having these simple tools organized and ready at your workstation creates a stress-free environment for crafting your beautiful textile blossoms.
As you progress with this crochet flower tutorial, you will quickly realize that experimenting with different yarn textures can yield completely unique results. A fuzzy mohair yarn can create a soft, romantic, dream-like bloom, while a shiny mercerized cotton gives a modern, sleek appearance. Understanding how materials behave allows you to customize your handmade elements to perfectly match any garment or home decor item.
Ultimately, the materials you select set the entire foundation for the rest of your crochet flower tutorial experience. Taking the time to invest in comfortable tools and high-quality, vibrant yarns will directly reflect in the beauty of your final product. Now that your workspace is fully prepared and your supplies are gathered, we are ready to move on to the core foundational stitches.
Before diving directly into the petal formations, this crochet flower tutorial requires a solid understanding of a few foundational crochet stitches. The absolute base of almost every circular project is either a slip knot followed by a chain stitch ring or the highly popular magic ring technique. The magic ring is incredibly useful for floral designs because it allows you to pull the center completely closed, leaving no visible hole.
Once your center ring is established, the single crochet stitch is frequently utilized in this crochet flower tutorial to build a firm, compact core. This stitch provides the necessary stability to anchor the larger, more dramatic petal stitches that will follow in subsequent rounds. Maintaining an even, consistent tension while executing your single crochets ensures that the center of your blossom remains perfectly symmetrical.
To create the beautiful, sweeping curves of individual petals, our crochet flower tutorial relies heavily on taller stitches like the half double crochet and the double crochet. The double crochet stitch is particularly effective because its height allows you to create rapid contrast against the shorter center stitches. By clustering multiple double crochets into a single space, you naturally force the fabric to fan out into a classic petal shape.
For crafters looking to add even more drama and depth, this crochet flower tutorial introduces the treble crochet stitch. The treble crochet is even taller than the double crochet, making it absolutely perfect for creating elongated petals or outer layers on multi-tiered blossoms. Learning to transition smoothly from a short stitch to a tall stitch and back down again is the secret to beautiful organic shapes.
The final crucial stitch component in our crochet flower tutorial toolkit is the simple yet powerful slip stitch. Slip stitches are not used to add height, but rather to join rounds seamlessly and to create sharp, defined transitions between individual petals. Mastering the placement of your slip stitches prevents your finished blossom from looking messy or unevenly spaced around the central core.
Practicing these core movements individually before beginning your main project will make following the rest of the crochet flower tutorial incredibly satisfying. Consistency is key when it comes to fiber arts, and a little bit of patience goes a long way. Once your fingers are familiar with the rhythm of these stitches, you are ready to construct the actual floral pattern.
Now we will begin the actual construction phase of our crochet flower tutorial, starting with the creation of an adjustable magic loop. Work six single crochet stitches directly into that magic loop, then pull the tail firmly to close the center hole completely. Join the round with a smooth slip stitch into the very first single crochet you made, creating a perfect tiny circle.
For the second round of this crochet flower tutorial, we will build the foundation spaces where our gorgeous petals will soon grow. Chain one, then work two single crochet stitches into every single stitch around the circle, giving you a total of twelve stitches. Join this round with another slip stitch, ensuring your tension remains uniform so the circle stays completely flat on your table.
The third round is where the magic truly happens in our crochet flower tutorial as we begin shaping the individual decorative petals. In the very next stitch, you will work the following sequence: one single crochet, one half double crochet, and one double crochet. This gradual increase in stitch height creates the rising slope of your first delicate, handmade flower petal.
To complete the downward slope of the petal in this crochet flower tutorial, look at the immediate next stitch in your round. In that space, work the exact reverse sequence: one double crochet, one half double crochet, and then one single crochet. To lock the first petal into place and give it a beautiful definition, execute a slip stitch into the following chain.
Repeat this exact petal sequence all the way around the rest of your circular core as instructed by this crochet flower tutorial. By alternating the rising and falling stitch clusters with anchoring slip stitches, you will organically create six perfectly balanced petals. Keep a steady eye on your stitch counts to ensure that each petal receives the exact same amount of yarn real estate.
Once your final petal is completed, cut your working yarn leaving a generous six-inch tail for finishing purposes. Pull the yarn tail completely through the last loop on your hook to secure the work against unravelling. Congratulations, you have successfully followed the core steps of this creative crochet flower tutorial to produce a beautiful, finished textile accent.
Now that you have successfully completed the core portion of this crochet flower tutorial, it is time to explore how to utilize your creations. One of the most popular ways to showcase your handmade blossoms is by turning them into wearable fashion accessories. You can easily sew a metal brooch pin or a sturdy alligator hair clip to the back of the dense cotton center.
Another fantastic application for the techniques learned in this crochet flower tutorial is elevating your interior home decor style. You can stitch a collection of these colorful yarn blooms onto plain throw pillow covers, creating a cozy, textured bohemian vibe. They also look absolutely stunning when joined together side-by-side to form a unique, floral-themed garland for a nursery.
If you want to take your crochet flower tutorial results to the next level, consider adding beautiful mixed-media embellishments. Sewing a glossy pearl, a vintage wooden button, or shimmering glass beads directly into the center core adds instant luxury and visual interest. This simple addition completely transforms a basic yarn project into a high-end heirloom piece of art.
For those who love practical crafting, the knowledge gained from this crochet flower tutorial can be applied to customized gift wrapping. Instead of using disposable plastic bows on birthday or holiday presents, tie a gorgeous, reusable handmade flower onto the twine. Your friends and family will cherish the extra thought, and they can reuse the decorative bloom for themselves later.
You can also adapt this crochet flower tutorial to create stunning multi-layered, three-dimensional designs by working into the back loops only. By leaving the front loops of your center core open, you can attach a secondary, smaller round of contrasting petals on top. This advanced layering technique creates realistic depth that mimics real nature, like roses or complex carnations.
The possibilities truly are endless once you understand the basic geometry taught throughout this comprehensive guide. Sharing your completed projects on social platforms or gifting them to neighbors brings a wonderful sense of community and personal accomplishment. Keep experimenting with colors, textures, and placements to make every single project uniquely yours.
What is the best yarn type for a beginner attempting a crochet flower tutorial?
The absolute best option for beginners is a 100% cotton yarn in a worsted or sport weight. Cotton provides exceptional stitch clarity, meaning you can easily see exactly where to insert your hook, and it holds its shape beautifully without stretching out.
How do I stop my finished crochet flowers from curling inward?
If your petals are curling excessively, it usually means your stitching tension is slightly too tight or you have missed a stitch in your pattern. Try switching to a slightly larger hook size, or gently block your finished piece by misting it with water and pinning it flat until dry.
Can I scale this pattern down to make tiny micro crochet flowers?
Yes, absolutely. To scale down the design featured in this crochet flower tutorial, simply swap out your standard worsted yarn for thin embroidery floss or lace-weight quilting thread, and pair it with a specialized micro steel crochet hook ranging from 0.5mm to 1.5mm.
Is it necessary to use a magic ring to start the project?
While a magic ring is highly recommended because it allows you to pull the center completely closed with no gaps, it is not mandatory. You can alternatively chain four, join with a slip stitch to form a small loop, and then work your first round of stitches directly into that chain loop.
How can I attach my finished yarn flowers to blankets or garments?
The cleanest way to attach your work is by using the long yarn tails you left during the fastening-off step. Thread that tail onto a blunt tapestry needle and use a invisible mattress stitch to securely sew the flat back of the flower center onto your main fabric piece.
In this comprehensive crochet flower tutorial, we have covered everything from selecting the ideal cotton yarns and matching hooks to mastering the essential structural stitches like double and treble crochets.
We explored a foolproof, step-by-step method to build beautifully balanced petals and discussed a wide array of creative ways to embellish, layer, and utilize your finished fiber art pieces in daily life. Crafting these charming miniature projects is a wonderful, sustainable way to express your personal style while honing your creative textile skills.


