
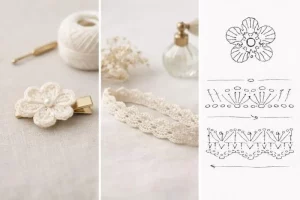
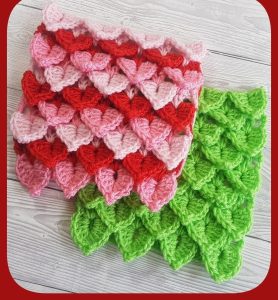
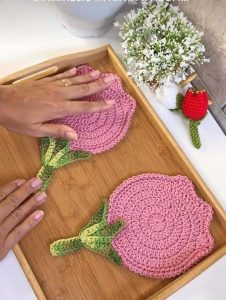
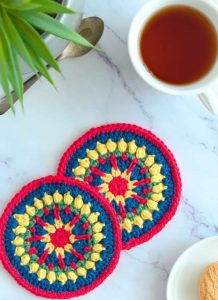
Crochet Flower - Tutorial

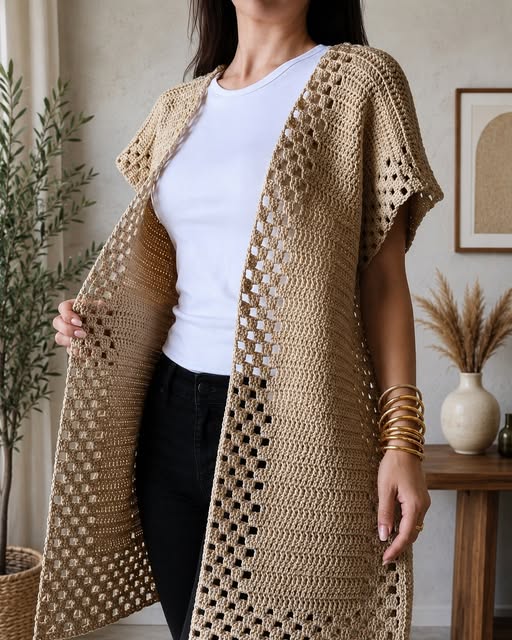
If you have been searching for the ultimate cozy fashion project, this comprehensive Crochet Cardigan – Tutorial is exactly what you need to elevate your handmade wardrobe. Making your own clothes is one of the most rewarding experiences a crafter can have, allowing you to customize everything from the yarn texture to the exact fit. This guide is designed to walk you through every single step with ease, ensuring you don’t feel overwhelmed by the process.
The beauty of a crochet cardigan lies in its absolute versatility, making it a staple piece that transcends seasons and fast-fashion trends. Whether you are aiming for a chunky, oversized look to wear on chilly autumn evenings or a lightweight, breezy layer for spring, mastering this crochet tutorial will give you the skills to create a garment that fits your unique body type perfectly.
Throughout this step-by-step crochet cardigan guide, we will break down complex techniques into simple, manageable instructions that anyone can follow. We will cover everything from selecting the right materials and understanding essential stitching techniques to assembling your panels and adding those gorgeous finishing touches. Grab your hooks, settle into your favorite crafting chair, and let’s dive into this wonderful fiber arts journey together.
When starting your Crochet Cardigan – Tutorial, the very first decision you need to make revolves around selecting the perfect crochet materials for your project. The weight and fiber content of your yarn will completely dictate how your finished garment drapes, feels against your skin, and holds its shape over time. For beginners, a medium worsted weight yarn is highly recommended because it allows you to see your stitches clearly and works up relatively quickly.
Natural fibers like cotton or wool offer incredible breathability and longevity, while premium acrylic blends provide excellent durability and budget-friendly machine-washable convenience. It is always wise to check your yarn label for the recommended crochet hook size, though you might want to go up a size if you tend to tension your yarn tightly. A hook that is slightly larger can give your cardigan a softer, more comfortable drape that moves naturally with your body.
In addition to your primary yarn and hook, a few essential crochet notions will make your crafting experience much smoother and more enjoyable. You will definitely want to keep a reliable pair of sharp scissors, a flexible measuring tape, and a few stitch markers close at hand. Stitch markers are absolute lifesavers when it comes to keeping track of your row counts and identifying where different panels need to be joined together later.
Don’t forget to invest in a sturdy yarn needle or tapestry needle, which is absolutely vital for weaving in your loose ends and sewing your cardigan panels together securely. Having all these tools organized before you make your first slip knot will prevent unnecessary interruptions and keep your creative momentum going strong. Choosing high-quality tools ensures that your crafting process remains comfortable from the very first stitch to the very last.
Before purchasing all your yarn, always make sure to check the dye lot numbers on the paper bands to ensure total color consistency across your entire garment. Buying an extra skein of yarn is a smart insurance policy, as running out of a specific color mid-project can be incredibly frustrating. Now that your workspace is fully prepped with the best materials, you are ready to move on to the fundamental mechanics of the garment.
Understanding how your tools interact with your chosen fiber is a core part of becoming a successful maker, so take your time during this preparation phase. A well-chosen yarn transforms a simple pattern into a luxurious piece of wearable art that you will be proud to showcase. With your basket filled with beautiful yarn and your hooks lined up, you have laid the perfect foundation for a stunning handmade piece.
Before diving headfirst into the main body of your garment, this Crochet Cardigan – Tutorial requires a basic understanding of a few fundamental crochet stitches. Most classic cardigans rely on a combination of basic stitches like the single crochet, half double crochet, and the timeless double crochet stitch. These stitches form the structural backbone of your fabric, offering a great balance of density, warmth, and flexibility.
To achieve that beautiful, professional-looking ribbed texture along the bottom hem and cuffs of your sleeves, you will likely utilize back loop only crochet techniques. Working exclusively into the back loops creates an elastic, stretchy fabric that mimics traditional knitting, allowing the garment to hug your wrists and hips comfortably. Mastering these simple variations will instantly elevate the overall look and functionality of your finished cardigan.
One of the most critical steps in any garment-focused crochet tutorial is creating a proper gauge swatch before working on the actual panels. A gauge swatch is simply a small square of fabric, usually four by four inches, stitched using the exact yarn and hook you plan to use for the project. This allows you to measure how many stitches and rows fit into a specific area, ensuring your final garment matches the intended sizing.
Skipping the gauge swatch is one of the most common mistakes crafters make, often resulting in a sweater that turns out way too large or disappointingly small. If your swatch has too many stitches per inch, it means your tension is tight, and you should switch to a larger hook. Conversely, if your swatch has too few stitches, your tension is loose, and you need to drop down to a smaller hook size.
Taking the time to adjust your hook size based on your personal tension guarantees that your hard work will result in a beautifully fitted piece of clothing. Think of the swatch as a stress-free practice run that allows you to get comfortable with your yarn’s unique rhythm before building the real panels. It builds your confidence and eliminates the guesswork, saving you from having to unravel hours of work later on.
Once you have verified that your gauge matches the pattern requirements perfectly, you can confidently proceed knowing that your sizing will be spot on. Consistency is key when it comes to tension, so try to work on your cardigan during moments when you feel relaxed and focused. With your stitches practiced and your gauge perfectly verified, you are ready to start shaping the actual structure of your new garment.
Now comes the truly exciting part of our Crochet Cardigan – Tutorial, where we begin crafting the individual crochet panels that form the structure of your sweater. This specific design is incredibly beginner-friendly because it uses a classic flat-panel construction method, avoiding complex shaping or round-working. You will start by crocheting one large rectangular piece, which will serve as the entire back panel of your cardigan.
You will begin this back piece by making a foundational chain stitch sequence that matches the width of your shoulders or hips, depending on your desired fit. From there, you simply work back and forth in rows using your main stitch pattern until the piece reaches your preferred length from shoulder to hem. Keep your edges straight by counting your stitches at the end of every single row to maintain total uniformity.
Once the back panel is complete, you will move on to creating two identical, narrower rectangles which will serve as your left and right front panels. These two front pieces should be exactly the same length as your back panel, but each will be roughly half the width of the back piece. These panels will eventually frame your chest and leave a comfortable opening down the center for an open-front look or buttons.
After completing the three body sections, it is time to focus your attention on crafting the two cozy crochet sleeve panels. Sleeves can be worked as flat rectangles that taper slightly toward the wrist, or as simple straight rectangles for a modern, trendy balloon-sleeve silhouette. Make sure both sleeves are completely identical in row count so that your arms look perfectly symmetrical when you wear the cardigan.
As you finish each individual panel, it is highly recommended to block your pieces using a bit of steam or water before assembling them. Blocking crochet relaxes the yarn fibers, flattens out curled edges, and sets the final dimensions of each piece, making the upcoming assembly process infinitely easier. It is a simple extra step that separates an amateur-looking project from a genuinely high-quality, professional handmade garment.
Keep your finished panels organized in a safe, clean space where they won’t get tangled or stretched out out of shape. Labeling each panel with a small piece of paper or a distinct stitch marker can help you quickly identify them during assembly. With all five essential panels beautifully stitched, blocked, and laid out, you are ready to watch them transform into a real sweater.
The final phase of this Crochet Cardigan – Tutorial is where the magic truly happens as you transform your flat panels into a gorgeous piece of wearable fashion. To begin the garment assembly, lay your back panel flat with the right side facing up, then place the two front panels directly on top. Align the outside edges carefully, making sure the top shoulders match up perfectly before pinning them together with stitch markers.
Using your yarn needle and a long strand of matching yarn, sew the shoulder seams together using a secure whip stitch or a mattress stitch for an invisible finish. Once the shoulders are securely joined, lay the entire piece flat and align the center of your sleeves with the shoulder seams you just created. Pin the sleeves in place along the edge of the body and sew them down with smooth, even stitches.
After the sleeves are attached, fold the cardigan inside out so that the front and back pieces match up, and the sleeves are folded in half. You will now sew a continuous seam starting from the cuff of the wrist, moving all the way up the arm, and down the side of the body. Repeat this exact process on the opposite side, ensuring that you leave enough room for a comfortable, unrestrictive fit.
Now that your cardigan is fully assembled, turn it right-side out to admire the beautiful shape you have created with your own two hands. To give the piece a truly polished appearance, we will add a gorgeous crochet border or collar around the entire inner front opening. Attach your yarn at the bottom hem and work single or double crochet stitches all the way up the front panel, around the neck, and down the other side.
Adding multiple rows of ribbing around this front opening creates a cozy collar that enhances the drape and prevents the edges from curling inward over time. You can also apply this same ribbing technique to the sleeve cuffs and bottom hem if you want a more cohesive, retail-quality look. Feel free to add custom features like functional pockets, stylish buttons, or even a cozy hood to match your personal style.
Once all your seams are sewn and your borders are finished, use your yarn needle to carefully weave in any remaining loose ends of yarn. Cut the yarn tails close to the fabric, give the entire garment one final gentle steam block, and your beautiful cardigan is officially ready to wear. You have successfully navigated the entire process, creating a timeless garment that reflects your creativity, patience, and dedication.
The amount of yarn required depends heavily on the size you are making, the weight of the yarn, and the specific stitch pattern used. For a standard medium-sized cardigan using worsted weight yarn, you will generally need between 5 to 7 skeins (approximately 1,000 to 1,500 yards). Always check your specific pattern guidelines and purchase an extra skein just to be safe.
Yes, this specific flat-panel construction method is highly suitable for beginners because it eliminates complex increasing or decreasing techniques. If you know how to make a basic foundation chain, single crochet, and double crochet, you can easily complete this project. Taking it step by step and utilizing stitch markers will help you succeed with confidence.
Washing instructions depend entirely on the fiber content listed on your original yarn label. If you used premium acrylic or superwash wool, you can generally wash it on a gentle cycle in cold water, preferably inside a mesh laundry bag. For natural wool or delicate fibers, hand washing and laying the garment flat to dry is always the safest method to prevent shrinking.
To make the cardigan longer, simply add more rows to your back and front panels before moving on to the sleeve assembly. To achieve a trendy, oversized fit, you can increase the width of your panels by adding more chains to your foundation row. Always remember that altering the dimensions will require more yarn than the standard version of the project.
Uneven edges are almost always caused by accidentally dropping or adding stitches at the beginning or end of your rows. This is an incredibly common issue for crafters of all skill levels when working on large garment panels. To fix this, count your stitches at the end of every row and use stitch markers in the first and last stitches to guide you.
The mattress stitch is highly recommended for joining crochet panels because it creates an almost completely invisible, flat seam that doesn’t add extra bulk. If you prefer using your crochet hook instead of a sewing needle, you can join pieces using slip stitches. Just be sure to keep your slip stitches loose so the seams remain flexible and comfortable to wear.
In this Crochet Cardigan – Tutorial, we have explored the entire rewarding process of creating your very own stylish, handmade garment from scratch.
From selecting the perfect cozy yarn and mastering your gauge swatch to crocheting the individual panels, assembling them seamlessly, and adding beautiful finished borders, you now possess all the knowledge needed to build a wardrobe staple that will last for years to come.


