
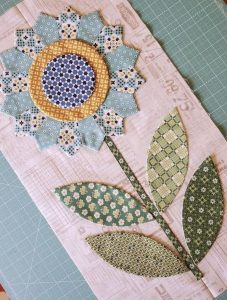
Crochet Flower - Tutorial

The Crochet Butterfly Square – Tutorial is exactly what you need if you are looking to elevate your next quilting or blanket project with a touch of whimsical, nature-inspired beauty. Combining the classic structure of a granny square with the delicate, intricate design of a winged creature, this specific pattern has taken the crafting world by storm. Whether you want to create a stunning textured afghan, a unique tote bag, or a gorgeous summer cardigan, mastering this motif will add an incredible layer of artistry to your handmade repertoire.
In this comprehensive Crochet Butterfly Square – Tutorial, we are going to break down every single step of the process so that you can tackle this project with absolute confidence. Many crocheters feel intimidated by three-dimensional or pictorial blocks, fearing that the yarn transitions or wing shapes will be too complex to manage. However, with the right guidance, clear stitch breakdowns, and a little bit of patience, you will find that this pattern is not only achievable but also incredibly addictive to crochet.
As you dive into this Crochet Butterfly Square – Tutorial, you will discover how easy it is to play with color combinations, utilize your yarn scraps, and practice essential stitching techniques. From selecting the perfect yarn weight to understanding how to seamlessly transition from the central butterfly shape into a solid square background, this guide covers it all. Get your hooks ready, choose your favorite yarn colors, and let’s explore how to create this beautiful, versatile motif together.

Selecting the right yarn and hook combination is the crucial first step to ensuring your project turns out beautifully defined and structurally sound. For this specific motif, a medium weight worsted weight yarn or a DK weight acrylic yarn is highly recommended because they offer excellent stitch definition, which makes the delicate butterfly wings stand out against the background. Cotton yarn is also a phenomenal choice if you are planning to make lightweight items like summer bags, kitchen placemats, or durable table runners.
Your choice of crochet hook size should directly correspond to the yarn weight you select, but keeping a tight, consistent tension is key to preventing the butterfly from looking sloppy. Typically, a 4.0 mm (G-6) hook or a 5.0 mm (H-8) hook works perfectly for standard medium yarns, allowing the stitches to remain firm yet flexible. Choosing the right hook ensures that your square maintains a perfectly flat shape without curling at the corners.
Color selection is where your creativity can truly shine, as the contrast between the insect and the background defines the entire look. We highly recommend using a vibrant, variegated, or solid bright color for the butterfly wings and a neutral, contrasting shade like cream, white, or charcoal gray for the outer square borders. This stark contrast creates a beautiful visual pop, making the central motif the absolute star of the show.
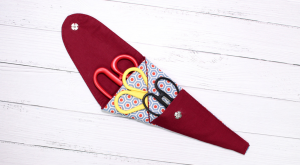
In addition to your primary yarn and hook, you will need a few essential crochet notions to make your crafting experience smooth and professional. A sharp pair of scissors and a sturdy tapestry needle are absolutely non-negotiable for weaving in the multiple yarn tails you will accumulate during color changes. Having these tools nearby will save you time and keep your workspace organized.
Using stitch markers can also be incredibly helpful, especially when you are counting the stitches along the outer edges to ensure your square remains perfectly symmetrical. It is very easy to accidentally skip a stitch when transitioning from the wing tips to the background corners, so marking your spaces is a fantastic habit. These little tools prevent mistakes before they happen.
Lastly, consider investing in a quality blocking board or a foam mat with stainless steel pins to finish your work professionally. Blocking your completed squares ensures they are all exactly the same size, with crisp, straight lines and perfect 90-degree corners. This extra step makes assembling multiple motifs into a larger blanket or garment significantly easier and cleaner.
To begin the actual construction within this Crochet Butterfly Square – Tutorial, you will start by creating the body and wings of the butterfly first. You will begin by making a slip knot and chaining a small ring, or alternatively, utilizing the magic ring technique for a completely seamless, tight center. Once your foundation loop is secure, you will work a series of chains and double crochet clusters into the center to establish the base of the body.
The body of the butterfly is typically created using a combination of slip stitches and short chains to form a delicate, elongated center line. Some advanced patterns suggest using a contrasting strand of darker yarn wrapped around the center afterwards to mimic the antenna and abdomen. For the initial rounds, however, focusing on building a stable foundation of stitches will ensure your wings sit symmetrically on both sides.
Creating the lower, smaller wings involves working half double crochets and standard double crochet stitches into the designated loops of your foundation ring. These stitches provide a soft, rounded shape that mimics the natural anatomy of a butterfly. It is essential to maintain an even tension here so that the lower wings do not overpower the upper sections of the motif.
The upper wings require a bit more height and drama, which is achieved by utilizing treble crochet stitches and strategic chain spaces. By grouping multiple treble crochets together into a single space, you create a beautiful, flared fan shape that gives the illusion of flight. This dimensional texture is what gives the project its unique, captivating look.
Once the basic wing shapes are formed, you will often work a final round of single crochet stitches around the entire perimeter of the wings in a contrasting color. This border row sharpens the edges, hides any minor structural imperfections, and creates a clean canvas for the next phase. This is the moment where your creature truly comes to life on your hook.
Pay close attention to your stitch counts at the end of this stage, ensuring that both sides of the butterfly are perfectly identical. A single missing stitch during the wing phase can cause the entire square background to warp or tilt later on. Take a moment to lay your work flat, count your loops, and admire the beautiful central insect you have just crafted.
The magic of turning a freeform shape into a usable block happens during the transition rounds, which require strategic stitch placement. To convert the irregular, rounded shape of the butterfly into a crisp four-sided geometry, you must use stitches of varying heights. You will attach your background yarn to the outer edge of a wing and begin working a combination of short and tall stitches.
To fill in the deep valleys between the wings and the body, you will use taller stitches like treble crochets or double treble crochets. Conversely, over the high peaks of the upper wings, you will use shorter stitches like single crochets or half double crochets. This clever variation in stitch height effectively levels out the uneven perimeter, creating a straight, uniform baseline.
Establishing the four distinct corners of your square is the most critical milestone of this entire transition process. Corners are traditionally formed by working a cluster of two double crochets, chain two, and two double crochets all into a single designated stitch space. These increase points push the fabric outward, forcing the circle-like shape into a definitive, sharp square.
As you work across the sides between the newly established corners, you will primarily use standard double crochet stitches to fill out the rows smoothly. It is vital to anchor these background stitches firmly into the back loops or spaces of the butterfly wings to ensure the motif remains secure. This technique gives the central butterfly a beautiful 3D effect, making it look as though it is resting on top of the fabric.
Consistency is your best friend during this phase, so make sure you are counting your side stitches between each corner space diligently. Every single side must contain the exact same number of double crochets to ensure your squares line up perfectly during assembly. If one side is shorter than the others, your finished item will puck and twist unevenly.
Once the initial transition row is complete, the subsequent rows become much easier, as you are simply following a standard granny square layout. You will work one double crochet into every stitch across the sides, and repeat your corner cluster formula in every corner space. Two or three rounds of the background color are usually sufficient to frame your butterfly gorgeously.
When it comes to putting multiple blocks together to form a larger project, the whip stitch method and the invisible mattress stitch are top choices. The whip stitch is incredibly fast and adds a rustic, handmade charm to your seams, while the mattress stitch creates a completely flat, hidden join. For a more decorative look, you can use a join-as-you-go single crochet seam to add raised texture between blocks.
Exploring unique colorways can completely transform the mood and style of your project, making each blanket or item truly one-of-a-kind. For a vintage, bohemian aesthetic, consider using muted earthy tones like mustard yellow, sage green, and terracotta orange for your wings. For a modern, vibrant look, try a monochrome palette or bright neon neon butterfly wings set against a stark, pitch-black background.
Proper care is essential to protecting your hard work and ensuring that your handmade items last for generations to come. If you used acrylic yarn, your project will be machine washable on a gentle cycle, but it should always be laid flat to dry. For delicate natural fibers like wool or cotton, hand washing in cold water with a mild wool rinse is the safest method to prevent shrinkage.
If you notice that your squares are slightly uneven or curling after assembly, a thorough steam blocking session will work wonders to relax the fibers. Hold a garment steamer or a steam iron a few inches above the fabric, being careful never to let the hot metal touch acrylic yarn directly, as it can melt. Gently pat the edges into alignment and let them cool completely.
To take your finished project to the absolute next level, consider adding a beautiful, cohesive border around the entire perimeter of your assembled blanket. A simple crab stitch border (reverse single crochet) provides a sophisticated, corded edge that frames the geometric blocks beautifully. Alternatively, a delicate shell or scallop stitch border can echo the soft, organic curves of the butterfly wings.
Never underestimate the power of documentation; take clear photos of your color combinations and write down your specific hook choices in a notebook. Sharing your progress on social media or craft blogs is a fantastic way to connect with the global crochet community and inspire others. Every square you create is a reflection of your unique creativity and dedication to the timeless art of fiber craft.
Yes, a determined beginner who is already familiar with basic stitches like single, double, and treble crochet can absolutely complete this project. The transition from the irregular butterfly shape to the straight lines of the square is the most challenging part, but following the stitch breakdowns patiently makes it highly manageable.
A single standard-sized square requires very little yarn, usually less than 30 to 40 yards total across all colors. This makes the pattern an incredible stash buster project for utilizing leftover scraps of yarn from previous, larger undertakings.
To achieve a clean color change without visible knots, introduce your new yarn color during the final pull-through of the very last stitch of your current color row. This ensures that the loop sitting on your hook is already the correct color for the upcoming round.
Curling is usually caused by tension that is too tight or a hook that is too small for the chosen yarn weight. If your block is bowing inward, try switching to a hook that is one size larger, or focus on relaxing your hands as you stitch.
Absolutely! This block is incredibly versatile and looks phenomenal when joined together to create festival tops, bohemian cardigans, tote bags, or cozy pillow covers. Just ensure your blocking is consistent so the garment hangs evenly.
When working your first background row around the wings, make sure you are anchoring your stitches deeply into the back loops or structural bars of the wing stitches. This pulls the wings flush with the background fabric, keeping them flat and secure.
In this Crochet Butterfly Square – Tutorial, we have explored everything from selecting the ideal worsted or cotton yarns to executing advanced shaping stitches and mastering the tricky transition into a perfect geometric block.
You have learned how to use stitch height variations to level out your rows, how to create flawless corners, and how to finish your work professionally with blocking and seamless joining techniques. This motif is a beautiful blend of structure and organic design that will undoubtedly add joy and color to your crafting journey.


