
Crochet Flower - Tutorial

A Crochet Heart Tutorial – Pattern is one of the most rewarding projects you can undertake, whether you are a seasoned pro or a complete beginner picking up a hook for the first time. There is something deeply personal about crafting a heart by hand, as it serves as a universal symbol of love, care, and handmade excellence. In this comprehensive guide, we will explore the intricate steps of creating various heart designs, ensuring that your finished product looks professional and polished every single time.
Mastering a Crochet Heart Tutorial – Pattern requires a basic understanding of stitches and a bit of patience, but the results are incredibly versatile. These little motifs can be used for Valentine’s Day decorations, appliqués for baby blankets, or even as stuffed 3D plushies for gifts. By following this guide, you will learn not just the “how-to,” but also the nuances of tension control and yarn selection that make a significant difference in the final aesthetic of your Crochet Heart Tutorial – Pattern.
This specific Crochet Heart Tutorial – Pattern is designed to be SEO-friendly and easy to follow, providing you with a roadmap to success. We will break down the essential terminology, from the Magic Ring to Double Crochet stitches, making sure you feel confident at every stage of the process. Grab your favorite yarn and a matching hook, and let’s dive into the wonderful world of heart-shaped crochet creations that will surely brighten anyone’s day.
To begin any successful Crochet Heart Tutorial – Pattern, you must first select the right materials. The weight of your yarn will directly determine the size of your heart; for instance, a bulky yarn will create a large, chunky heart, while embroidery floss will result in a tiny, delicate charm. Pairing your yarn with the correct hook size is crucial to ensure your stitches aren’t too loose or too tight.
The most common way to start a Crochet Heart Tutorial – Pattern is by using a Magic Ring (also known as a magic circle). This technique allows you to pull the center of your work tight, eliminating the hole that usually appears in the middle of circular projects. It provides a clean, professional finish that is essential for high-quality handmade items.
Within the Crochet Heart Tutorial – Pattern, you will frequently encounter the Chain Stitch (ch). This is the simplest stitch and acts as the “ladder” to reach the height of the next row. Most patterns will start with a series of chains if you aren’t using the magic ring method, serving as the foundation for your heart’s shape.
Another vital component of the Crochet Heart Tutorial – Pattern is the Slip Stitch (sl st). This stitch is not used to add height but rather to join rounds or move the yarn across the project without adding bulk. In heart patterns, the slip stitch is often used at the very end to create that sharp indentation at the top center of the heart.
Precision in your Crochet Heart Tutorial – Pattern comes from consistent tension. If you pull too hard, your heart might curl or look distorted; if you are too loose, the stuffing might show through if you are making a 3D version. Practicing your Single Crochet (sc) and Half Double Crochet (hdc) will help you maintain a steady rhythm.
Finally, reading a Crochet Heart Tutorial – Pattern requires familiarity with abbreviations. Most English patterns use US or UK terminology, so always check which one the designer is using. For this guide, we focus on US terms, which are the most common in the global crafting community, ensuring your Crochet Heart Tutorial – Pattern turns out exactly as pictured.
The Double Crochet (dc) is the workhorse of the Crochet Heart Tutorial – Pattern. It provides the necessary height to create the rounded “lobes” at the top of the heart. By placing multiple double crochets into the same stitch or space, you create a fan-like effect that naturally curves into the iconic heart shape.
For those looking to add even more volume, the Treble Crochet (tr) is often included in a Crochet Heart Tutorial – Pattern. This is a taller stitch that allows for a more dramatic curve. Usually, a combination of trebles and double crochets is used in a specific sequence to transition from the widest part of the heart down to the point.
The Increase (inc) technique is fundamental when following a Crochet Heart Tutorial – Pattern. Increasing means working two or more stitches into a single stitch from the previous row. This is how you expand the fabric to create the width of the heart, allowing the shape to grow outward from the center point or the starting ring.
Conversely, the Decrease (dec) or Single Crochet Two Together (sc2tog) is used in 3D Crochet Heart Tutorial – Pattern projects. This pulls two stitches into one, narrowing the fabric. This is essential for shaping the bottom point of a stuffed heart or for closing the rounds on an amigurumi-style project.
The Half Double Crochet (hdc) serves as a perfect middle ground in a Crochet Heart Tutorial – Pattern. It is taller than a single crochet but shorter than a double crochet. Designers use it to create a smooth gradient between the tall lobes of the heart and the shorter stitches near the bottom tip, ensuring a fluid silhouette.
When finishing your Crochet Heart Tutorial – Pattern, the Fasten Off technique is the final step. You must leave a long enough tail to weave in your ends securely. A well-hidden yarn tail ensures that your heart doesn’t unravel during use or washing, preserving the integrity of your Crochet Heart Tutorial – Pattern for years to come.
One way to elevate your Crochet Heart Tutorial – Pattern is by using Stitch Markers. These small tools help you keep track of the beginning of each round, which is especially important in continuous spiral patterns. Without them, it is easy to lose count, resulting in an asymmetrical heart that looks lopsided.
Selecting the right Yarn Fiber is another advanced consideration for your Crochet Heart Tutorial – Pattern. Cotton yarn provides excellent stitch definition, making the heart look crisp and sharp. Acrylic yarn is softer and more affordable, which is great for large-scale projects like a heart-themed blanket or bunting.
In a professional Crochet Heart Tutorial – Pattern, the Invisible Join is a game-changer. Instead of a standard slip stitch, this method mimics the top of a stitch, making the seam where you ended the round virtually undetectable. This is particularly useful if your heart will be viewed from both sides, like a hanging ornament.
Blocking your finished Crochet Heart Tutorial – Pattern can make a world of difference. By pinning the heart to a blocking mat and lightly steaming it or misting it with water, you can “set” the shape. This straightens out the edges and ensures the point at the bottom is perfectly sharp and the lobes are perfectly round.
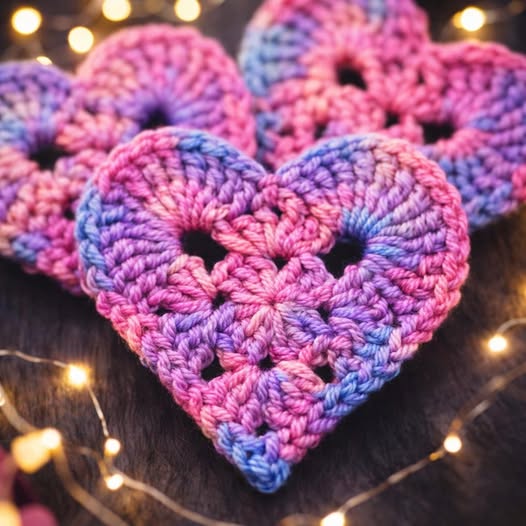
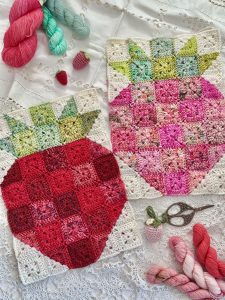
Colorwork can also be integrated into a Crochet Heart Tutorial – Pattern. You can try the Tapestry Crochet technique to create a heart pattern within a square, or use variegated yarn to give your heart a multi-colored, whimsical look. Changing colors at the right moment requires a clean transition, which is a skill every crafter should master.
If you are following a 3D Crochet Heart Tutorial – Pattern, the type of Stuffing you use matters. Polyester fiberfill is the standard, but you should be careful not to overstuff. Overstuffing stretches the stitches and can make the heart look lumpy. Aim for a firm but squishy texture to keep your Crochet Heart Tutorial – Pattern looking its best.
If your heart looks more like a circle, the issue likely lies in the Stitch Height distribution within your Crochet Heart Tutorial – Pattern. Ensure you are significantly increasing the height of the stitches at the top (using trebles or doubles) and decreasing them toward the bottom (using singles or slip stitches) to create that distinct “V” shape.
A common problem in a Crochet Heart Tutorial – Pattern is the “gap” in the middle. If you didn’t use a magic ring, your starting chain might be too loose. You can fix this by using a darning needle to sew the center hole shut using the starting yarn tail, pulling it tight to mimic the look of a magic circle.
If the edges of your Crochet Heart Tutorial – Pattern are curling inward, your Tension might be too tight. Try using a hook that is 0.5mm larger than what the yarn label recommends. This will give the stitches more room to lay flat, which is especially important for flat appliqués.
Lopsidedness in a Crochet Heart Tutorial – Pattern usually comes from an accidental skip of a stitch. Always count your stitches at the end of every round. It might seem tedious, but it is the only way to ensure that both sides of the heart are symmetrical and that the pattern remains balanced.
When the bottom point of your Crochet Heart Tutorial – Pattern isn’t sharp enough, you can add a Picot Stitch at the very tip. A picot is created by chaining two or three and then slip stitching back into the first chain. This creates a tiny point that emphasizes the heart’s bottom V-shape beautifully.
Finally, if you find the instructions in a Crochet Heart Tutorial – Pattern confusing, look for Video Demonstrations. Sometimes seeing the hand movements of a creator can clarify where exactly the hook needs to be inserted. Combining written patterns with visual aids is the fastest way to master the art of the Crochet Heart Tutorial – Pattern.
What is the best yarn for a Crochet Heart Tutorial – Pattern?
For beginners, a medium-weight (worsted) cotton or acrylic yarn is best. Cotton offers great stitch definition, while acrylic is more forgiving and has more stretch.
Can I make a Crochet Heart Tutorial – Pattern if I only know the basic stitches?
Yes! Most heart patterns use the basic stitches: chain, single crochet, and double crochet. Once you know these, you can easily follow a tutorial.
How do I make my crochet heart larger?
To make the heart larger using the same Crochet Heart Tutorial – Pattern, simply use a thicker yarn and a larger hook. Alternatively, you can add more rounds of increasing stitches around the perimeter.
Why is my crochet heart not symmetrical?
This usually happens due to uneven tension or a missed stitch on one side. Always count your stitches for each lobe to ensure they match perfectly.
What can I do with finished crochet hearts?
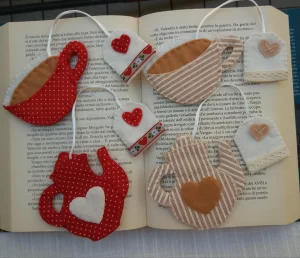
They are perfect as keychains, coasters, holiday ornaments, or sewn onto clothing and hats as cute accents.
How do I stiffen a flat crochet heart?
You can use a mixture of water and white glue, or a commercial fabric stiffener. Soak the heart, squeeze out the excess, and pin it to a flat surface until dry.
In this Crochet Heart Tutorial – Pattern guide, we have covered everything from the foundational stitches like the Magic Ring and Double Crochet to advanced finishing techniques like Blocking and the Invisible Join. Learning to create these beautiful motifs is a journey of patience and creativity.
Whether you are making a small gift for a loved one or decorating your home, the versatility of the heart shape makes it a staple in any crafter’s repertoire. By focusing on tension, stitch counting, and material choice, you can transform a simple piece of yarn into a work of art.


