
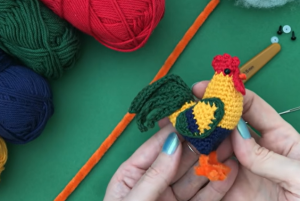
Crochet Flower - Tutorial

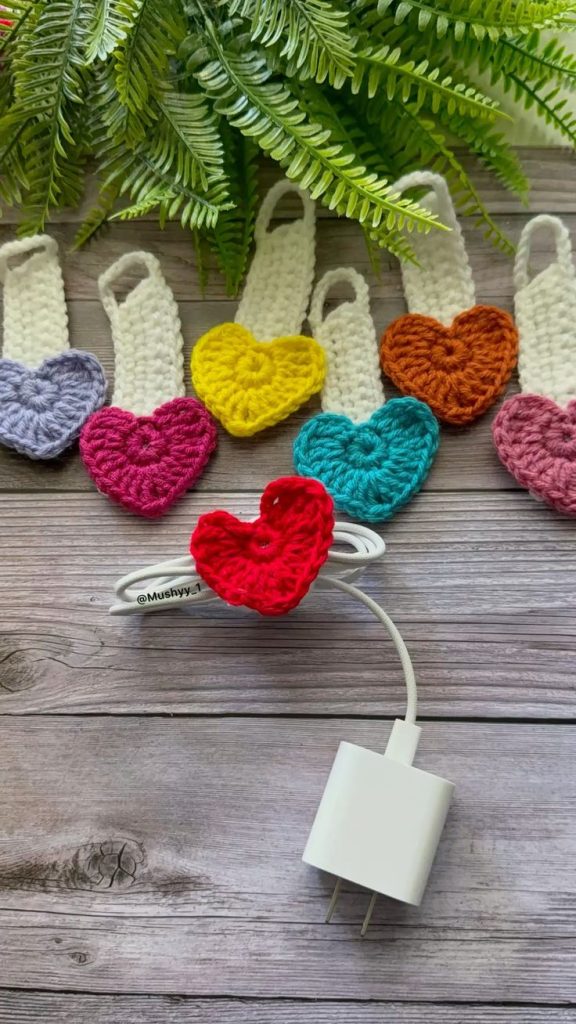
A Crochet Cord Organizer – Pattern is the perfect weekend project for anyone tired of the tangled mess of charging cables, headphones, and USB wires cluttering their workspace or bag. In our increasingly digital world, managing these accessories has become a daily struggle, but a handmade solution offers a blend of functionality and aesthetic charm that plastic ties simply cannot match. By using a Crochet Cord Organizer – Pattern, you can create a customized, eco-friendly accessory that keeps your tech organized while showcasing your crafting skills.
When you start looking for a Crochet Cord Organizer – Pattern, you’ll find that the beauty lies in its simplicity. These small but mighty items are usually worked in one piece, requiring very little yarn—making them the ultimate scrap yarn crochet project. Whether you are a seasoned pro or a beginner looking to practice basic stitches, following a dedicated Crochet Cord Organizer – Pattern ensures that your finished product is durable, stylish, and perfectly sized for various cable thicknesses.
Embracing a Crochet Cord Organizer – Pattern is also a step toward a more sustainable lifestyle. Instead of relying on disposable zip ties or cheap plastic clips, you are crafting a reusable tool that lasts for years. This article will guide you through everything you need to know about the Crochet Cord Organizer – Pattern, from selecting the right cotton yarn to mastering the buttonhole technique, ensuring your tech gear stays neat, tidy, and uniquely yours.
The foundation of any successful Crochet Cord Organizer – Pattern starts with choosing the right yarn weight. For these small items, a mercerized cotton yarn is highly recommended because it offers excellent stitch definition and does not stretch out over time. Using a Size 4 medium weight yarn or a DK weight yarn provides the necessary sturdiness to hold heavy power bricks and long cables securely.
In addition to your yarn, you will need a crochet hook that matches your yarn choice, typically a 3.5mm (E) or 4.0mm (G) hook. Using a slightly smaller hook than the yarn label suggests is a pro tip for this Crochet Cord Organizer – Pattern, as it creates a tighter tension. This ensures that the fabric density is high enough to prevent the cord from slipping through the stitches.
Don’t forget the hardware, as a Crochet Cord Organizer – Pattern usually requires a closure system. Wooden buttons, metal snaps, or even Velcro strips are popular choices. Most crafters prefer a 20mm button because it adds a rustic, handmade touch to the design. Having a tapestry needle on hand is also vital for weaving in ends and sewing your chosen fastener firmly onto the crochet fabric.
If you want to add a professional flair to your Crochet Cord Organizer – Pattern, consider using stitch markers. These are incredibly helpful for marking the spot where your buttonhole stitch begins, especially if you are working in a round or creating multiple organizers at once. Keeping your tools organized before you start makes the crocheting process much more enjoyable and efficient.
Another key component for this Crochet Cord Organizer – Pattern is a pair of sharp embroidery scissors. Since you will be working with small amounts of yarn, precision is key when finishing the piece. A clean cut ensures that your weaving-in technique stays hidden, making the final product look like it was bought from a high-end boutique rather than made from leftovers.
Finally, think about personalization when gathering materials for your Crochet Cord Organizer – Pattern. You can use variegated yarn for a splash of color or solid neutrals for a minimalist, modern tech look. Gathering all these crochet supplies beforehand ensures that once you start your Crochet Cord Organizer – Pattern, you can flow through the stitches without interruption.
The most common stitch used in a Crochet Cord Organizer – Pattern is the single crochet (sc). This stitch is favored because it creates a solid, thick texture that holds its shape well. When following a Crochet Cord Organizer – Pattern, you will likely start with a foundation chain, followed by several rows of single crochet to create a rectangular tab that wraps around your cables.
Another technique often featured in a Crochet Cord Organizer – Pattern is the half double crochet (hdc). This stitch is slightly taller than a single crochet and adds a bit of flexibility to the organizer. If you are making an organizer for thicker laptop chargers, using the hdc stitch allows the fabric to wrap more comfortably around the bulkier wire without putting too much strain on the yarn fibers.
The slip stitch (sl st) is crucial for finishing the edges of your Crochet Cord Organizer – Pattern. Many patterns suggest doing a final round of slip stitches around the entire perimeter of the piece. This “border” technique prevents the edges from curling and gives the Crochet Cord Organizer – Pattern a polished, “store-bought” appearance that enhances its overall durability.
Creating the opening for the button is perhaps the most technical part of a Crochet Cord Organizer – Pattern. This usually involves a chain space technique, where you skip a few stitches and chain the same number to create a hole. Learning how to scale this buttonhole is important; it needs to be tight enough to hold the button but loose enough for easy daily use.
For those who want a bit of texture, some Crochet Cord Organizer – Patterns incorporate the moss stitch or linen stitch. These stitches involve a combination of single crochets and chain spaces, resulting in a woven look. This not only makes the crochet cable holder look sophisticated but also adds a layer of “grip” that helps keep the organizer from sliding off the cord.
Advanced crafters might use the back loop only (BLO) technique in their Crochet Cord Organizer – Pattern. Working in the back loops creates decorative ridges that add a modern, ribbed aesthetic to the item. This simple variation can turn a basic Crochet Cord Organizer – Pattern into a stylish accessory that makes for a great handmade gift for friends and colleagues.
To begin your Crochet Cord Organizer – Pattern, start by creating a slip knot and chaining 15 to 20 stitches, depending on the size of the cable you wish to secure. This initial foundation row determines the length of your organizer. It is always better to go slightly longer than you think you need, as the yarn tension will pull the piece inward once you start adding rows.
Once your chain is ready, work one single crochet into the second chain from the hook and in each chain across. Turn your work, chain one (this is your turning chain), and continue to work rows of single crochet. For a standard Crochet Cord Organizer – Pattern, you usually need about 4 to 6 rows to achieve a width of approximately 1 to 1.5 inches, which is ideal for most cords.
In the second to last row of your Crochet Cord Organizer – Pattern, it is time to create the buttonhole. Crochet until you reach the center of the row, chain two, skip two stitches, and then continue crocheting to the end. In the final row, you will work stitches into that chain space to solidify the hole. This ensures your Crochet Cord Organizer – Pattern is functional and the hole won’t fray.
After completing the rows, do not cut the yarn immediately. Instead, work a slip stitch border around the entire rectangle. This step is often omitted in basic tutorials, but a high-quality Crochet Cord Organizer – Pattern always includes it. It adds weight to the edges and ensures that the crochet fabric doesn’t stretch out of proportion when it’s under tension from the cord.
Now, it is time for the assembly. Position your button on the opposite side of the buttonhole and sew it on using a needle and thread or a small strand of the same yarn. Make sure the button is attached securely, as it will be pulled on frequently. A well-constructed Crochet Cord Organizer – Pattern relies heavily on this anchor point to keep your electronics safe.
The final step in your Crochet Cord Organizer – Pattern is the finishing touch. Use your tapestry needle to weave in the yarn tails meticulously. If you want to go the extra mile, you can “block” your finished piece by wetting it slightly and pinning it into a perfect rectangle. This gives your Crochet Cord Organizer – Pattern a professional, crisp finish that is ready for use or gifting.
One of the best things about a Crochet Cord Organizer – Pattern is how easy it is to customize for different needs. If you have a massive power strip cable, you can simply increase the initial chain count to make a longer wrap. This flexibility makes the Crochet Cord Organizer – Pattern a universal solution for everything from tiny earbud wires to heavy-duty extension cords.
You can also experiment with color blocking in your Crochet Cord Organizer – Pattern. By switching yarn colors every two rows, you can create a striped effect that helps you color-code your cables. For example, use a red organizer for power cables and a blue one for data cables. This level of organization is made possible through the versatility of the Crochet Cord Organizer – Pattern.
For those who enjoy a more “boho” style, you can add small crochet embellishments to your Crochet Cord Organizer – Pattern. A tiny crochet flower or a star appliqué sewn onto the front of the organizer adds personality. Since the base Crochet Cord Organizer – Pattern is so simple, it acts as a blank canvas for your creative expression and artistic flair.
If you prefer a closure without a button, you can adapt the Crochet Cord Organizer – Pattern to use a toggle or a bead. Some patterns even suggest using a crochet loop made entirely of yarn, which is a great option if you don’t have any hardware on hand. Adapting the Crochet Cord Organizer – Pattern to what you have available is a key skill in sustainable crafting.
Another way to scale the Crochet Cord Organizer – Pattern is by changing the yarn fiber. While cotton is best for durability, using a soft wool blend can create a more luxurious feel for items like high-end headphone cables. Just be aware that animal fibers may stretch more than plant fibers, so adjust your stitch gauge accordingly when following the Crochet Cord Organizer – Pattern.
Finally, consider making a “set” of these organizers. A Crochet Cord Organizer – Pattern can be used to create a matching collection for a travel bag. By making three or four organizers in varying sizes but the same color, you create a cohesive travel organization kit. This makes the Crochet Cord Organizer – Pattern not just a single project, but a comprehensive solution for digital clutter.
What is the best yarn for a Crochet Cord Organizer – Pattern?
The best yarn is 100% cotton or a cotton blend. Cotton is less stretchy than acrylic or wool, ensuring the Crochet Cord Organizer – Pattern stays tight around your cables. It is also very durable and can handle frequent handling.
How long does it take to finish a Crochet Cord Organizer – Pattern?
Because of its small size, an experienced crocheter can finish one in about 15 to 20 minutes. Beginners might take 30 to 45 minutes. It is a perfect quick crochet project for those with limited time.
Can I wash my crochet cord organizer?
Yes! If you use cotton yarn, you can easily hand wash the organizer or put it in a mesh laundry bag in the washing machine. This is one of the main benefits of using a Crochet Cord Organizer – Pattern over plastic alternatives.
What if my button is too small for the buttonhole?
If the hole in your Crochet Cord Organizer – Pattern is too large, you can “sew” it slightly smaller using a piece of yarn and a tapestry needle. Alternatively, you can replace the button with a larger one to ensure a secure fit.
Is this pattern suitable for complete beginners?
Absolutely. The Crochet Cord Organizer – Pattern only requires knowledge of the chain and single crochet stitches. It is often recommended as one of the first projects for someone learning how to crochet.
Can I sell items made from this Crochet Cord Organizer – Pattern?
Most designers allow you to sell finished products made from their patterns as long as you give credit. These organizers are very popular at craft fairs and in Etsy shops because they are practical and affordable.
Mastering the Crochet Cord Organizer – Pattern is a rewarding way to bring order to your digital life while enjoying the meditative process of crochet. We have covered everything from selecting the right sturdy cotton yarn and crochet hooks to executing the perfect single crochet stitch and buttonhole technique. This project is a testament to how a small amount of creativity and a few scraps of yarn can solve a common everyday problem like tangled wires.
By following this Crochet Cord Organizer – Pattern, you now have the tools to create a functional, stylish, and eco-friendly accessory. Whether you are making them for yourself, as gifts, or to sell, these organizers are sure to be a hit. Remember to experiment with different sizes and colors to find the perfect fit for all your tech accessories.


