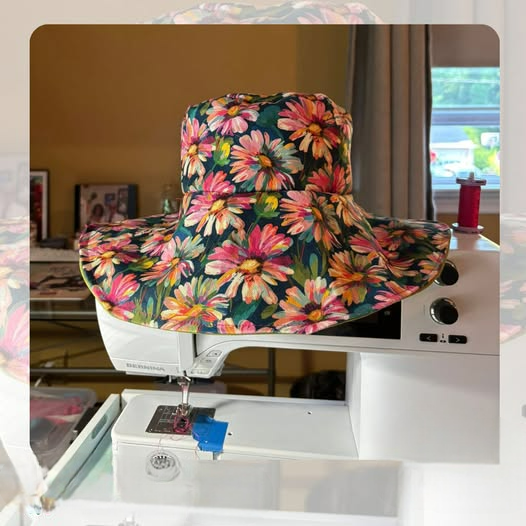
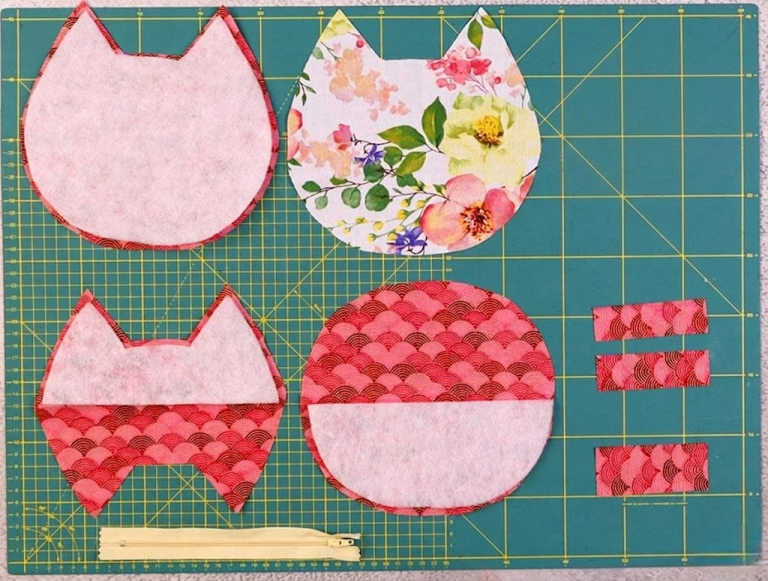
Fabric Hat - Tutorial

The Padded Trivet – Tutorial you are about to explore is the perfect project for anyone looking to combine kitchen utility with a touch of handmade charm. Creating a Padded Trivet is not just about protecting your dining table from heat; it is an opportunity to practice your sewing skills while utilizing fabric scraps or upcycled denim to create something truly durable. This tutorial is designed to guide you through every stitch, ensuring that your finished product is both thick enough to insulate and stylish enough to complement your home decor.
Whether you are an experienced quilter or a beginner looking for a weekend project, this Padded Trivet – Tutorial offers a rewarding experience that yields immediate results. A trivet is essentially a heavy-duty coaster for pots and pans, and when we add the “padded” element, we are focusing on heat resistance and structural integrity. By following this step-by-step guide, you will learn how to layer materials properly to ensure your surfaces remain safe from high temperatures while adding a personalized aesthetic to your kitchen.
In this comprehensive Padded Trivet – Tutorial, we will dive deep into the world of textile crafts, focusing on patchwork techniques and insulated batting. Understanding the balance between aesthetics and functionality is key when working on kitchen accessories. We have optimized this guide with the best SEO strategies and handmade craft tips to help you master the art of the padded trivet, making it an ideal gift for friends or a staple item for your own culinary space.

Choosing the right fabric is the foundation of any successful sewing project. For a Padded Trivet, you should prioritize natural fibers like 100% cotton, as synthetic materials can melt when exposed to high heat. Many crafters enjoy using denim scraps or heavy canvas for the outer layers because these materials offer natural durability and a rustic look that fits perfectly in modern or farmhouse-style kitchens.
The “padded” part of this Padded Trivet – Tutorial relies heavily on the internal stuffing. To make a truly functional heat-resistant barrier, you should use Insul-Bright or a similar heat-resistant batting. This specialized material contains a thin layer of metalized polyester film that reflects heat back toward the source, protecting your delicate wooden or glass tables from thermal damage.
In addition to your main fabric and batting, you will need standard sewing notions. This includes high-quality cotton thread, sharp fabric shears, and a quilting ruler for precise measurements. Having a rotary cutter and a cutting mat can significantly speed up the process, especially if you plan on making multiple trivets as part of a set for a holiday gift or a craft fair display.
Don’t forget the importance of interfacing if you are using thinner cotton fabrics. While the padding provides the bulk, a light layer of fusible interfacing can help the outer fabric maintain its shape over time, especially after multiple trips through the washing machine. This tutorial emphasizes longevity, so taking these small extra steps will ensure your handmade trivet lasts for years of daily use.
For the finishing touches, you might want to consider adding a hanging loop. A simple strip of bias tape or a folded piece of your main fabric can be sewn into the corner, allowing you to hang your Padded Trivet on a wall hook. This not only keeps your kitchen organized but also turns your handicraft into a piece of functional wall art when it is not being used on the table.
Finally, ensure your sewing machine is fitted with a needle appropriate for multiple layers. A 90/14 or 100/16 needle is usually best for sewing through the “sandwich” of fabric and thick padding. This Padded Trivet – Tutorial is designed to be accessible, but having the right tools prepared beforehand will prevent skipped stitches and broken needles, making your DIY experience much more enjoyable.
The core concept of a Padded Trivet is the “quilt sandwich” method. This involves placing your batting between two layers of fabric, creating a three-layer structure that is then held together by quilting stitches. In this tutorial, we focus on a square design, which is the easiest for beginners to master while providing ample surface area for large soup pots or casserole dishes.
When we talk about the Padded Trivet – Tutorial process, we must mention seam allowance. Consistency is vital in textile arts; using a standard 1/4-inch seam allowance ensures that all your edges line up perfectly. If your layers are particularly thick, you might want to increase this slightly to 1/2-inch to give the fabric room to “turn” without creating unsightly bulges at the corners.
The padded aspect isn’t just for heat; it also provides a soft landing for heavy cookware. By using patchwork techniques, you can create the top layer from several different fabric strips, making each trivet unique. This tutorial encourages creativity—feel free to experiment with half-square triangles or simple granny square patterns if you want to incorporate a bit of traditional quilting into your project.
Another important term in this Padded Trivet – Tutorial is “quilting in the ditch.” This refers to sewing directly into the seams of your patchwork to secure the layers together without the stitches being highly visible. Alternatively, you can use decorative stitches or a simple grid pattern to add visual interest and ensure the heat-resistant padding doesn’t shift or bunch up during washing.
Properly clipping your corners is a professional secret for achieving sharp, crisp edges. Once you have sewn around the perimeter of your trivet (leaving a small gap for turning), you should trim the excess fabric at the corners diagonally. This reduces bulk, allowing the corner to push out fully into a perfect 90-degree angle, which is a hallmark of high-quality handmade kitchenware.
To finish the construction, you will perform a topstitch around the entire edge. This not only closes the opening used for turning the trivet right-side out but also gives the item a polished, store-bought appearance. In this Padded Trivet – Tutorial, we recommend a slow and steady pace during topstitching to ensure your lines are straight and professional, as this is the most visible part of the sewing.
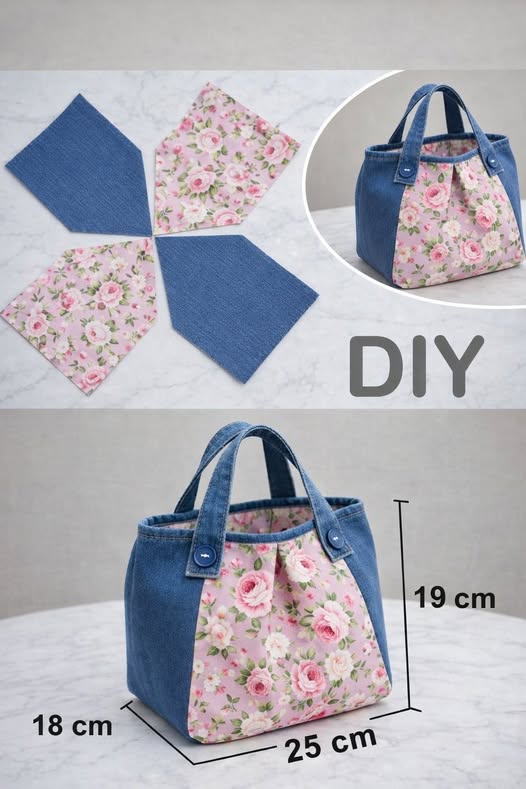
The first step in our Padded Trivet – Tutorial is the cutting phase. You will need to cut two 10-inch squares of your outer fabric and one 9.5-inch square of your insulated batting. Cutting the batting slightly smaller than the fabric helps reduce bulk in the seams, making it much easier to sew the final edges and achieve a flat, even surface for your pots to rest on.
Next, lay your batting on the wrong side of one fabric square and secure it with quilting pins or fabric glue. If you are following the patchwork route, you would assemble your top square first before layering. This Padded Trivet – Tutorial favors the “envelope method,” where the two fabric squares are placed right-sides together with the batting on top, creating a stack that is easy to manage under the presser foot.
Sew around three and a half sides of the square, making sure to backstitch at the beginning and end. The opening should be about 3 inches wide—large enough to pull the fabric through but small enough to close easily later. As you follow this tutorial, remember that the padded layers can be slippery, so using a walking foot on your sewing machine can help feed the layers through evenly.
Once you have turned the trivet right-side out, use a blunt tool like a knitting needle or a “point turner” to gently push out the corners. Press the entire project with a hot iron to flatten the seams. This Padded Trivet – Tutorial emphasizes the importance of pressing; it is the difference between a project that looks “homemade” and one that looks “handmade” with professional precision.
Now it is time for the quilting. You can sew a simple “X” from corner to corner or a series of parallel lines. This step is crucial because it bonds the insulated batting to the fabric. Without these stitches, the padding would eventually fold over inside the fabric, ruining the trivet’s ability to protect your table and making it difficult to balance a pot on top.
The final step in this Padded Trivet – Tutorial is to hand-sew the opening shut using a ladder stitch (also known as an invisible stitch), or simply topstitch 1/8-inch from the edge around the entire square. Congratulations! You have successfully completed your Padded Trivet. You can now repeat this process to create a matching set, perhaps experimenting with different color palettes or fabric textures.
If you are a content creator sharing this Padded Trivet – Tutorial on your own blog, you need to focus on SEO optimization. Use keywords like “easy sewing project,” “DIY kitchen decor,” and “handmade gift ideas” throughout your post. Providing clear, high-resolution photos of each step will keep readers on your page longer, which is a positive signal for search engine rankings.
Maintenance of your Padded Trivet is quite simple, but it is important to communicate this to your audience or gift recipients. Because we used 100% cotton and heat-resistant batting, these items are generally machine washable. However, to preserve the life of the padded interior, we recommend washing on a gentle cycle and laying them flat to dry rather than using a high-heat dryer setting.
For those interested in sustainable crafting, this Padded Trivet – Tutorial is a goldmine. You can market these as “Eco-friendly Kitchen Solutions” by using recycled textiles. Upcycling old clothing into functional home items is a huge trend in the DIY community, and it adds a layer of “storytelling” to your products that mass-produced items simply cannot compete with.
When writing your own articles or social media captions about this tutorial, remember to use H2 headers and bullet points to make the content scannable. Search engines love well-structured data. Additionally, including a video tutorial or a Pinterest-friendly image can significantly increase your reach, as the crafting niche is highly visual and thrives on platforms like Instagram and TikTok.
Always encourage your readers to customize their Padded Trivet. Suggest adding embroidery, using variegated thread, or even trying different shapes like circles or hexagons. This engagement helps build a community around your handicraft blog, turning a simple Padded Trivet – Tutorial into a source of inspiration for a wide variety of creative projects.
Finally, keep an eye on AdSense policies by ensuring your content is original, helpful, and free from prohibited topics. By providing a genuine, high-quality Padded Trivet – Tutorial, you are creating “evergreen content” that will continue to attract traffic for years. Quality handmade tutorials never go out of style, as there is always someone new looking to learn the beautiful art of sewing.
What is the best fabric for a Padded Trivet?
The best fabric is always 100% cotton. Avoid polyester or synthetic blends, as they can melt or scorch when a hot pan is placed on them. Heavyweight fabrics like denim or canvas are excellent for the base.
Can I use regular polyester batting for the padding?
While you can use it, it is not recommended for high heat. Regular polyester batting can flatten or melt over time. For the best results in this Padded Trivet – Tutorial, use batting specifically designed for heat resistance, like Insul-Bright.
How do I clean my handmade Padded Trivet?
You can machine wash them on a cold, gentle cycle. It is best to air dry them to maintain the shape and integrity of the internal padding. If they get wrinkled, a quick press with a steam iron will make them look brand new.
Is this project suitable for absolute beginners?
Yes! This is one of the best projects for beginners because it involves straight lines and basic “sandwich” construction. It is a great way to practice topstitching and quilting without committing to a full-sized quilt.
How many layers of batting should I use?
Usually, one layer of insulated batting plus one layer of cotton batting is the perfect combination. This provides enough thickness to protect the table while keeping the trivet flexible enough to be stored easily.
What size should a standard trivet be?
A standard size is between 8 and 10 inches square. This size accommodates most medium to large pots. You can easily adjust the measurements in this Padded Trivet – Tutorial to create larger ones for baking sheets or smaller ones for tea kettles.
In this Padded Trivet – Tutorial, we have covered everything from selecting the right heat-resistant materials to the final topstitching techniques that give your project a professional finish. We learned that the key to a functional trivet lies in using 100% cotton fabrics and specialized insulated batting to protect your home surfaces. By following the structured steps provided, you now have the skills to create beautiful, durable, and sustainable kitchen accessories that reflect your personal style.
We hope this guide has inspired you to dive into your fabric stash and start sewing! Whether you are making these for your own home or as thoughtful handmade gifts, the Padded Trivet is a classic project that never fails to please.