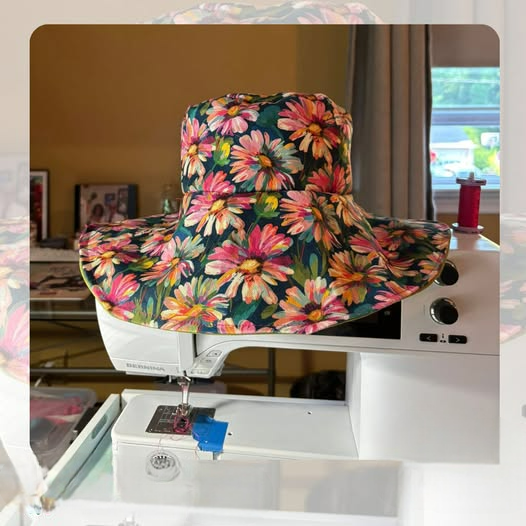
Fabric Hat - Tutorial

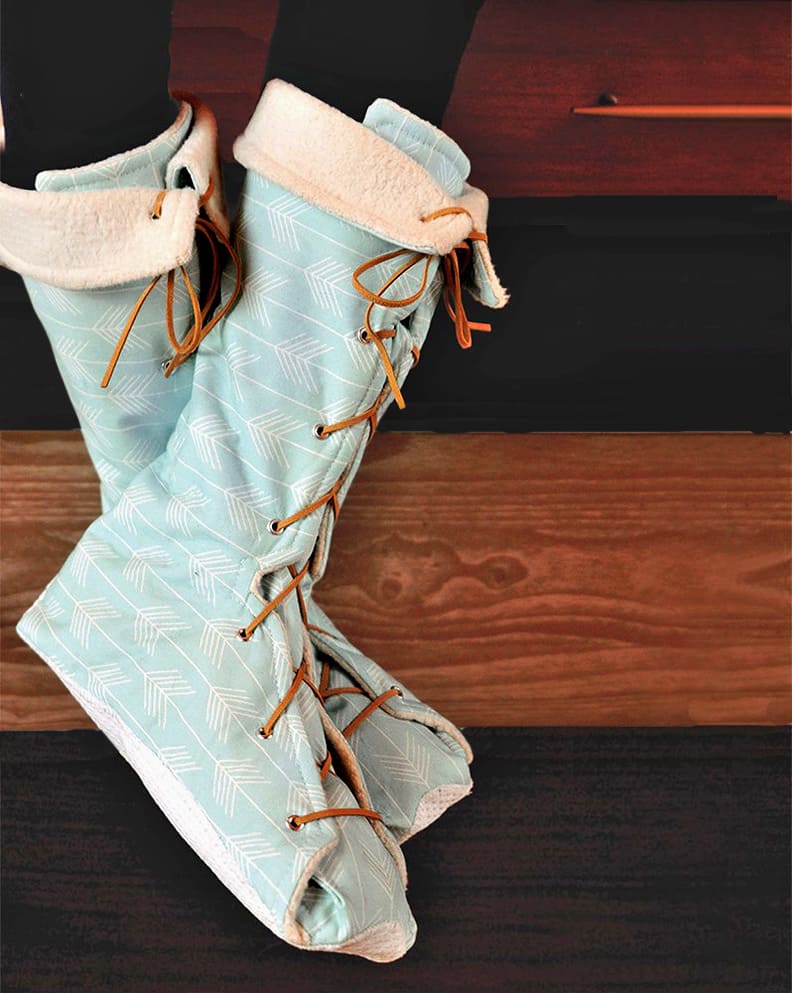
Moccasin Slippers – Tutorial is the ultimate guide for anyone looking to combine comfort with the timeless art of handmade footwear. Creating your own footwear might seem daunting at first, but with this detailed Moccasin Slippers – Tutorial, you will discover that the process is both rewarding and surprisingly accessible for crafters of all levels. There is nothing quite like the feeling of sliding your feet into a pair of custom-made slippers that have been tailored specifically to your size and style preferences.
This Moccasin Slippers – Tutorial focuses on the intersection of traditional design and modern durability, ensuring that your finished project isn’t just beautiful but also functional for daily use around the house. By following the steps outlined in this comprehensive guide, you will learn how to select the best materials, master the essential stitching techniques, and assemble a pair of high-quality moccasins. The goal is to provide a humanized crafting experience that prioritizes clarity and professional results for your DIY wardrobe.
In the world of textile arts and handmade accessories, the Moccasin Slippers – Tutorial serves as a foundational project that introduces you to working with thicker fabrics or leather-like materials. Whether you are an experienced sewist or a beginner looking for a weekend project, these DIY slippers offer a perfect canvas for creativity. We will explore how to optimize your workflow and ensure your project meets the highest standards of creative craftsmanship while keeping the assembly process simple and enjoyable.
To begin your Moccasin Slippers – Tutorial, the first step is gathering the correct materials to ensure longevity and comfort. You will need a sturdy base material, such as soft leather, heavy-duty felt, or synthetic suede, which provides the classic moccasin look while being easy to manipulate. Choosing a breathable fabric for the lining is also crucial, as it keeps your feet warm without causing overheating during extended wear.
Preparation is key to a successful DIY footwear project, so ensure you have high-quality waxed thread and a leather needle. These tools are specifically designed to pierce through thicker layers without breaking, which is a common challenge in shoe making. A sharp pair of fabric shears or a rotary cutter will help you achieve the clean edges necessary for a professional-looking Moccasin Slippers – Tutorial result.
Don’t forget to include cushioning inserts or a layer of high-density foam for the inner sole to provide extra support. Many crafters following this Moccasin Slippers – Tutorial prefer to use a non-slip material for the outer sole to increase safety on hardwood or tiled floors. Organizing your workspace before you start will make the assembly process much smoother and more efficient.
The pattern you choose for your Moccasin Slippers – Tutorial should be scaled accurately to your foot measurements to avoid a fit that is too tight or too loose. It is highly recommended to create a paper template first, allowing you to trace the shapes onto your fabric with precision. Using tailor’s chalk or a disappearing ink pen ensures that your markings stay invisible on the finished product.
Once your pieces are cut, take a moment to finish the edges if you are using a fabric that tends to fray. This attention to detail is what separates a basic craft project from a high-end handmade accessory. This Moccasin Slippers – Tutorial encourages you to double-check the symmetry of your left and right foot pieces before moving on to the actual sewing phase.
Finally, consider the aesthetic details like decorative stitching or adding a fleece lining for a more luxurious feel. The beauty of this Moccasin Slippers – Tutorial is that it allows for complete customization, letting you choose colors and textures that reflect your personal style. Having all your supplies ready will allow you to focus entirely on the creative and technical aspects of the build.
The heart of the Moccasin Slippers – Tutorial lies in the assembly of the “vamp” (the top part of the shoe) to the sole. You will typically start by pinning the center of the toe area to the center of the sole to maintain alignment. Using a whipstitch or a blanket stitch is the most traditional way to join these sections, providing both strength and a classic handmade aesthetic.
As you move through this Moccasin Slippers – Tutorial, remember to keep your tension consistent to avoid puckering the material. If you are working with leather, using a stitching pony or a set of clamps can help hold the pieces in place while you work. This stage requires patience, as the curved edges around the toe box need careful manipulation to ensure a smooth, rounded finish.
The heel section is the next focus of our Moccasin Slippers – Tutorial, where you will close the back seam to create the structure of the slipper. A reinforced backstitch is recommended here, as the heel experiences the most stress when you are putting the slippers on or taking them off. Ensuring a flush seam at the back will prevent irritation against your skin and improve the overall comfort.
Once the main structure is joined, this Moccasin Slippers – Tutorial moves into the finishing of the ankle opening. You can create a simple fold-over cuff or add a contrast trim to give the slippers a more defined look. If you are adding laces or ties, make sure to punch the holes evenly around the collar to allow for a snug, adjustable fit that keeps the moccasins secure.
Working with natural fibers or leather means the material will “give” slightly over time, so don’t be worried if the fit feels a bit snug initially. This Moccasin Slippers – Tutorial is designed to create a pair of shoes that molds to the unique shape of your feet through regular use. High-quality stitching techniques ensure that the seams remain intact even as the fabric stretches and settles.
The final part of the assembly in this Moccasin Slippers – Tutorial involves inserting the inner lining and the padded sole. Secure these in place with a few hidden stitches or a fabric-safe adhesive to prevent them from sliding around. Taking the time to hide your knots inside the lining will give your handmade moccasins a clean, store-bought quality that you can be proud of.
When sharing your version of the Moccasin Slippers – Tutorial online, it is important to understand the basics of SEO for crafters. Using descriptive titles and relevant keywords helps search engines understand your content, making it easier for other enthusiasts to find your work. This Moccasin Slippers – Tutorial demonstrates how to integrate terms naturally within a narrative to maintain a high-quality user experience.
Structuring your digital content with H2 headings and bullet points improves readability, which is a key factor in keeping visitors engaged on your page. By providing a valuable resource like this Moccasin Slippers – Tutorial, you establish authority in the crafting niche. Remember that image alt-text and meta descriptions are also vital components of a successful SEO strategy for any blog or website.
In the competitive world of online tutorials, offering a unique perspective or a simplified method can set your content apart. This Moccasin Slippers – Tutorial emphasizes the human element, speaking directly to the maker’s journey and the satisfaction of creating something from scratch. Authentic engagement and clear instructions are the best ways to build a loyal community around your creative brand.
Using internal links to other related projects, such as a crochet slipper guide or a sewing basics article, can keep your audience exploring your site for longer. This Moccasin Slippers – Tutorial is a great example of “evergreen content,” meaning it remains relevant and useful to readers for years to come. Investing time in keyword research ensures that your hard work reaches the widest possible audience.
Don’t forget the importance of mobile optimization, as many crafters follow tutorials on their phones or tablets while they work in their studios. A clean layout without intrusive pop-ups makes this Moccasin Slippers – Tutorial more accessible and user-friendly. High-resolution photos showing close-up details of the stitching will also improve the “time on page” metric for your site’s SEO.
Finally, encouraging social sharing and comments can boost your visibility in search results. When people interact with your Moccasin Slippers – Tutorial, it signals to search engines that your content is helpful and trustworthy. Building a digital presence in the hobby community requires a balance of technical knowledge and a genuine passion for sharing the joy of making.
After completing your Moccasin Slippers – Tutorial, knowing how to care for your new footwear is essential for their longevity. If you used leather, applying a leather conditioner every few months will keep the material supple and prevent cracking. For fabric or felt versions, a gentle spot cleaning with a damp cloth and mild soap is usually sufficient to keep them looking fresh.
Customization is where you can truly let your personality shine through this Moccasin Slippers – Tutorial. You might consider adding embroidery designs, beadwork, or even a monogram to the vamp of the slipper. These personal touches turn a standard pair of house shoes into a meaningful gift or a cherished personal accessory that tells a story of your crafting skills.
If you find that the soles wear down after heavy use, this Moccasin Slippers – Tutorial can be easily adapted to include a replaceable outer sole. Simply unstitch the bottom and attach a new piece of leather or rubber to extend the life of your slippers. This sustainable approach to fashion is one of the many benefits of learning how to make your own clothes and accessories.
Seasonal adjustments are another way to utilize the skills learned in this Moccasin Slippers – Tutorial. You can make a lightweight linen version for the summer months or a double-insulated version for the winter. Experimenting with different textures and weights will help you understand how different materials behave during the sewing and assembly process.
For those interested in the business of crafting, creating a signature style of moccasin based on this Moccasin Slippers – Tutorial can be the start of a small Etsy shop. Consistently high quality and attention to detail are what customers look for in artisan footwear. Your ability to explain the process through a tutorial format also helps build trust with potential buyers who appreciate the work involved.
Always remember that every pair you make is an opportunity to refine your technique. Use the knowledge gained from this Moccasin Slippers – Tutorial to experiment with different sizes, from tiny baby moccasins to sturdy versions for adults. The versatility of this pattern makes it a staple in any maker’s library, offering endless possibilities for creativity and comfort.
What is the best material for beginners in this Moccasin Slippers – Tutorial?
For those new to the Moccasin Slippers – Tutorial, a heavy wool felt or a soft synthetic suede is highly recommended. These materials are easier to sew with a standard needle than thick genuine leather, and they don’t require specialized tools for punching holes.
Do I need a sewing machine for this Moccasin Slippers – Tutorial?
No, this Moccasin Slippers – Tutorial is designed specifically for hand-stitching. Hand-sewing gives you much better control over the curves of the shoe and allows for the traditional moccasin aesthetic that is difficult to replicate with a machine.
How do I ensure the slippers aren’t slippery on tile floors?
To make your project from this Moccasin Slippers – Tutorial safer, you can apply a few dots of puffy fabric paint or silicone sealant to the bottom of the soles. Alternatively, you can sew on a small patch of non-slip rubberized fabric specifically designed for slipper soles.
Can I wash my moccasin slippers in a washing machine?
If you used leather or suede for your Moccasin Slippers – Tutorial, you should never put them in the washing machine as it will ruin the material. For fabric or wool versions, hand-washing in cold water and air-drying is the safest method to maintain the shape and integrity of the stitching.
How long does it take to complete one pair of slippers?
A typical crafter can complete the Moccasin Slippers – Tutorial in about 3 to 5 hours, depending on their experience level and the complexity of any decorative details added. It is a perfect one-day project for a relaxing weekend.
How do I get the right size for my foot?
The best way to size your project in this Moccasin Slippers – Tutorial is to trace your foot onto a piece of paper while wearing a sock. Add a half-inch margin around the entire silhouette to account for the seam allowance and the thickness of the material.
This Moccasin Slippers – Tutorial has provided you with a comprehensive roadmap to creating your own comfortable, stylish, and durable indoor footwear. We have covered everything from the initial selection of materials and preparation to the intricate stitching techniques required to assemble a professional-looking pair of moccasins.
By focusing on SEO-friendly content and humanized instructions, this guide aims to support your growth as a maker while providing a functional item you can use every day. Remember that the key to success in any DIY project is patience and a willingness to experiment with different textures and styles.