
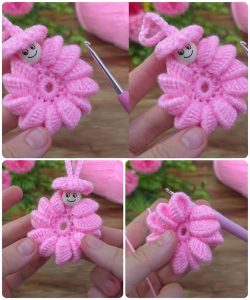
Crochet Flower - Tutorial

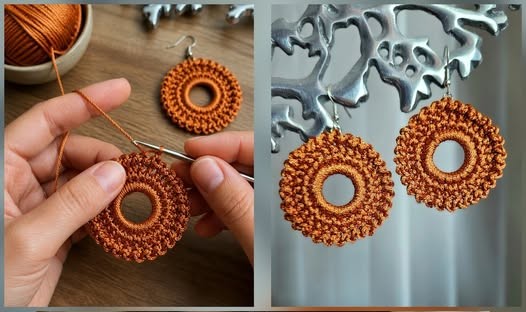
Crochet Earrings – Tutorial is your ultimate guide to creating stunning, lightweight, and personalized jewelry that stands out in any crowd. Handcrafted accessories have taken the fashion world by storm, and learning how to master a Crochet Earrings – Tutorial allows you to blend traditional craftsmanship with modern style. Whether you are looking to create a thoughtful gift or expand your own collection, these tiny masterpieces offer a perfect canvas for your creativity and skill.
Diving into a Crochet Earrings – Tutorial is remarkably rewarding because it requires very little yarn and can be completed in a single sitting. Unlike larger projects like blankets or sweaters, handmade jewelry provides instant gratification and allows you to experiment with intricate micro-crochet techniques without a massive time commitment. Many crafters find that making crochet earrings is the perfect way to use up those beautiful scrap yarns that are too small for anything else but too pretty to throw away.
To succeed with this Crochet Earrings – Tutorial, you will need to focus on precision and tension, as working with smaller hooks and fine crochet thread requires a steady hand. By following the steps outlined in this guide, you will learn how to transform simple crochet stitches into elegant geometric shapes, floral motifs, and bohemian dangles. Let’s explore the essential components, techniques, and finishing touches that will elevate your DIY jewelry projects to a professional level.
Starting your journey with a Crochet Earrings – Tutorial begins with gathering the right high-quality supplies to ensure your jewelry is durable and skin-friendly. Unlike standard projects, you will typically use lace weight yarn or size 10 crochet thread, which provides the delicate structure needed for wearable art. Choosing a mercerized cotton thread is often recommended because it has a slight sheen and holds its shape better than standard wool or acrylic blends.
The heart of any Crochet Earrings – Tutorial is the crochet hook, which must be significantly smaller than what you might use for a scarf. A steel crochet hook ranging from 1.0mm to 1.75mm is ideal for achieving the tight, crisp stitches required for micro-crochet. Using a hook that is too large will result in a floppy earring that loses its definition once hung from the ear, so always check your gauge before starting.
In addition to thread and hooks, you will need jewelry hardware such as fishhook ear wires, jump rings, and occasionally headpins. It is vital to choose hypoallergenic earring hooks, such as those made from sterling silver or stainless steel, to prevent skin irritation for the wearer. Having a pair of jewelry pliers (needle-nose and round-nose) on hand is also essential for opening and closing jump rings securely during the assembly phase.
A Crochet Earrings – Tutorial also benefits from various embellishments that add personality and flair to your finished pieces. Glass seed beads, freshwater pearls, or even small metallic charms can be integrated into your stitches to create a more sophisticated look. If you plan on adding beads, remember to string them onto your thread before you start crocheting, unless you are using a very tiny hook to pull the thread through the bead.
Stability is a common concern in any Crochet Earrings – Tutorial, as thin thread can sometimes curl or lose its form over time. To combat this, many professional makers use a fabric stiffener or a mixture of water and white glue to block their earrings once finished. This process ensures that your crochet patterns remain flat and display their intricate details clearly while being worn, giving them a high-end, store-bought finish.
Finally, don’t forget the basic tools like a sharp pair of embroidery scissors and a fine tapestry needle for weaving in those tiny ends. Because the scale is so small, hiding your yarn tails is a crucial skill in this Crochet Earrings – Tutorial to ensure the back of your earring looks just as neat as the front. Once you have your kit ready, you are prepared to dive into the technical side of creating beautiful fiber art jewelry.
The first step in mastering a Crochet Earrings – Tutorial is understanding how to manipulate standard stitches on a much smaller scale. The magic ring (or magic circle) is perhaps the most important technique to learn, as it allows you to start circular earrings without leaving a hole in the center. This creates a professional, seamless look for floral crochet earrings or sunburst motifs that are popular in modern fashion.
Most designs in a Crochet Earrings – Tutorial rely on the single crochet (sc) and slip stitch (sl st) to build structure and shape. Because the thread is thin, the single crochet stitch creates a dense fabric that holds its shape well, while the slip stitch is perfect for moving across a row or creating decorative borders. Maintaining consistent tension is the secret to making sure your left and right earrings are identical in size and appearance.
To add height and variety to your Crochet Earrings – Tutorial, you will frequently use half double crochet (hdc) and double crochet (dc) stitches. These longer stitches are excellent for creating “petals” or “fans” that give your jewelry a lacy, bohemian vibe. When working with fine thread, these stitches appear much more delicate than they do in chunky yarn, allowing for complex geometric crochet designs that look like fine lace.
Another advanced technique often featured in a Crochet Earrings – Tutorial is the picot stitch, which creates small decorative points along the edge of your work. This is a favorite for vintage-style earrings and snowflake designs, adding a touch of elegance and intricacy. Learning how to place a picot precisely can transform a simple circle into a sophisticated starburst or a scalloped edge that catches the light beautifully.
Color changes are also a great way to enhance your Crochet Earrings – Tutorial without adding bulk to the project. By switching thread colors mid-row, you can create ombre effects or vibrant contrasts that make your handmade earrings pop. Since you are working with such small amounts of material, you can afford to use premium, hand-dyed threads to achieve unique colorways that aren’t available in mass-produced jewelry.
Lastly, this Crochet Earrings – Tutorial emphasizes the importance of “working in the round” versus “working in rows.” Most earrings are worked in the round to create circles, squares, or hexagons, but some fringe crochet earrings are worked in rows to create movement and flow. Understanding how to read crochet diagrams for small motifs will significantly speed up your learning process and open up a world of endless design possibilities.
Once you have completed the crocheted portion of your Crochet Earrings – Tutorial, the next phase is assembly, which bridges the gap between a piece of lace and a piece of jewelry. Start by weaving in all loose ends very carefully using your fine darning needle. In a project this small, any visible knots or tails can ruin the aesthetic, so take your time to hide the thread within the densest part of your crochet stitches.
Blocking is a vital step in this Crochet Earrings – Tutorial that many beginners skip, but it makes a world of difference. To block your earrings, pin them onto a foam board in their desired shape while they are slightly damp or coated in stiffening solution. Allow them to dry completely—usually overnight—to ensure they maintain their crisp edges and don’t curl when they hit the humidity of the air or the warmth of the skin.
After the pieces are dry and stiff, this Crochet Earrings – Tutorial moves into the hardware stage where you will attach the ear wires. Using your needle-nose pliers, gently twist the loop of a jump ring sideways to open it (never pull it apart, as this weakens the metal). Slide the jump ring through the top stitch of your crochet motif and then through the loop of the earring hook before twisting it back into its original position.
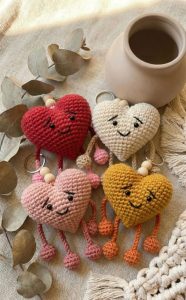
If your Crochet Earrings – Tutorial design includes beads or dangles, this is the time to add them using headpins. Slide your bead onto the pin, use your round-nose pliers to create a small loop at the top, and trim the excess wire. These dangles can then be attached to the bottom of your crochet motif using another jump ring, adding weight and movement to the finished fiber jewelry.
Quality control is an essential part of any Crochet Earrings – Tutorial. Hold both earrings up side-by-side to ensure they are symmetrical; if one is slightly larger, you may need to adjust your tension or add a small amount of fabric stiffener to reshape it. Check that all jump rings are closed tightly with no gaps, as thin thread can easily slip through a poorly closed ring, causing you to lose your hard work.
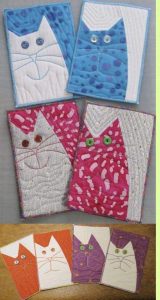
Finally, consider how you will present or store your creations from this Crochet Earrings – Tutorial. Placing them on a custom earring card not only protects them but also gives them a professional appearance if you intend to sell them or give them as gifts. Proper storage in a dry place will keep the cotton thread clean and ensure the metal components don’t tarnish, preserving your hand-crocheted jewelry for years to come.
Many people who follow a Crochet Earrings – Tutorial eventually realize that these items are highly marketable due to their low material cost and high perceived value. Because they are unique and handcrafted, you can position your work in the “slow fashion” niche, which appeals to eco-conscious consumers. Focusing on unique crochet designs and high-quality photography can help you build a successful online shop or craft fair booth.
To turn your hobby into a business using this Crochet Earrings – Tutorial, consistency is key. Develop a “signature style”—perhaps you specialize in boho tassel earrings or ultra-fine floral micro-crochet. Having a cohesive brand identity makes your work recognizable and helps you stand out in a crowded market like Etsy or Instagram, where crochet accessories are currently very trendy.
Pricing your work from a Crochet Earrings – Tutorial can be tricky, as the material cost is low but the labor is intensive. Don’t undersell yourself; calculate your hourly rate and add the cost of your premium threads and sterling silver hardware. Customers are often willing to pay a premium for handmade jewelry that they know was made with care and attention to detail, especially if you offer custom color options.
Social media is a powerful tool for anyone sharing their results from a Crochet Earrings – Tutorial. Short-form videos (Reels or TikToks) showing the process of micro-crochet are incredibly popular and can go viral, driving traffic to your store. Use relevant hashtags like #CrochetJewelry, #MicroCrochet, and #HandmadeEarrings to reach a global audience of craft lovers and fashionistas.
Expanding your repertoire beyond a single Crochet Earrings – Tutorial is a great way to keep your customers coming back for more. Once you master earrings, you can apply the same fine-thread techniques to create matching necklaces, bracelets, or even hair accessories. Offering “matching sets” is a proven strategy to increase your average order value and provide a complete fashion solution for your clients.
Ultimately, the goal of this Crochet Earrings – Tutorial is to empower you to express your personal style through the art of crochet. Whether you keep your creations for yourself or build a thriving craft business, the skills you’ve learned here—precision, design, and assembly—will serve as a foundation for all your future fiber art endeavors. Enjoy the process of creating something beautiful from just a simple string and a tiny hook.
What is the best thread to use for crochet earrings?
The most recommended material is size 10 mercerized cotton thread. It is strong, has a beautiful finish, and comes in a wide variety of colors. For even more delicate designs, some experts use size 20 or 40 thread, though these require more advanced skills.
How do I keep my crochet earrings from curling?
Using a fabric stiffener is the most effective method. You can buy commercial stiffeners or make a 50/50 mix of water and white craft glue. Dip your earrings in the solution, squeeze out the excess, and pin them to a flat surface until dry.
Are crochet earrings heavy to wear?
Not at all! One of the biggest advantages of following a Crochet Earrings – Tutorial is that the finished products are incredibly lightweight. Even large, statement-style crochet hoops are much more comfortable for all-day wear than metal or stone alternatives.
Can I wash my crochet earrings if they get dirty?
Yes, but you must be gentle. Hand wash them in cool water with a tiny drop of mild soap. After washing, you will likely need to re-block and re-stiffen them to restore their original shape and crispness.
What size crochet hook is best for jewelry?
For most Crochet Earrings – Tutorial patterns, a 1.25mm to 1.5mm steel hook is the “sweet spot.” It allows for tight stitches without being so small that it becomes frustrating for beginners to see the stitch definition.
How do I prevent the metal hooks from tarnishing?
Always use high-quality hardware like 925 sterling silver or gold-filled wires. Store your earrings in a dry, cool place, preferably in a small jewelry bag, to minimize exposure to air and moisture which causes oxidation.
This Crochet Earrings – Tutorial has covered everything from selecting the finest mercerized threads and tiny steel hooks to the intricate process of blocking and assembling your final pieces.
We explored how basic crochet stitches can be transformed into high-fashion accessories and discussed the importance of using hypoallergenic hardware for professional results. By mastering these micro-crochet techniques, you now have the power to create an endless variety of handmade jewelry that reflects your unique personality and artistic vision.


