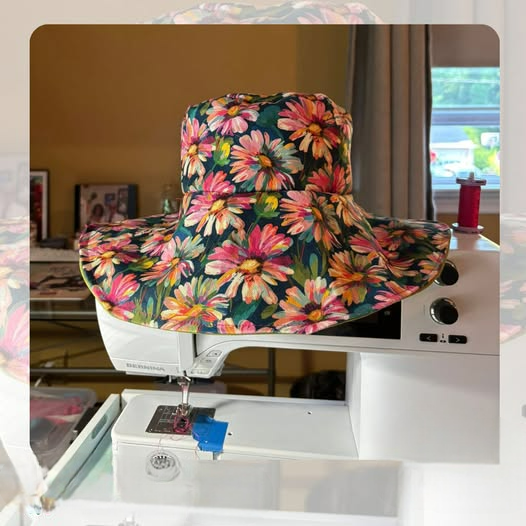
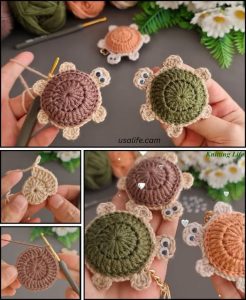
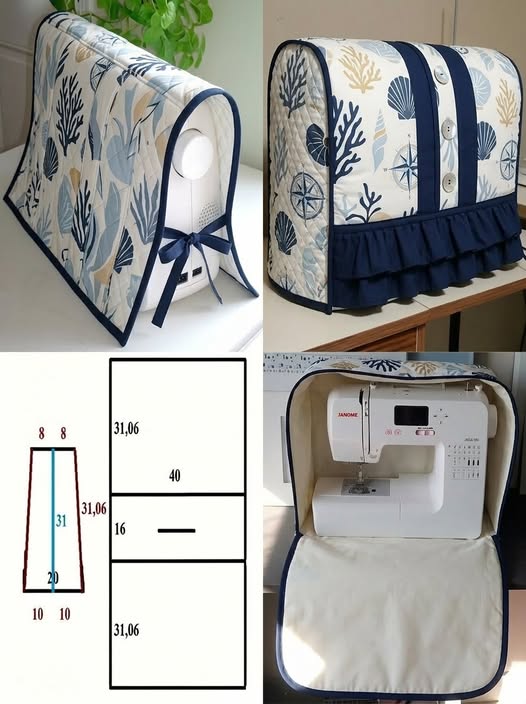
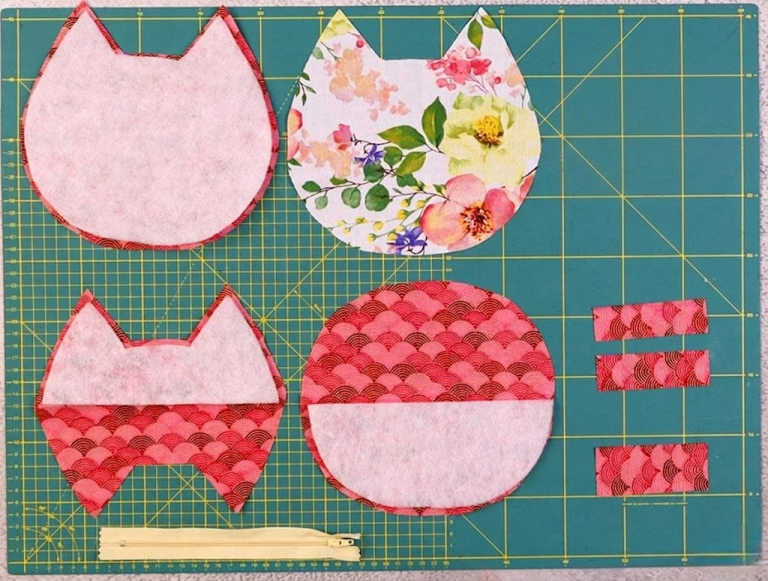
Fabric Hat - Tutorial

The Cathedral window cushion – Tutorial you are about to explore will guide you step-by-step through one of the most breathtaking and rewarding projects in the world of quilting and patchwork. There is something truly magical about taking simple pieces of fabric and transforming them into a dimensional masterpiece that looks incredibly complex but relies on foundational folding techniques. If you have been searching for a way to elevate your home decor with a touch of vintage elegance, this classic design is the perfect answer.
Creating a Cathedral window cushion – Tutorial style project allows you to play with color, texture, and depth in ways that standard quilting simply cannot match. The unique structure creates a beautiful frame around your chosen accent fabrics, mimicking the stunning stained-glass windows found in historic cathedrals. It is a wonderful method for using up precious fabric scraps, turning small bits of beloved material into a stunning focal point for your living room sofa or favorite armchair.
In this comprehensive Cathedral window cushion – Tutorial, we will break down the entire process into manageable steps that ensure your success, even if you have never attempted dimensional quilting before. By focusing on precision pressing and careful stitching, you will watch your fabric fold and bloom into a gorgeous, tactile cushion cover. Let’s gather your materials, warm up your iron, and dive into the art of creating a timeless piece of textile art.
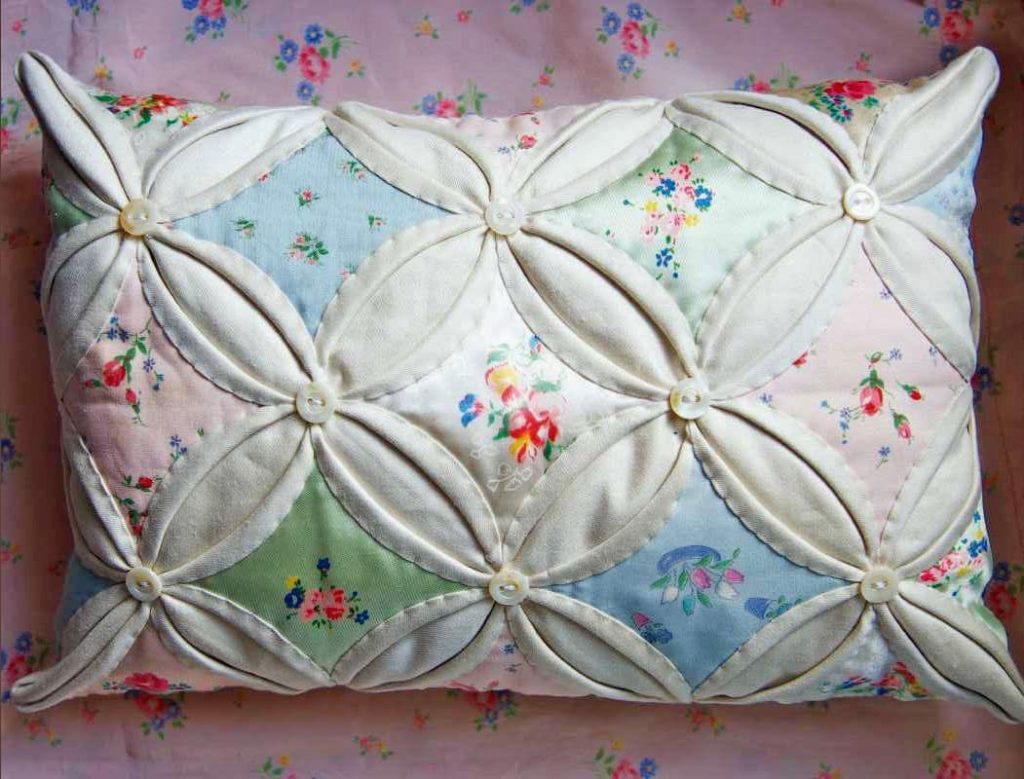
The foundation of any successful Cathedral window cushion – Tutorial lies in understanding how the three-dimensional structure is built. Unlike traditional patchwork where blocks are pieced edge-to-edge, this technique relies on folding a larger background fabric to create a heavy, self-lined base. This folded base forms the “windows” into which your vibrant accent fabrics are set, creating a beautiful contrast between the solid frame and the patterned center.
Choosing the right fabric is absolutely critical for this specific project because of the multiple layers of folding involved. For the background or frame fabric, a high-quality, lightweight 100% quilting cotton or a crisp muslin is highly recommended. You want a fabric that holds a sharp crease when ironed but isn’t so thick that it becomes bulky and difficult to sew when multiple layers meet.
The accent fabrics, which appear inside the windows, are where you can let your creativity shine and showcase your personal style. This is the ultimate opportunity to dig into your scrap bin for small, vibrant prints, florals, or geometric designs that pop against your background. Because these pieces are small, even the tiniest remnants of your favorite textile collections can find a prominent home in your cushion design.
Before cutting into your beautiful textiles, it is always a wise practice to pre-wash and press all your materials to prevent future shrinkage. Since a cushion cover will likely need washing over time, ensuring all fabrics shrink at the same rate beforehand protects your hard work from warping. Once your fabrics are clean, a good starching spray can add extra crispness, making the precision folding much easier to manage.
Precision cutting is your best friend when preparing for this Cathedral window cushion – Tutorial layout. Because the folding process relies on exact geometry, your initial squares must be perfectly square and cut precisely to size. Using a rotary cutter, a self-healing mat, and a clear quilting ruler will give you the sharp, accurate edges needed for perfect alignment later on.
To build a standard cushion size, you will need to determine how many window units will fit across your desired dimensions. A typical layout might involve a grid of four by four blocks or five by five blocks, depending on the initial size of your cut squares. Taking the time to plan your layout and calculate your fabric needs now ensures a smooth, enjoyable sewing experience from start to finish.
The true magic of the Cathedral window cushion – Tutorial method begins with the iron, as pressing is just as important as sewing in this project. To start, take one of your large background squares and fold it exactly in half with the wrong sides together, pressing the fold to create a sharp center crease. Open the fabric, fold it in half the other way, and press again so you have two intersecting crease lines marking the exact center.
Next, open the square flat with the wrong side facing up, and carefully fold each of the four outer corners inward so they meet precisely at the center intersection. Use your iron to press these folds flat, creating a smaller square out of the folded fabric. Securing these crisp folds with a bit of fabric starch will help the cotton retain its shape as you move to the next stage.
Now, you will repeat this exact process a second time on the same piece of fabric to create even more depth and structure. Take the four new corners of your smaller square and fold them inward to the center once again, pressing firmly with a hot iron. You will now have a dense, layered square that is a fraction of the original size, with all the raw edges neatly enclosed inside.
To secure this folded unit before joining it to the others, you will need to stitch down the tips of the folds in the center. Thread your machine or hand needle with a matching thread color and place a few tight stitches right where the four points meet in the middle. This small step keeps the fabric from shifting and unfolding during the assembly process, saving you a lot of frustration.
You will need to repeat this entire folding, pressing, and securing process for every single background square required for your cushion layout. While it might feel repetitive, turning this stage into a mindful crafting session with your favorite music or podcast makes the time fly by. Consistency is key here, so try to use the exact same folding pressure and iron heat for every single unit.
Once all your background units are folded and pressed, lay them out on a flat surface or a design wall in your desired grid pattern. Seeing the folded blocks sitting side-by-side gives you your first glimpse of the beautiful secondary patterns that begin to form between the squares. This is the perfect moment to check that all your blocks are uniform in size before you begin joining them together.
Joining the folded background units together is the next exciting phase of our Cathedral window cushion – Tutorial journey. Take two of your pressed squares and place them right sides together, aligning the edges perfectly where the folded flaps meet. Sew a precise quarter-inch seam along one side, unfolding the outer flaps slightly if needed to ensure you are only catching the edges of the squares.
Continue sewing your units into rows, and then sew those rows together to form the complete grid for the front of your cushion. As you join the blocks, you will notice that the diamond-shaped spaces created between the joined units form the perfect frames for your accent fabric. The structure of the cushion will start to feel heavier and more substantial with every row you add to the project.
Now it is time to prepare the beautiful accent squares that will act as the stained-glass panes inside your fabric windows. Cut your accent fabrics into small squares that are slightly larger than the exposed diamond openings on your joined background grid. These colorful squares will sit directly over the flat diamond spaces, hiding the seams you just sewed.
Place an accent square over one of the diamond spaces on your grid, securing it in place with a few fine sewing pins or a dab of water-soluble fabric glue. The glue trick is highly recommended by expert quilters because it keeps the small fabric piece perfectly centered without any pins getting in the way of your sewing machine foot. Repeat this placement for all the window openings across your cushion front.
To create the signature curved frame of the Cathedral window cushion – Tutorial, you will now roll the folded bias edges of the background fabric over the raw edges of the accent squares. Gently pull the folded edge outward and wrap it over the colorful fabric, pinning it securely down to create a beautiful, soft curve. This bias edge will manipulate easily, allowing you to create a smooth, elegant frame around every single accent piece.
Using a coordinating thread, topstitch carefully along the very edge of the rolled bias curves to secure them in place and lock the accent fabric down. You can achieve this with a precise machine stitch close to the edge, or choose to sew it by hand using an invisible blind stitch for a pristine, heirloom finish. Once all the edges are stitched down, your stunning dimensional cushion front is complete and ready for the final assembly.
With the beautiful dimensional front of your Cathedral window cushion – Tutorial complete, it is time to turn this piece of textile art into a functional home accessory. Give the finished front panel a gentle press from the back side to settle all the stitches without flattening the beautiful rolled curves on the front. Measure your completed panel to confirm the final dimensions for cutting your backing fabric pieces.
For the back of the cushion, an envelope closure is a fantastic, beginner-friendly option that eliminates the need for inserting tricky zippers. To create this closure, cut two pieces of your background fabric or a coordinating accent fabric that match the width of your cushion front but overlap significantly in length. Having a generous overlap ensures that the cushion insert stays neatly hidden inside and doesn’t pop out over time.
Hem one long edge of each backing piece by folding the fabric over twice, pressing it flat, and topstitching it in place for a clean finish. This hemmed edge will be the visible opening on the back of your completed cushion cover, so take your time to ensure your stitching is straight and neat. Once hemmed, you are ready to sandwich the pieces together for the final construction.
Lay your beautiful cathedral window front panel on your work table with the right side facing up, admiring the texture you’ve created. Place the two backing pieces face down on top of it, aligning the raw outer edges with the front panel so that the hemmed edges overlap in the middle. Pin generously around the entire perimeter of the square to keep all the dense layers from shifting while you sew.
Sew around all four outer edges of the cushion cover using a sturdy half-inch seam allowance, reinforcing the areas where the backing fabrics overlap with a few backstitches. Because you are sewing through multiple layers of fabric, using a fresh, heavy-duty sewing machine needle, such as a size 90/14, will make the process smooth and prevent skipped stitches. Clip the corners carefully to remove excess bulk before turning.
Reach inside the envelope opening and gently turn the entire cushion cover right side out, using a blunt tool to push the corners out into crisp points. Give the outer seams a final press with your iron, slide a plush cushion insert inside, and find the perfect spot in your home to display your masterpiece. You have successfully completed a gorgeous heirloom project that will be admired for years to come.
The best fabric for the main body and background of the cushion is 100% quilting cotton or high-quality muslin. These fabrics hold a sharp crease when pressed, which is essential for the precise folding required in this technique. For the window accents, you can use any lightweight cotton scraps, small prints, or batiks that offer a beautiful contrast to your background color.
Yes, absolutely! While the finished cushion looks incredibly intricate, the technique itself relies on basic folding and straight stitching. By following this Cathedral window cushion – Tutorial step-by-step and focusing on accurate pressing, a patient beginner can achieve beautiful results. Taking your time during the folding stages is the secret to success.
No special sewing machine foot is required to sew the rolled bias edges. A standard all-purpose sewing foot or an open-toe applique foot works perfectly because it gives you a clear view of the needle position. The most important factor is stitching close to the folded edge to catch the fabric cleanly.
Because of the folded layers and rolled edges, it is best to spot clean the cushion cover whenever possible or hand wash it gently in cold water with a mild detergent. If you must use a washing machine, place the cover inside a mesh laundry bag, use a delicate cycle, and lay it flat to air dry. Iron gently from the reverse side if needed.
Both methods work beautifully, and the choice depends on your personal preference and sewing style. Machine stitching is much faster and provides a strong, durable finish for items that will see daily use. Hand sewing takes longer but offers a relaxing, meditative experience and results in an invisible finish with no visible topstitching.
In this Cathedral window cushion – Tutorial, we have explored the entire creative journey of making a gorgeous, dimensional piece of home decor from scratch. We covered everything from choosing the perfect crisp quilting cottons and vibrant scrap accents to mastering the precise art of folding, pressing, and assembling the background grid.
Finally, we learned how to insert the colorful fabric window panes, roll the classic bias curves, and assemble a practical envelope-style backing to finish the cushion beautifully. This project is a wonderful testament to how simple geometric folds can transform basic fabric into a timeless, textured heirloom.