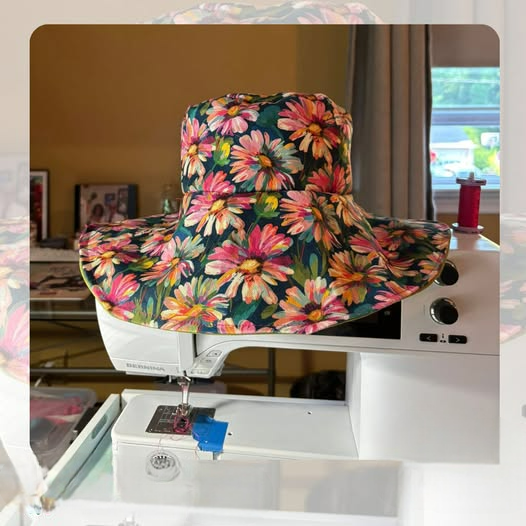
Fabric Hat - Tutorial

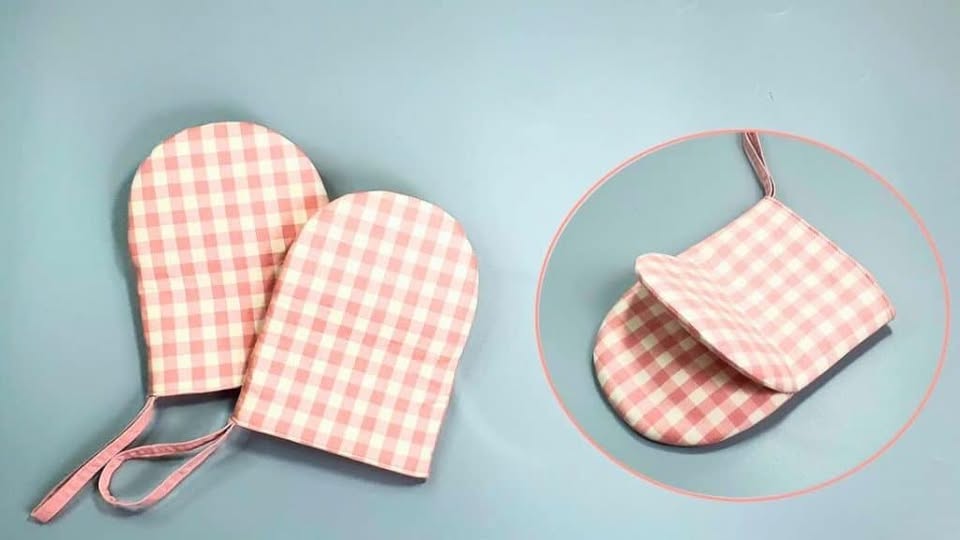
If you have ever scorched your fingers while rushing to pull a bubbling casserole out of the oven, you know that a high-quality pair of oven mitts is a kitchen essential you simply cannot live without. Finding the perfect pair in stores can be surprisingly frustrating, as they are often either too bulky, too thin, or lacking the personality you want for your culinary space. Fortunately, learning easy oven mitts sewing allows you to take complete control of both function and fashion, giving you a rewarding weekend project that brightens up your kitchen. This comprehensive tutorial is designed to guide you through every single step of the process, ensuring your finished project looks professional and performs beautifully.
Sewing your own kitchen accessories is one of the most satisfying ways to dive into DIY home decor, especially when you use a straightforward easy oven mitts sewing approach. Not only does this project make an incredibly thoughtful housewarming or holiday gift for the food lovers in your life, but it also serves as a fantastic way to practice quilting, binding, and handling thick layers of fabric. By selecting your own heat-resistant materials and vibrant cotton prints, you can customize your mitts to match your kitchen color scheme perfectly while ensuring your hands stay completely safe from high temperatures.
Throughout this detailed easy oven mitts sewing guide, we will break down the entire process into manageable, bite-sized steps so you can sew with absolute confidence. We will cover everything from selecting the right protective batting to achieving clean, durable seams that stand up to daily use and frequent trips through the washing machine. Grab your favorite fabric scraps, thread your sewing machine, and let’s jump right into this creative tutorial that combines everyday utility with personal style.
When embarking on an easy oven mitts sewing project, your choice of materials is the most critical factor for ensuring safety and longevity in the kitchen. Because these mitts will directly handle scorching pans and heavy cast iron, you must prioritize fabrics that can withstand extreme temperatures without melting or transferring heat too quickly. Standard polyester fabrics or synthetic batting should be completely avoided here, as they can melt under high heat and cause severe burns.
For the exterior and lining of your project, always choose 100% cotton fabric, which is durable, easy to wash, and naturally heat-resistant. Quilting cotton is an excellent choice for this tutorial because it comes in thousands of beautiful prints, cuts easily, and behaves beautifully under the sewing machine needle. If you want a more rugged, farmhouse-style look, heavy-duty cotton canvas, denim, or linen are fantastic alternative options for the outer shell.
The secret to a truly protective oven mitt lies hidden inside the layers, which means selecting the right internal padding is crucial. For this easy oven mitts sewing technique, we highly recommend using a specialized heat-resistant batting like Insul-Bright. This innovative material features hollow polyester fibers needle-punched through a metallized polyester film, which effectively reflects hot or cold energy back to its source.
However, relying solely on a single layer of reflective batting is usually not enough to keep your hands safe from sustained heat. To provide adequate insulation, you should always pair your heat-reflective layer with at least one layer of 100% cotton batting. This extra layer absorbs moisture, adds comfortable cushioning, and provides the necessary density to block heat transfer when holding hot baking sheets.
Before making your first cuts, it is highly recommended to pre-wash your cotton fabrics to prevent any unwanted shrinkage later on. Since oven mitts inevitably get stained by tomato sauce, grease, and batter, they will need to be tossed into the washing machine frequently. Pre-washing ensures that your outer fabric and lining shrink before assembly, preventing your seams from puckering or warping after the first wash.
To wrap up your material preparation, gather high-quality cotton thread, a heavy-duty sewing machine needle (size 90/14 or 100/16 is ideal), and plenty of quilting clips or heavy pins. Because you will be stitching through multiple thick layers of cotton and batting, a standard universal needle might struggle or break. Having the right tools on hand from the start makes this easy oven mitts sewing experience incredibly smooth and enjoyable.
Creating the template for this easy oven mitts sewing layout is incredibly simple, and you do not need to buy expensive commercial patterns to get started. You can easily create a custom-fit template by using your own hand as a guide, ensuring the final mitt fits your grip perfectly. A good oven mitt should be loose enough to slip on and off in a split second, yet snug enough that it won’t slide around while you are carrying heavy dishes.
To draw your custom template for this tutorial, place your dominant hand flat on a piece of paper, keeping your thumb extended naturally to the side. Using a pencil, trace a generous outline around your hand, leaving at least 1.5 to 2 inches of extra space all the way around your fingers and palm. Extend the wrist section down by at least 3 to 4 inches to ensure your lower arm is safely protected from the hot edges of oven racks.
Once you have your basic hand shape drawn, smooth out the lines into a classic, rounded mitten silhouette with a distinct, comfortable thumb pocket. Cut out this paper template, slip your hand underneath it once more, and mimic a gripping motion to verify there is plenty of room for movement. If it feels a bit too tight anywhere, simply sketch a slightly wider line around that area and trim away the excess paper.
With your custom template ready, it is time to map out your cuts on your prepared fabric and insulating layers. For a complete pair of oven mitts, you will need to cut a mirror image of each piece to ensure you have a left and a right mitt. Fold your 100% cotton fabric right sides together, place your pattern piece on top, pin it securely, and cut through both layers simultaneously.
For each individual oven mitt, you will need to cut two pieces of outer fabric, two pieces of lining fabric, two pieces of Insul-Bright, and two pieces of 100% cotton batting. This means you will be working with a total of eight layers per mitt during the assembly phase of this easy oven mitts sewing process. Keeping your pieces organized in neat stacks will prevent confusion as you move toward the assembly and quilting stages.
To make the sewing process much easier down the road, take a moment to mark the opening at the wrist with a fabric pen. Ensuring that all your fabric pieces are cut precisely along the grainline will prevent the mitt from twisting out of shape over time. With your neat stacks of cotton and insulation ready, you are fully prepared to move on to the actual assembly of your project.
Quilting the layers together is a fantastic step in this easy oven mitts sewing journey because it secures the insulation and prevents the internal padding from shifting. Shifting batting can create dangerous thin spots over time, leaving your hands vulnerable to unexpected burns when handling hot cookware. Beyond the vital safety benefits, quilting adds a gorgeous, professional texture to your homemade kitchen accessories that elevates the entire design.
To begin the quilting process for this tutorial, create a fabric sandwich for each side of your mitt. Lay your outer fabric face down on your table, place the layer of 100% cotton batting on top, followed by the Insul-Bright layer, and finally place the lining fabric face up. Smooth out any wrinkles with your hands from the center outward, and use plenty of quilting clips or safety pins to hold this thick sandwich firmly together.
If your sewing machine has a walking foot, this is the absolute best time to attach it to your machine. A walking foot feeds the top and bottom layers of your fabric sandwich through the machine at the exact same speed, preventing the layers from shifting or bunching. If you do not own a walking foot, simply reduce your presser foot pressure slightly and use a longer stitch length to help the fabric glide smoothly.
You can choose any quilting design you like, but a simple diagonal crosshatch pattern or straight vertical lines look incredibly stylish and work beautifully. Use a water-soluble fabric marker and an acrylic ruler to draw parallel lines spaced about 1 to 1.5 inches apart across the surface of the fabric. Sew carefully along these marked lines, backstitching at the beginning and end of each row to lock your threads securely.
Repeat this quilting process for all four separate fabric sandwiches until you have beautifully quilted panels ready for final shape cutting. Once the quilting is finished, place your paper pattern piece over each quilted panel, trace it, and trim away any excess batting or uneven fabric edges. This step ensures that all your edges are perfectly flush, making the final easy oven mitts sewing assembly incredibly precise.
Now, take your two matching quilted panels for one mitt and place them together with the outer fabric sides facing each other. Pin or clip heavily around the entire perimeter, paying extra close attention to the tight curve where the thumb meets the palm of the hand. Pinning thoroughly at this stage prevents the thick, bulky layers from sliding out of alignment while you are sewing the main structural seam.
With your quilted panels securely pinned, you are ready to sew the main structural seam around the perimeter of your mitt. Set your sewing machine to a strong, straight stitch with a slightly longer stitch length, such as 3.0mm, to easily penetrate the dense layers. Start stitching at one side of the wrist opening, using a sturdy 1/4-inch seam allowance, and slowly sew up toward the fingers.
As you approach the curves of the fingertips and the thumb, slow your sewing speed down and pivot your machine carefully. To pivot smoothly, leave your needle down in the fabric, lift your presser foot, rotate the mitt slightly, lower the foot, and continue stitching. Taking your time around these curves ensures a smooth, rounded shape that looks polished and fits your hand beautifully.
The most critical area of this entire easy oven mitts sewing step is the deep inside curve between the thumb and the index finger. Sew into this corner carefully, leave your needle down, pivot, and reinforce this specific spot by backstitching over it two or three times. This area experiences a massive amount of stress when you open and close your hand, so extra reinforcement prevents the seam from popping over time.
Once the perimeter is completely stitched, it is time to trim the seam allowances to reduce internal bulk before turning the mitt right side out. Use sharp scissors to trim the excess batting close to the stitch line, and clip small notches into the curved sections around the fingers. Most importantly, cut a small, sharp slit straight into the valley between the thumb and palm, being very careful not to cut through your actual stitches.
Now comes the exciting moment: carefully reach inside the opening and gently turn the entire oven mitt right side out through the wrist. Use a blunt tool, like a wooden chopstick or a turning tool, to gently push out the rounded curves of the fingers and the thumb from the inside. Take your time during this step to avoid putting too much sudden pressure on your fresh seams, smoothing out the edges until the mitten shape is fully formed.
To complete your easy oven mitts sewing project, you need to finish the raw edges at the wrist opening using a clean fabric binding. Cut a strip of matching cotton fabric 2.5 inches wide, fold it in half lengthwise, and sew it around the raw edge of the wrist, folding the ends over for a clean finish. You can also sandwich a small loop of folded ribbon into this binding seam, creating a handy hanging loop so you can display your beautiful work proudly in your kitchen.
No, you should never use standard polyester batting for any easy oven mitts sewing project. Polyester is a synthetic material made from plastic, which means it will melt instantly when exposed to hot pans or oven racks, potentially causing severe burns to your skin. Always use specialized heat-resistant batting like Insul-Bright combined with 100% cotton batting to ensure your hands are completely safe from heat transfer.
Yes, pre-washing your fabric is a highly recommended step for this easy oven mitts sewing guide. Cotton fabrics naturally shrink during their first cycle through a hot washing machine and dryer. Because oven mitts are used in the kitchen, they will inevitably get dirty and need regular washing; pre-washing ensures that your outer fabric and lining won’t shrink unevenly or warp your beautiful quilting later on.
Because you will be stitching through multiple thick layers of cotton fabric, cotton batting, and reflective insulation, you should use a heavy-duty needle. A size 90/14 or 100/16 denim or quilting needle is perfect for this project. Standard universal needles are too thin and flexible, meaning they are highly likely to bend, skip stitches, or break entirely when hitting the dense layers of a quilted fabric sandwich.
Your finished handmade oven mitts can be easily cared for to keep them looking fresh and clean. Machine wash them in cold or warm water with a gentle detergent to preserve the vibrant colors of your cotton fabric prints. Tumble dry them on a low heat setting or reshape them and lay them flat to air dry. Avoid using liquid fabric softeners, as they can sometimes leave a residue on the internal insulating fibers over time.
Yes, you can absolutely complete this easy oven mitts sewing project using a standard universal presser foot if you do not own a walking foot. To prevent your thick layers from shifting or bunching, simply reduce your sewing machine’s presser foot pressure slightly and increase your stitch length to around 3.0mm or 3.5mm. Using plenty of quilting clips or safety pins across your fabric sandwich will also help keep everything locked perfectly in place.
In this comprehensive tutorial, we have covered every single phase of creating your own custom kitchen protection, from selecting heat-safe 100% cotton fabric to mastering the final wrist binding.
You learned how to safely combine reflective Insul-Bright insulation with dense cotton batting to create a highly protective barrier, and how to create a custom pattern using your own hand. We also explored the structural importance of quilting your fabric sandwiches and reinforcing high-stress areas like the thumb curve to ensure your finished mitts last for years to come.
