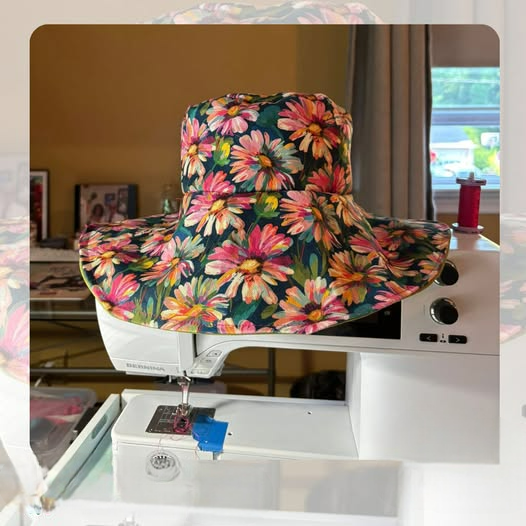
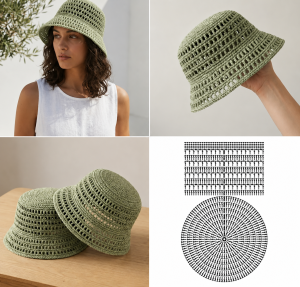
Fabric Hat - Tutorial

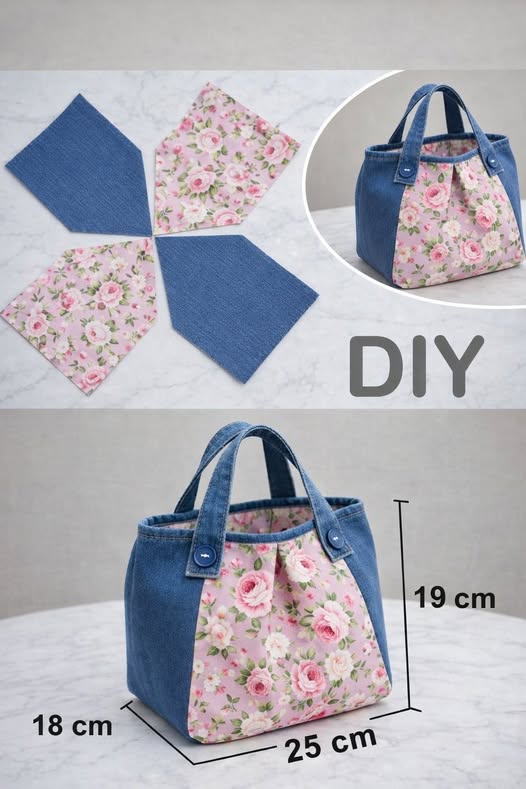
This comprehensive Cat Zipper Bag – Tutorial will guide you step-by-step through creating a charming, functional pouch that combines your love for felines and sustainable crafting. If you have been searching for a delightful way to upcycle fabric scraps or give a second life to an old pair of denim jeans, this project is the ultimate solution. Crafting your own accessories allows you to control every single detail, ensuring that the finished piece is uniquely yours while keeping durable materials out of landfills.
In this detailed Cat Zipper Bag – Tutorial, we are focusing heavily on the art of upcycling denim and transforming sturdy, forgotten textiles into wearable art. Old jeans possess the perfect weight, structure, and character required to make a long-lasting zipper pouch that can withstand daily wear and tear. By incorporating creative fabric choices and a whimsical animal shape, you will learn how to turn basic utility fabric into a conversation starter that is as practical as it is adorable.
Whether you plan to use this pouch for makeup, stationery, or your favorite crafting notions, mastering the assembly process is incredibly rewarding. This Cat Zipper Bag – Tutorial is designed for makers of all skill levels, breaking down complex sewing concepts into digestible, humanized steps that guarantee a flawless result. Gather your materials, prep your sewing machine, and let us dive into the wonderful world of handmade, cat-themed storage accessories.

When embarking on this Cat Zipper Bag – Tutorial, your first step is selecting the right textiles, and nothing beats the charm of upcycling denim from old jeans. Denim provides an incredibly sturdy foundation for the exterior of your bag, meaning you will not necessarily need heavy interfacing to help the pouch hold its shape. Look for pairs of pants that have interesting washes, fading, or even unique pocket seams that you can strategically incorporate into your design.
To complement the rugged exterior of your upcycled denim, you will want to select a lightweight cotton fabric for the inner lining. This is your chance to add a fun pop of color or a whimsical print, such as tiny fish skeletons, paw prints, or contrasting polka dots. The contrast between the tough, textured denim on the outside and a smooth, vibrant lining on the inside creates a professional, high-quality aesthetic.
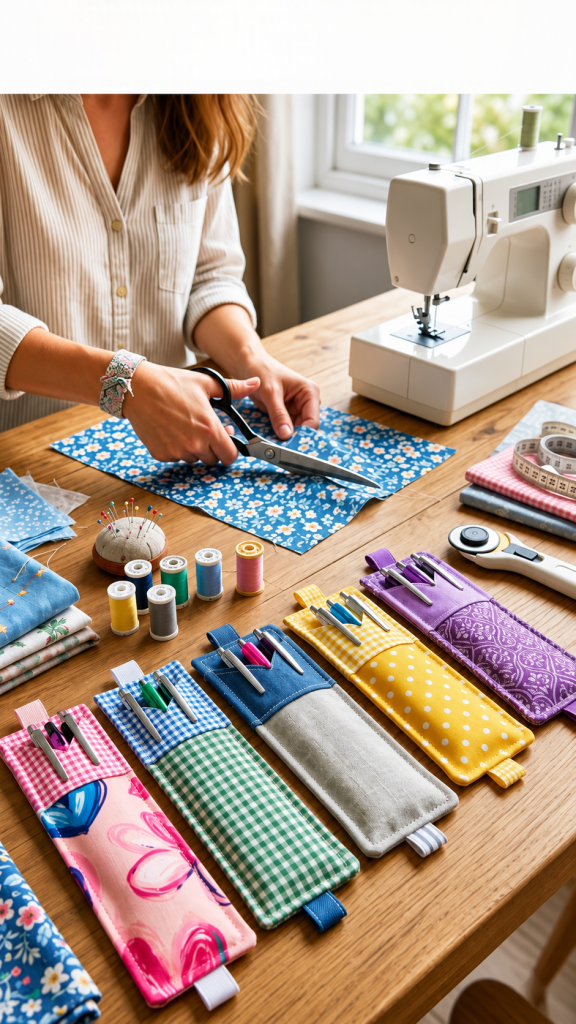
In addition to your main fabrics, you will need a standard nylon or metal zipper that matches your color scheme, measuring at least seven to eight inches in length. Standard sewing notions like high-quality polyester thread, sharp fabric shears, a rotary cutter, and plenty of sewing pins or quilting clips are absolute essentials. If your denim is exceptionally thick, consider swapping your standard sewing machine needle for a designated denim or heavy-duty needle to prevent thread breakage.
Do not forget the small decorative elements that will truly bring your feline companion to life on the face of the pouch. You can use scraps of contrasting fabric, felt, or even embroidery floss to create the delicate facial features, whiskers, and distinctive triangular ears. Taking the time to curate these components beforehand ensures a seamless, uninterrupted, and highly enjoyable crafting experience from start to finish.
A key aspect of successful upcycling denim projects is preparing the fabric correctly before making your very first cut. Always wash and dry the old jeans thoroughly to ensure any shrinkage has already occurred and to remove any leftover starch or dirt. Once dry, press the denim flat with a hot steam iron so that your pattern pieces can be traced and cut with absolute precision.
By focusing on reclaimed materials for this Cat Zipper Bag – Tutorial, you are not only saving money but also actively participating in a eco-conscious crafting movement. Repurposing old garments breathes new life into items that might otherwise be discarded, giving them a brand-new purpose. Now that your materials are laundered, pressed, sorted, and ready on your cutting mat, we can move forward to the preparation phase.
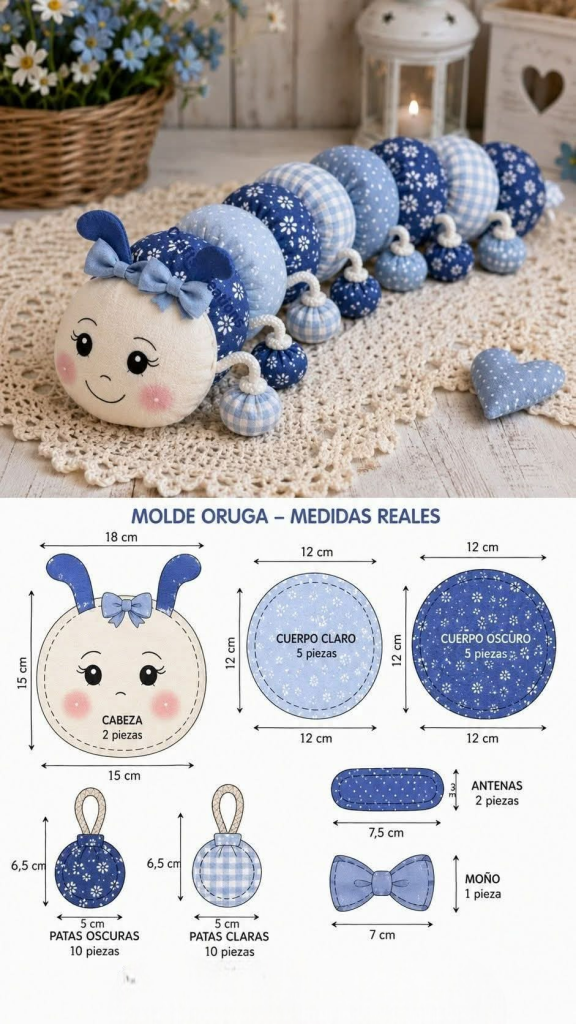
Before you can assemble your pouch, you need to create the template that gives this Cat Zipper Bag – Tutorial its distinctive, adorable silhouette. Grab a piece of heavy cardstock or graph paper and sketch out a classic rounded pouch shape, making sure to add two prominent triangular ears at the top rim. If you prefer a more minimalist approach, you can draft a standard rectangular pouch and plan to insert separate, dimensional ears into the top seam during assembly.
When drafting your custom pattern, it is crucial to factor in a standard one-quarter inch or one-half inch seam allowance all the way around the perimeter. Label your paper template pieces clearly, noting which sections need to be cut from the exterior upcycled denim and which ones belong to the cotton lining fabric. You will need to cut two identical pieces of denim for the front and back, and two identical pieces of lining fabric.
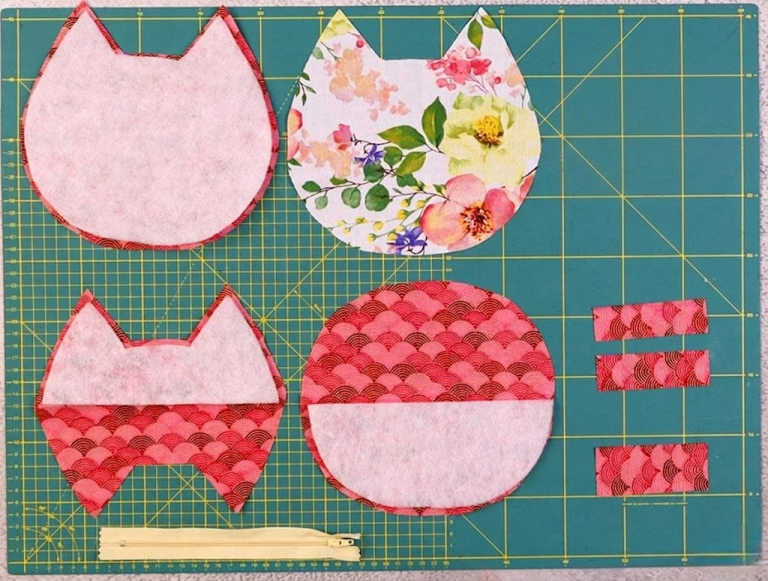
Carefully pin your paper pattern onto the prepared denim, keeping a close eye on the grainline of the fabric to ensure the pouch stretches evenly. Use your sharp fabric shears or a rotary cutter to cut out the front panel and the back panel of your cat pouch. If you want a more structured bag, you can also cut two pieces of fusible fleece or lightweight interfacing to iron onto the back of your denim pieces.
Repeat this exact same cutting process with your chosen cotton lining fabric, resulting in two perfectly matched inner panels. If you opted for dimensional ears rather than a solid silhouette, cut four small triangles from your denim and lining scraps at this stage. These smaller pieces will be sewn together and basted onto the main body later, giving your feline friend a fun, 3D appearance.
Now is the ideal time to add the whimsical facial features to the front denim panel before any of the major bag assembly begins. You can use a water-soluble fabric marker to sketch out closed, sleepy eyes, a tiny triangular nose, and long, playful whiskers. Use dark embroidery floss to hand-stitch these details using a simple backstitch, or machine-applique small pieces of contrasting felt for a bold look.
Take a quick moment to inspect all your cut pieces, ensuring that the faces line up beautifully and that the ears are completely symmetrical. Having all your exterior panels decorated and your lining pieces organized sets you up for absolute success in the next sewing phases. Your flat pieces of fabric are now officially ready to be transformed into a functional, multi-dimensional storage accessory.
Inserting a zipper can often feel intimidating for beginners, but this section of the Cat Zipper Bag – Tutorial breaks it down into foolproof steps. Start by placing your decorated front denim panel flat on your workspace with the right side of the fabric facing up toward you. Take your zipper and lay it face down along the top edge of the denim, aligning the edge of the zipper tape perfectly with the raw edge of the fabric.
Next, take one of your cotton lining pieces and place it directly on top of the zipper with the right side facing down. You have essentially created a zipper sandwich, where the zipper itself is securely nestled between the right sides of your exterior denim and your lining fabric. Pin or clip all three layers tightly together along that top edge to prevent any shifting while you navigate your sewing machine.
Attach a designated zipper foot to your sewing machine, which allows you to stitch incredibly close to the zipper teeth without riding up over them. Carefully sew along the pinned edge, removing the clips or pins as you approach them to avoid breaking your needle. If the zipper pull gets in your way while sewing, simply drop your needle down, raise the presser foot, and slide the pull out of the way.
Once you finish sewing that first side, flip both the denim and the lining fabrics away from the zipper so that their wrong sides are touching. Press the seam flat with an iron, being extremely careful not to melt the nylon zipper teeth with excessive heat. To ensure the lining never gets caught in the zipper teeth during daily use, topstitch beautifully along the denim edge about an eighth of an inch away from the teeth.
Now, repeat this exact same sandwiching process for the remaining back denim panel and the second piece of cotton lining fabric. Lay the unsewn edge of the zipper tape face down on the right side of your back denim panel, then place the lining piece on top. Pin the layers thoroughly, stitch closely along the zipper teeth using your zipper foot, flip the fabrics open, press gently, and topstitch the edge.
When you finish this step, you will have two beautiful exterior panels and two lining panels perfectly secured to both sides of the zipper tape. Take a moment to admire how clean the seams look and how smoothly the zipper glides back and forth along the track. You have conquered the hardest part of the assembly, bringing you one step closer to a finished pouch.
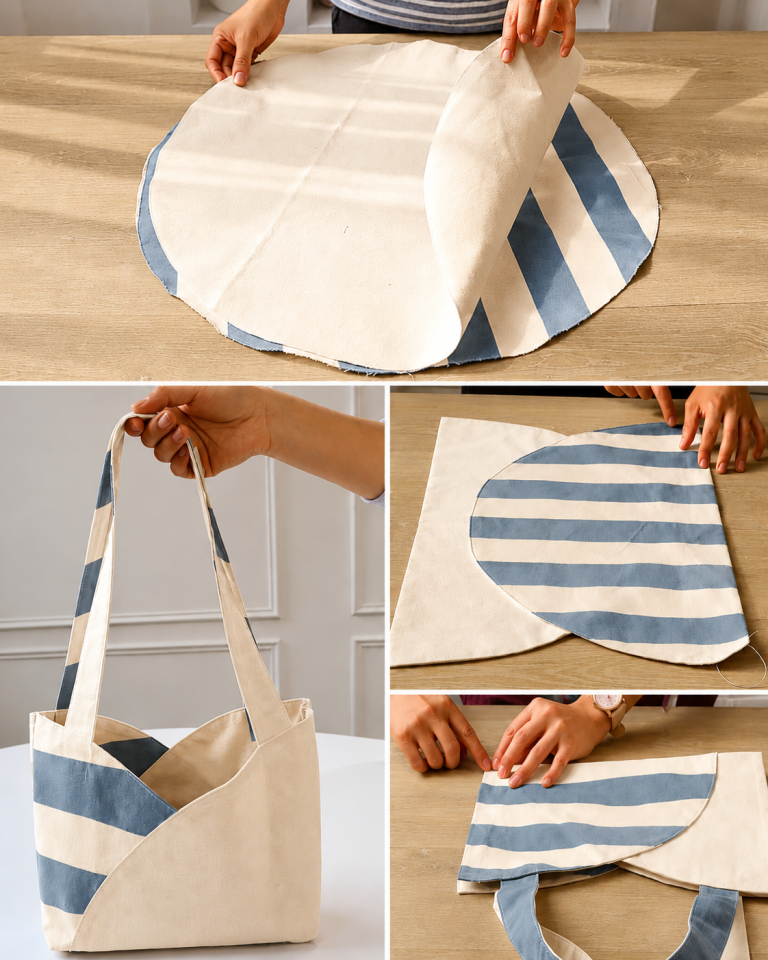
We have reached the exciting climax of our Cat Zipper Bag – Tutorial, where all your separated pieces finally come together into a functional pouch. Crucial step: open your zipper at least halfway before doing anything else, as this creates the opening you need to turn the bag right side out later. If you forget to open the zipper, you will accidentally lock yourself out of your own creation once the perimeter is sewn.
Separate your fabrics so that the two exterior upcycled denim panels are facing right sides together, and the two cotton lining panels are facing right sides together. Align all the outer edges carefully, making sure the teeth of the zipper bend naturally toward the lining side of the pouch. Pin or clip around the entire outer perimeter of the rectangular or cat-shaped form, ensuring the ears line up perfectly.
Prepare to sew around the outside edge, but remember to leave a three-inch to four-inch opening at the bottom edge of the lining fabric. This unsewn gap is absolutely vital, as it serves as the birth canal through which the entire denim pouch will be pulled right side out. Using a standard presser foot, sew all the way around the perimeter, making sure to backstitch securely at the beginning and end of your opening.
Once the perimeter is fully stitched, take your fabric shears and trim away any excess fabric from the corners and the curves around the ears. Clipping small V-shapes into the curved areas helps the fabric lay completely flat and prevents bulkiness once the bag is turned. Be very careful not to cut through your actual stitches as you trim away this excess seam allowance.
Reach your fingers through the open gap in the lining, grab the far corners of the denim exterior, and gently pull the bag right side out. Use a dull turning tool, a chopstick, or a knitting needle to gently push out the sharp points of the cat ears and the bottom corners. Give the entire pouch a thorough press with your steam iron to flatten all the freshly turned edges beautifully.
To finish your project completely, tuck the raw edges of the lining opening inward by a quarter of an inch and press them flat. You can machine-stitch this opening closed very close to the edge, or hand-sew it using a blind ladder stitch for an invisible look. Push the completed lining down inside the gorgeous denim exterior, zip it shut, and celebrate your stunning handmade accessory.
A nylon coil zipper size #3 or #5 is ideal for this project because it is flexible, easy to cut over with sewing scissors, and gentle on sewing machine needles. Metal zippers look beautiful and offer a vintage aesthetic, but they require extra caution when sewing around the ends to avoid breaking your needle.
Yes, washing your old denim garments before cutting your pattern pieces is highly recommended. Denim can shrink unevenly during laundered cycles, and pre-washing removes any residual dirt, stiffening agents, or oils, ensuring your finished bag retains its shape permanently.
Absolutely! This project is an excellent introduction to zipper insertion and bag making because the steps are straightforward. Take your time, use plenty of pins, sew slowly, and utilize a dedicated zipper foot to make the process completely stress-free.
To prevent skipped stitches or broken threads on heavy material, switch to a designated denim needle (size 90/14 or 100/16). Lengthen your stitch slightly to a 3.0mm or 3.5mm setting, and go slowly over bulky areas where multiple layers of fabric meet.
Yes, you can easily add a loop by folding a small strip of denim or ribbon and inserting it face-inward between the exterior layers before sewing the perimeter. Place it right below the zipper line so that it is securely anchored into the side seam when turned right side out.
In this Cat Zipper Bag – Tutorial, we explored the rewarding process of upcycling denim to create a charming, functional, and eco-friendly accessory. From selecting your materials and drafting a custom feline silhouette to mastering the zipper sandwich technique and finishing the final seams, you have learned valuable skills that can be applied to countless future sewing adventures.
This project proves that with a little creativity, old garments can easily be diverted from landfills and transformed into high-quality, durable treasures.